ManagingLanguage
This page demonstrates how you can use Drupal to manage translations of your tour content. Be sure that the content type you are using for your stop has "Multilingual support" set to "Enabled, with entity translation" as demonstrated in the creating a custom stop type instructions.
Visit an existing stop node and click the "Translate" tab. For this running example we will use the "Yosemite in the Spring" Image Gallery Stop that we have already created. In this view, you will see a list of all the languages that have been enabled. In order to control the list of languages, visit "Administration -> Configuration -> Regional and language". You can add and remove languages from that screen. Below shows the available languages for our sample stop.
![]()
Now click "add translation" next to the language you would like to translate the content in to. In this edit screen you will see all the fields that were enabled for translation. By default the English (or your default language) version of the content will appear.
![]()
You can now replace the English contents with the translated equivalents. (Excuse the Google Translate example below).
![]()
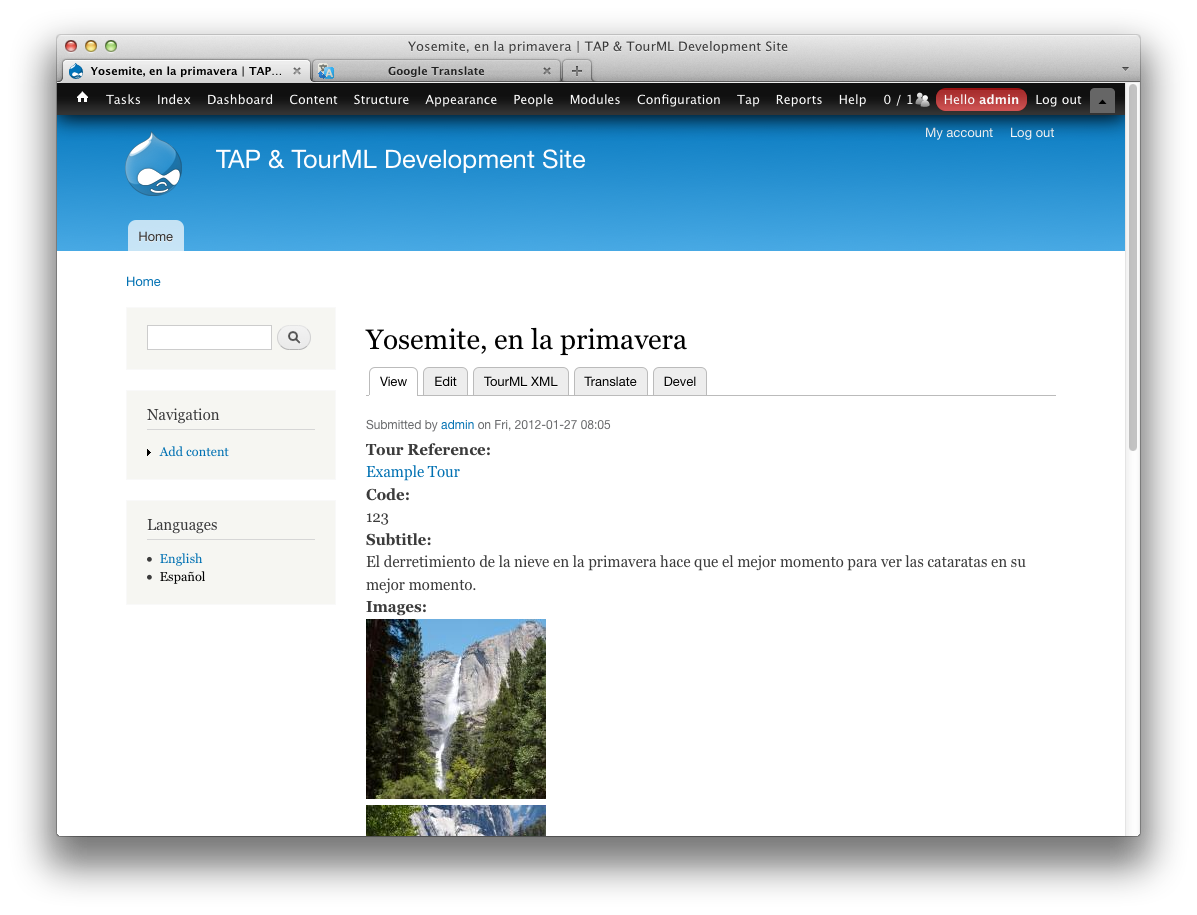
Now view the node. You will see links for the enabled languages in the left sidebar of the page. Click the name of the language for which you provided translation. In the screenshot below you can see that the subtitle shows the Spanish text when viewing content as Spanish. Notice that the title is NOT translated. Read ahead on how to enable translation of the "Title" field.

The TAP authoring tools require the Title module that allows the default title field on nodes to be replaced with a translatable field. If you manage your Stop content type you will see a "replace" link next to the "Title" field. Simply click this link to perform the replacement. One you replace the title field, be sure to edit the field and make sure "Users may translate this field" is enabled in the field settings.

Now when you add translations for your content the title field will also appear in the list of fields available for translation.

Finally, you must manage the TourML XML display for the content type in order to map the new title field. Select "TourML Title" as the format for the "Title" field as seen in the screenshot below.

You'll now notice that the title is translated when viewing different translations of stop content.
Here is a final view of the TourML for our example stop in both English and Spanish. You can click the language links in the left sidebar to toggle between languages.

