-
Notifications
You must be signed in to change notification settings - Fork 0
Expand file tree
/
Copy pathblog.html
More file actions
1 lines (1 loc) · 269 KB
/
Copy pathblog.html
File metadata and controls
1 lines (1 loc) · 269 KB
1
<!DOCTYPE html><!--bCxGb8r55jQv5QEKHT2iM--><html lang="en"><head><meta charSet="utf-8"/><meta name="viewport" content="width=device-width, initial-scale=1"/><link rel="preload" as="image" href="/images/logo-small.png"/><link rel="stylesheet" href="/_next/static/chunks/438fe2dbbbfd829d.css" data-precedence="next"/><link rel="stylesheet" href="/_next/static/chunks/9ba9b719c4b6976c.css" data-precedence="next"/><link rel="preload" as="script" fetchPriority="low" href="/_next/static/chunks/ba947f6798c3c403.js"/><script src="/_next/static/chunks/9a513a8c4dabec14.js" async=""></script><script src="/_next/static/chunks/713fc8ad9ceac69a.js" async=""></script><script src="/_next/static/chunks/19e94e7551cef099.js" async=""></script><script src="/_next/static/chunks/turbopack-2ca5897f65736e1e.js" async=""></script><script src="/_next/static/chunks/d2b88760aa36d453.js" async=""></script><script src="/_next/static/chunks/ff1a16fafef87110.js" async=""></script><script src="/_next/static/chunks/708205fa81a1891d.js" async=""></script><script src="/_next/static/chunks/cc81a65f641a0c5f.js" async=""></script><link rel="preload" href="/_next/static/chunks/578ca6ed020117e9.css" as="style"/><link rel="preload" href="https://www.googletagmanager.com/gtag/js?id=G-Y039CLFJME" as="script"/><title>Blog | Tech Blog | FAESEL.COM</title><meta name="description" content="Read the latest articles about technology, coding, and digital innovation"/><link rel="author" href="https://www.faesel.com/about"/><meta name="author" content="Faesel Saeed"/><meta name="keywords" content="blog,technology,web development,programming,software engineering"/><link rel="alternate" type="application/rss+xml" href="https://www.faesel.com/feed.xml"/><meta property="og:title" content="Blog | Tech Blog"/><meta property="og:description" content="Read the latest articles about technology, coding, and digital innovation"/><meta property="og:type" content="website"/><meta name="twitter:card" content="summary_large_image"/><meta name="twitter:site" content="@faeselsaeed"/><meta name="twitter:creator" content="@faeselsaeed"/><meta name="twitter:title" content="Blog | Tech Blog"/><meta name="twitter:description" content="Read the latest articles about technology, coding, and digital innovation"/><link rel="shortcut icon" href="/favicon.ico"/><link rel="icon" href="/favicon.ico"/><link rel="apple-touch-icon" href="/favicon.ico"/><script type="application/ld+json">{"@context":"https://schema.org","@type":"Organization","name":"Faesel Saeed","url":"https://www.faesel.com","logo":{"@type":"ImageObject","url":"https://www.faesel.com/images/logo.png"},"sameAs":["https://github.com/faesel","https://www.linkedin.com/in/faesel-saeed-a97b1614"]}</script><script type="application/ld+json">{"@context":"https://schema.org","@type":"WebSite","name":"FAESEL.COM","url":"https://www.faesel.com","description":"A modern tech blog exploring technology, coding, and digital innovation","publisher":{"@type":"Organization","name":"Faesel Saeed","url":"https://www.faesel.com"}}</script><script src="/_next/static/chunks/a6dad97d9634a72d.js" noModule=""></script></head><body><div hidden=""><!--$--><!--/$--></div><a href="#main-content" class="skip-to-content">Skip to content</a><header class="Header-module__hBw1pG__header"><div class="Header-module__hBw1pG__container"><a class="Header-module__hBw1pG__logo" aria-label="Home" href="/"><img alt="Logo" width="40" height="40" decoding="async" data-nimg="1" class="Header-module__hBw1pG__logoImage" style="color:transparent" src="/images/logo-small.png"/></a><button class="Header-module__hBw1pG__mobileMenuButton" aria-label="Toggle menu" aria-expanded="false">☰</button><nav class="Header-module__hBw1pG__nav " role="navigation" aria-label="Main navigation"><a class="Header-module__hBw1pG__navLink " href="/">Home</a><a class="Header-module__hBw1pG__navLink Header-module__hBw1pG__active" href="/blog">Blog</a><a class="Header-module__hBw1pG__navLink " href="/projects">Projects</a><a class="Header-module__hBw1pG__navLink " href="/about">About</a><a class="Header-module__hBw1pG__navLink " href="/contact">Contact</a><a href="/feed.xml" class="Header-module__hBw1pG__rssLink" aria-label="RSS Feed" title="RSS Feed"><svg xmlns="http://www.w3.org/2000/svg" viewBox="0 0 24 24" width="18" height="18" fill="currentColor" class="RssIcon-module__Zq2JtW__icon " aria-hidden="true"><circle cx="6.18" cy="17.82" r="2.18"></circle><path d="M4 4.44v2.83c7.03 0 12.73 5.7 12.73 12.73h2.83c0-8.59-6.97-15.56-15.56-15.56zm0 5.66v2.83c3.9 0 7.07 3.17 7.07 7.07h2.83c0-5.47-4.43-9.9-9.9-9.9z"></path></svg></a></nav></div></header><main id="main-content" style="min-height:70vh"><script type="application/ld+json">{"@context":"https://schema.org","@type":"BreadcrumbList","itemListElement":[{"@type":"ListItem","position":1,"name":"Home","item":"https://www.faesel.com"},{"@type":"ListItem","position":2,"name":"Blog","item":"https://www.faesel.com/blog"}]}</script><script type="application/ld+json">{"@context":"https://schema.org","@type":"CollectionPage","name":"Blog","description":"Articles about technology, coding, and digital innovation","url":"https://www.faesel.com/blog"}</script><div class="page-module__jXZM3G__container"><header class="page-module__jXZM3G__header"><h1 class="page-module__jXZM3G__title">Blog</h1><p class="page-module__jXZM3G__subtitle">Articles about technology, coding, and more</p></header><div class="page-module__jXZM3G__filters"><button class="page-module__jXZM3G__filterButton page-module__jXZM3G__active">All</button><button class="page-module__jXZM3G__filterButton ">.env</button><button class="page-module__jXZM3G__filterButton ">.net</button><button class="page-module__jXZM3G__filterButton ">Nx</button><button class="page-module__jXZM3G__filterButton ">ai</button><button class="page-module__jXZM3G__filterButton ">asp.net</button><button class="page-module__jXZM3G__filterButton ">authentication</button><button class="page-module__jXZM3G__filterButton ">authorization</button><button class="page-module__jXZM3G__filterButton ">az-lazy</button><button class="page-module__jXZM3G__filterButton ">azure</button><button class="page-module__jXZM3G__filterButton ">azure-queues</button><button class="page-module__jXZM3G__filterButton ">azure-storage</button><button class="page-module__jXZM3G__filterButton ">banana-cake-pop</button><button class="page-module__jXZM3G__filterButton ">blob</button><button class="page-module__jXZM3G__filterButton ">blog</button><button class="page-module__jXZM3G__filterButton ">bloomrpc</button><button class="page-module__jXZM3G__filterButton ">c#</button><button class="page-module__jXZM3G__filterButton ">chilli-cream</button><button class="page-module__jXZM3G__filterButton ">ci</button><button class="page-module__jXZM3G__filterButton ">cli</button><button class="page-module__jXZM3G__filterButton ">commandline</button><button class="page-module__jXZM3G__filterButton ">console</button><button class="page-module__jXZM3G__filterButton ">containers</button><button class="page-module__jXZM3G__filterButton ">contentful</button><button class="page-module__jXZM3G__filterButton ">continuous-integration</button><button class="page-module__jXZM3G__filterButton ">convention</button><button class="page-module__jXZM3G__filterButton ">copilot</button><button class="page-module__jXZM3G__filterButton ">deconstruction</button><button class="page-module__jXZM3G__filterButton ">disqus</button><button class="page-module__jXZM3G__filterButton ">dotnet</button><button class="page-module__jXZM3G__filterButton ">dotnet core</button><button class="page-module__jXZM3G__filterButton ">dotnet-tools</button><button class="page-module__jXZM3G__filterButton ">electron</button><button class="page-module__jXZM3G__filterButton ">env-cmd</button><button class="page-module__jXZM3G__filterButton ">environments</button><button class="page-module__jXZM3G__filterButton ">gatsbyjs</button><button class="page-module__jXZM3G__filterButton ">git</button><button class="page-module__jXZM3G__filterButton ">google-analytics</button><button class="page-module__jXZM3G__filterButton ">graphql</button><button class="page-module__jXZM3G__filterButton ">graphql-voyager</button><button class="page-module__jXZM3G__filterButton ">gridwatch</button><button class="page-module__jXZM3G__filterButton ">grpc</button><button class="page-module__jXZM3G__filterButton ">grpc-reflection</button><button class="page-module__jXZM3G__filterButton ">grpc-web</button><button class="page-module__jXZM3G__filterButton ">helmet</button><button class="page-module__jXZM3G__filterButton ">hotchocolate</button><button class="page-module__jXZM3G__filterButton ">ide</button><button class="page-module__jXZM3G__filterButton ">ipc-channel</button><button class="page-module__jXZM3G__filterButton ">jaeger</button><button class="page-module__jXZM3G__filterButton ">javascript</button><button class="page-module__jXZM3G__filterButton ">json-ld</button><button class="page-module__jXZM3G__filterButton ">knowledge-graph</button><button class="page-module__jXZM3G__filterButton ">linked-data</button><button class="page-module__jXZM3G__filterButton ">logging</button><button class="page-module__jXZM3G__filterButton ">markdown</button><button class="page-module__jXZM3G__filterButton ">mermaid</button><button class="page-module__jXZM3G__filterButton ">monitoring</button><button class="page-module__jXZM3G__filterButton ">monorepo</button><button class="page-module__jXZM3G__filterButton ">msbuild</button><button class="page-module__jXZM3G__filterButton ">new-relic</button><button class="page-module__jXZM3G__filterButton ">notes</button><button class="page-module__jXZM3G__filterButton ">nswag</button><button class="page-module__jXZM3G__filterButton ">nuget</button><button class="page-module__jXZM3G__filterButton ">nunit</button><button class="page-module__jXZM3G__filterButton ">obsidian</button><button class="page-module__jXZM3G__filterButton ">open-graph</button><button class="page-module__jXZM3G__filterButton ">open-telemetry</button><button class="page-module__jXZM3G__filterButton ">otlp</button><button class="page-module__jXZM3G__filterButton ">ownership</button><button class="page-module__jXZM3G__filterButton ">plantuml</button><button class="page-module__jXZM3G__filterButton ">poison queue</button><button class="page-module__jXZM3G__filterButton ">powershell</button><button class="page-module__jXZM3G__filterButton ">powershell-gallery</button><button class="page-module__jXZM3G__filterButton ">project-structure</button><button class="page-module__jXZM3G__filterButton ">proto-files</button><button class="page-module__jXZM3G__filterButton ">queues</button><button class="page-module__jXZM3G__filterButton ">react</button><button class="page-module__jXZM3G__filterButton ">research</button><button class="page-module__jXZM3G__filterButton ">rest</button><button class="page-module__jXZM3G__filterButton ">seo</button><button class="page-module__jXZM3G__filterButton ">shx</button><button class="page-module__jXZM3G__filterButton ">slack</button><button class="page-module__jXZM3G__filterButton ">spa</button><button class="page-module__jXZM3G__filterButton ">syntax</button><button class="page-module__jXZM3G__filterButton ">table-storage</button><button class="page-module__jXZM3G__filterButton ">teamcity</button><button class="page-module__jXZM3G__filterButton ">template</button><button class="page-module__jXZM3G__filterButton ">tokens</button><button class="page-module__jXZM3G__filterButton ">tracing</button><button class="page-module__jXZM3G__filterButton ">twitter</button><button class="page-module__jXZM3G__filterButton ">unit-test</button><button class="page-module__jXZM3G__filterButton ">unit-tests</button><button class="page-module__jXZM3G__filterButton ">versioning</button><button class="page-module__jXZM3G__filterButton ">windows-terminal</button><button class="page-module__jXZM3G__filterButton ">wsl</button></div><div class="page-module__jXZM3G__grid"><article class="BlogCard-module__h7P_Na__card"><a aria-label="Read Stop Burning Tokens with GridWatch" href="/blog/stop-burning-tokens-with-gridwatch"><div class="BlogCard-module__h7P_Na__imageWrapper"><img alt="Stop Burning Tokens with GridWatch" loading="lazy" decoding="async" data-nimg="fill" class="BlogCard-module__h7P_Na__image" style="position:absolute;height:100%;width:100%;left:0;top:0;right:0;bottom:0;color:transparent" src="https://images.ctfassets.net/wjg1udsw901v/2cwSDrr8iE5me2vayzL0xK/80d2a2e60c4c3178d610c58a8db273c4/token-hero.svg"/></div></a><div class="BlogCard-module__h7P_Na__content"><a href="/blog/stop-burning-tokens-with-gridwatch"><h3 class="BlogCard-module__h7P_Na__title">Stop Burning Tokens with GridWatch</h3></a><div class="BlogCard-module__h7P_Na__meta"><time class="BlogCard-module__h7P_Na__date" dateTime="2026-06-10T00:00+01:00">📅 <!-- -->June 9, 2026</time><span class="BlogCard-module__h7P_Na__separator">•</span><span class="BlogCard-module__h7P_Na__readingTime">⏱️ <!-- -->11 min read</span></div><p class="BlogCard-module__h7P_Na__excerpt">The context wall nobody warns you about Here's something that took me longer to learn than I'd like to admit: Copilot CLI has varied context window ca...</p><div class="BlogCard-module__h7P_Na__tags"><span class="BlogCard-module__h7P_Na__tag">gridwatch</span><span class="BlogCard-module__h7P_Na__tag">copilot</span><span class="BlogCard-module__h7P_Na__tag">tokens</span><span class="BlogCard-module__h7P_Na__tag">ai</span></div></div></article><article class="BlogCard-module__h7P_Na__card"><a aria-label="Read GridWatch v0.28.0 — From Side Project to Daily Driver" href="/blog/gridwatch-v028-from-side-project-to-daily-driver"><div class="BlogCard-module__h7P_Na__imageWrapper"><img alt="GridWatch v0.28.0 — From Side Project to Daily Driver" loading="lazy" decoding="async" data-nimg="fill" class="BlogCard-module__h7P_Na__image" style="position:absolute;height:100%;width:100%;left:0;top:0;right:0;bottom:0;color:transparent" src="https://images.ctfassets.net/wjg1udsw901v/25D8ZUmMWM3oAgIcNw56Yp/27dd5fecd3c8afa58af2daa437fa4dad/gridwatch-v028-hero.png"/></div></a><div class="BlogCard-module__h7P_Na__content"><a href="/blog/gridwatch-v028-from-side-project-to-daily-driver"><h3 class="BlogCard-module__h7P_Na__title">GridWatch v0.28.0 — From Side Project to Daily Driver</h3></a><div class="BlogCard-module__h7P_Na__meta"><time class="BlogCard-module__h7P_Na__date" dateTime="2026-04-12T00:00+01:00">📅 <!-- -->April 11, 2026</time><span class="BlogCard-module__h7P_Na__separator">•</span><span class="BlogCard-module__h7P_Na__readingTime">⏱️ <!-- -->7 min read</span></div><p class="BlogCard-module__h7P_Na__excerpt">It started with curiosity, now I can't live without it A few months back I wrote about building GridWatch — a desktop dashboard for GitHub Copilot CLI...</p><div class="BlogCard-module__h7P_Na__tags"><span class="BlogCard-module__h7P_Na__tag">gridwatch</span><span class="BlogCard-module__h7P_Na__tag">copilot</span><span class="BlogCard-module__h7P_Na__tag">cli</span></div></div></article><article class="BlogCard-module__h7P_Na__card"><a aria-label="Read Building GridWatch — A Dashboard for GitHub Copilot CLI Sessions" href="/blog/gridwatch-copilot-session-manager"><div class="BlogCard-module__h7P_Na__imageWrapper"><img alt="Building GridWatch — A Dashboard for GitHub Copilot CLI Sessions" loading="lazy" decoding="async" data-nimg="fill" class="BlogCard-module__h7P_Na__image" style="position:absolute;height:100%;width:100%;left:0;top:0;right:0;bottom:0;color:transparent" src="https://images.ctfassets.net/wjg1udsw901v/23Pz8ZHNR3LA4dru1fR9ki/fd356cebbc39758d158d9318c23c44fb/screenshot-sessions.png"/></div></a><div class="BlogCard-module__h7P_Na__content"><a href="/blog/gridwatch-copilot-session-manager"><h3 class="BlogCard-module__h7P_Na__title">Building GridWatch — A Dashboard for GitHub Copilot CLI Sessions</h3></a><div class="BlogCard-module__h7P_Na__meta"><time class="BlogCard-module__h7P_Na__date" dateTime="2026-02-28T00:00+00:00">📅 <!-- -->February 28, 2026</time><span class="BlogCard-module__h7P_Na__separator">•</span><span class="BlogCard-module__h7P_Na__readingTime">⏱️ <!-- -->3 min read</span></div><p class="BlogCard-module__h7P_Na__excerpt">Introduction If you've been using GitHub Copilot CLI, you'll know it stores a surprising amount of data locally — session metadata, conversation histo...</p><div class="BlogCard-module__h7P_Na__tags"><span class="BlogCard-module__h7P_Na__tag">copilot</span><span class="BlogCard-module__h7P_Na__tag">gridwatch</span><span class="BlogCard-module__h7P_Na__tag">cli</span></div></div></article><article class="BlogCard-module__h7P_Na__card"><a aria-label="Read Going fullstack with Nx monorepo using C# and React" href="/blog/fullstack-nx-using-react-csharp"><div class="BlogCard-module__h7P_Na__imageWrapper"><img alt="Going fullstack with Nx monorepo using C# and React" loading="lazy" decoding="async" data-nimg="fill" class="BlogCard-module__h7P_Na__image" style="position:absolute;height:100%;width:100%;left:0;top:0;right:0;bottom:0;color:transparent" src="https://images.ctfassets.net/wjg1udsw901v/4PwE6fYKXRgmDdn4A7ok44/f8252594cc8221cce16af558aec0f929/image.png"/></div></a><div class="BlogCard-module__h7P_Na__content"><a href="/blog/fullstack-nx-using-react-csharp"><h3 class="BlogCard-module__h7P_Na__title">Going fullstack with Nx monorepo using C# and React</h3></a><div class="BlogCard-module__h7P_Na__meta"><time class="BlogCard-module__h7P_Na__date" dateTime="2026-02-24T00:00+00:00">📅 <!-- -->February 24, 2026</time><span class="BlogCard-module__h7P_Na__separator">•</span><span class="BlogCard-module__h7P_Na__readingTime">⏱️ <!-- -->8 min read</span></div><p class="BlogCard-module__h7P_Na__excerpt">Introduction Recently, I’ve been using the Nx monorepo framework quite extensively—but purely for frontend React projects. I’d always thought of Nx as...</p><div class="BlogCard-module__h7P_Na__tags"><span class="BlogCard-module__h7P_Na__tag">dotnet</span><span class="BlogCard-module__h7P_Na__tag">react</span><span class="BlogCard-module__h7P_Na__tag">Nx</span><span class="BlogCard-module__h7P_Na__tag">monorepo</span></div></div></article><article class="BlogCard-module__h7P_Na__card"><a aria-label="Read Electron & New Relic Integration Using Open Telemetry" href="/blog/electron-newrelic-integration-using-open-telemetry"><div class="BlogCard-module__h7P_Na__imageWrapper"><img alt="Electron & New Relic Integration Using Open Telemetry" loading="lazy" decoding="async" data-nimg="fill" class="BlogCard-module__h7P_Na__image" style="position:absolute;height:100%;width:100%;left:0;top:0;right:0;bottom:0;color:transparent" src="https://images.ctfassets.net/wjg1udsw901v/4N5m97m5WfdJi5u7D8I4tX/00d1a21ab7ce8db54af5fa6f84f89e9d/article-banner.jpg"/></div></a><div class="BlogCard-module__h7P_Na__content"><a href="/blog/electron-newrelic-integration-using-open-telemetry"><h3 class="BlogCard-module__h7P_Na__title">Electron & New Relic Integration Using Open Telemetry</h3></a><div class="BlogCard-module__h7P_Na__meta"><time class="BlogCard-module__h7P_Na__date" dateTime="2023-03-17T00:00+00:00">📅 <!-- -->March 17, 2023</time><span class="BlogCard-module__h7P_Na__separator">•</span><span class="BlogCard-module__h7P_Na__readingTime">⏱️ <!-- -->8 min read</span></div><p class="BlogCard-module__h7P_Na__excerpt">Introduction Recently I encountered a scenario where I needed to integrate New Relic into my Electron application. New Relic supports a number of inte...</p><div class="BlogCard-module__h7P_Na__tags"><span class="BlogCard-module__h7P_Na__tag">electron</span><span class="BlogCard-module__h7P_Na__tag">new-relic</span><span class="BlogCard-module__h7P_Na__tag">open-telemetry</span><span class="BlogCard-module__h7P_Na__tag">tracing</span><span class="BlogCard-module__h7P_Na__tag">logging</span><span class="BlogCard-module__h7P_Na__tag">jaeger</span><span class="BlogCard-module__h7P_Na__tag">otlp</span><span class="BlogCard-module__h7P_Na__tag">ipc-channel</span></div></div></article><article class="BlogCard-module__h7P_Na__card"><a aria-label="Read Why every developer needs to use Obsidian" href="/blog/why-every-developer-needs-to-use-obsidian"><div class="BlogCard-module__h7P_Na__imageWrapper"><img alt="Why every developer needs to use Obsidian" loading="lazy" decoding="async" data-nimg="fill" class="BlogCard-module__h7P_Na__image" style="position:absolute;height:100%;width:100%;left:0;top:0;right:0;bottom:0;color:transparent" src="https://images.ctfassets.net/wjg1udsw901v/78Ws2s56LgCLoxkx3Xdcsl/083d00cd84eeec428087bbab65ae3580/obsidian-logo.png"/></div></a><div class="BlogCard-module__h7P_Na__content"><a href="/blog/why-every-developer-needs-to-use-obsidian"><h3 class="BlogCard-module__h7P_Na__title">Why every developer needs to use Obsidian</h3></a><div class="BlogCard-module__h7P_Na__meta"><time class="BlogCard-module__h7P_Na__date" dateTime="2021-05-24T00:00+01:00">📅 <!-- -->May 23, 2021</time><span class="BlogCard-module__h7P_Na__separator">•</span><span class="BlogCard-module__h7P_Na__readingTime">⏱️ <!-- -->8 min read</span></div><p class="BlogCard-module__h7P_Na__excerpt">As a engineer learning new languages, tools frameworks etc is just part and parcel of the job. Over time the spectrum of knowledge a full stack engine...</p><div class="BlogCard-module__h7P_Na__tags"><span class="BlogCard-module__h7P_Na__tag">obsidian</span><span class="BlogCard-module__h7P_Na__tag">research</span><span class="BlogCard-module__h7P_Na__tag">notes</span><span class="BlogCard-module__h7P_Na__tag">markdown</span><span class="BlogCard-module__h7P_Na__tag">ownership</span><span class="BlogCard-module__h7P_Na__tag">mermaid</span><span class="BlogCard-module__h7P_Na__tag">git</span><span class="BlogCard-module__h7P_Na__tag">knowledge-graph</span><span class="BlogCard-module__h7P_Na__tag">ide</span><span class="BlogCard-module__h7P_Na__tag">plantuml</span><span class="BlogCard-module__h7P_Na__tag">open-graph</span></div></div></article><article class="BlogCard-module__h7P_Na__card"><a aria-label="Read How to Deconstruct objects in C# like we do in Javascript" href="/blog/deconstruct-objects-in-csharp-like-in-javascript"><div class="BlogCard-module__h7P_Na__imageWrapper"><img alt="How to Deconstruct objects in C# like we do in Javascript" loading="lazy" decoding="async" data-nimg="fill" class="BlogCard-module__h7P_Na__image" style="position:absolute;height:100%;width:100%;left:0;top:0;right:0;bottom:0;color:transparent" src="https://images.ctfassets.net/wjg1udsw901v/4l5ONHEazPnD41lO0henyW/d4cbb6edf21c40cdb3e340faf620a270/deconstruction.jpg"/></div></a><div class="BlogCard-module__h7P_Na__content"><a href="/blog/deconstruct-objects-in-csharp-like-in-javascript"><h3 class="BlogCard-module__h7P_Na__title">How to Deconstruct objects in C# like we do in Javascript</h3></a><div class="BlogCard-module__h7P_Na__meta"><time class="BlogCard-module__h7P_Na__date" dateTime="2021-04-09T00:00+01:00">📅 <!-- -->April 8, 2021</time><span class="BlogCard-module__h7P_Na__separator">•</span><span class="BlogCard-module__h7P_Na__readingTime">⏱️ <!-- -->2 min read</span></div><p class="BlogCard-module__h7P_Na__excerpt">I've been using C# for about a decade now, and every now and again I discover something that surprises me. This week it's the ability to deconstruct a...</p><div class="BlogCard-module__h7P_Na__tags"><span class="BlogCard-module__h7P_Na__tag">c#</span><span class="BlogCard-module__h7P_Na__tag">javascript</span><span class="BlogCard-module__h7P_Na__tag">deconstruction</span><span class="BlogCard-module__h7P_Na__tag">syntax</span><span class="BlogCard-module__h7P_Na__tag">.net</span></div></div></article><article class="BlogCard-module__h7P_Na__card"><a aria-label="Read ASP.NET GraphQL server with Hot Chocolate" href="/blog/aspnet-graphql-server-with-hot-chocolate"><div class="BlogCard-module__h7P_Na__imageWrapper"><img alt="ASP.NET GraphQL server with Hot Chocolate" loading="lazy" decoding="async" data-nimg="fill" class="BlogCard-module__h7P_Na__image" style="position:absolute;height:100%;width:100%;left:0;top:0;right:0;bottom:0;color:transparent" src="https://images.ctfassets.net/wjg1udsw901v/74JrRnpexhOnSAsBwNOPV7/635bc389cea0de36f3158df45483ae85/graphql.jpg"/></div></a><div class="BlogCard-module__h7P_Na__content"><a href="/blog/aspnet-graphql-server-with-hot-chocolate"><h3 class="BlogCard-module__h7P_Na__title">ASP.NET GraphQL server with Hot Chocolate</h3></a><div class="BlogCard-module__h7P_Na__meta"><time class="BlogCard-module__h7P_Na__date" dateTime="2021-04-05T00:00+01:00">📅 <!-- -->April 4, 2021</time><span class="BlogCard-module__h7P_Na__separator">•</span><span class="BlogCard-module__h7P_Na__readingTime">⏱️ <!-- -->10 min read</span></div><p class="BlogCard-module__h7P_Na__excerpt">Starting my journey with GraphQL Up till now, I've always heavily relied on RESTfull services to power API's, this recently got widened with GRPC whic...</p><div class="BlogCard-module__h7P_Na__tags"><span class="BlogCard-module__h7P_Na__tag">graphql</span><span class="BlogCard-module__h7P_Na__tag">hotchocolate</span><span class="BlogCard-module__h7P_Na__tag">graphql-voyager</span><span class="BlogCard-module__h7P_Na__tag">asp.net</span><span class="BlogCard-module__h7P_Na__tag">authentication</span><span class="BlogCard-module__h7P_Na__tag">authorization</span><span class="BlogCard-module__h7P_Na__tag">versioning</span><span class="BlogCard-module__h7P_Na__tag">rest</span><span class="BlogCard-module__h7P_Na__tag">chilli-cream</span><span class="BlogCard-module__h7P_Na__tag">logging</span><span class="BlogCard-module__h7P_Na__tag">open-telemetry</span><span class="BlogCard-module__h7P_Na__tag">banana-cake-pop</span></div></div></article><article class="BlogCard-module__h7P_Na__card"><a aria-label="Read Adding environments to ASP.NET Core with React.js SPA" href="/blog/aspnet-core-react-spa-adding-environments"><div class="BlogCard-module__h7P_Na__imageWrapper"><img alt="Adding environments to ASP.NET Core with React.js SPA" loading="lazy" decoding="async" data-nimg="fill" class="BlogCard-module__h7P_Na__image" style="position:absolute;height:100%;width:100%;left:0;top:0;right:0;bottom:0;color:transparent" src="https://images.ctfassets.net/wjg1udsw901v/1IeybLQIjDnbaXTl4sbqTn/294b0ef4ad9095ee3633f6c38a0e35aa/hero.png"/></div></a><div class="BlogCard-module__h7P_Na__content"><a href="/blog/aspnet-core-react-spa-adding-environments"><h3 class="BlogCard-module__h7P_Na__title">Adding environments to ASP.NET Core with React.js SPA</h3></a><div class="BlogCard-module__h7P_Na__meta"><time class="BlogCard-module__h7P_Na__date" dateTime="2021-01-19T00:00+00:00">📅 <!-- -->January 19, 2021</time><span class="BlogCard-module__h7P_Na__separator">•</span><span class="BlogCard-module__h7P_Na__readingTime">⏱️ <!-- -->8 min read</span></div><p class="BlogCard-module__h7P_Na__excerpt">Recently I started working on a project that was created from the ASP.NET SPA template for react. It's one of the templates you get by default with do...</p><div class="BlogCard-module__h7P_Na__tags"><span class="BlogCard-module__h7P_Na__tag">react</span><span class="BlogCard-module__h7P_Na__tag">spa</span><span class="BlogCard-module__h7P_Na__tag">asp.net</span><span class="BlogCard-module__h7P_Na__tag">dotnet core</span><span class="BlogCard-module__h7P_Na__tag">environments</span><span class="BlogCard-module__h7P_Na__tag">env-cmd</span><span class="BlogCard-module__h7P_Na__tag">shx</span><span class="BlogCard-module__h7P_Na__tag">template</span><span class="BlogCard-module__h7P_Na__tag">msbuild</span><span class="BlogCard-module__h7P_Na__tag">.env</span></div></div></article><article class="BlogCard-module__h7P_Na__card"><a aria-label="Read My journey of creating a .NET CLI tool" href="/blog/my-journey-of-creating-a-dotnet-cli-tool"><div class="BlogCard-module__h7P_Na__imageWrapper"><img alt="My journey of creating a .NET CLI tool" loading="lazy" decoding="async" data-nimg="fill" class="BlogCard-module__h7P_Na__image" style="position:absolute;height:100%;width:100%;left:0;top:0;right:0;bottom:0;color:transparent" src="https://images.ctfassets.net/wjg1udsw901v/5nkhsfNMJDJ5NGcAfvQ2Lt/a2ac18006da7a4865044b77365b55987/AzLazy.png"/></div></a><div class="BlogCard-module__h7P_Na__content"><a href="/blog/my-journey-of-creating-a-dotnet-cli-tool"><h3 class="BlogCard-module__h7P_Na__title">My journey of creating a .NET CLI tool</h3></a><div class="BlogCard-module__h7P_Na__meta"><time class="BlogCard-module__h7P_Na__date" dateTime="2020-12-18T00:00+00:00">📅 <!-- -->December 18, 2020</time><span class="BlogCard-module__h7P_Na__separator">•</span><span class="BlogCard-module__h7P_Na__readingTime">⏱️ <!-- -->8 min read</span></div><p class="BlogCard-module__h7P_Na__excerpt">Why I started building a CLI As a .NET engineer, I work with Azure storage a lot, its versatility, ease of use, as well as cost makes it a common stap...</p><div class="BlogCard-module__h7P_Na__tags"><span class="BlogCard-module__h7P_Na__tag">cli</span><span class="BlogCard-module__h7P_Na__tag">azure</span><span class="BlogCard-module__h7P_Na__tag">queues</span><span class="BlogCard-module__h7P_Na__tag">table-storage</span><span class="BlogCard-module__h7P_Na__tag">containers</span><span class="BlogCard-module__h7P_Na__tag">blob</span><span class="BlogCard-module__h7P_Na__tag">azure-storage</span><span class="BlogCard-module__h7P_Na__tag">dotnet-tools</span><span class="BlogCard-module__h7P_Na__tag">az-lazy</span><span class="BlogCard-module__h7P_Na__tag">console</span><span class="BlogCard-module__h7P_Na__tag">commandline</span></div></div></article><article class="BlogCard-module__h7P_Na__card"><a aria-label="Read .NET & GRPC What they forgot to tell you" href="/blog/dotnet-grpc-forgot-to-tell-you"><div class="BlogCard-module__h7P_Na__imageWrapper"><img alt=".NET & GRPC What they forgot to tell you" loading="lazy" decoding="async" data-nimg="fill" class="BlogCard-module__h7P_Na__image" style="position:absolute;height:100%;width:100%;left:0;top:0;right:0;bottom:0;color:transparent" src="https://images.ctfassets.net/wjg1udsw901v/5m1MwxccFfmDxkLKcq3dBt/b54fc31b09d0a266a3d8cd5082839976/grpc-logojpg.jpg"/></div></a><div class="BlogCard-module__h7P_Na__content"><a href="/blog/dotnet-grpc-forgot-to-tell-you"><h3 class="BlogCard-module__h7P_Na__title">.NET & GRPC What they forgot to tell you</h3></a><div class="BlogCard-module__h7P_Na__meta"><time class="BlogCard-module__h7P_Na__date" dateTime="2020-09-08T00:00+01:00">📅 <!-- -->September 7, 2020</time><span class="BlogCard-module__h7P_Na__separator">•</span><span class="BlogCard-module__h7P_Na__readingTime">⏱️ <!-- -->9 min read</span></div><p class="BlogCard-module__h7P_Na__excerpt">As an engineer, I have always had a heavy reliance on REST'ful API's for passing information between applications. With the introduction of open API s...</p><div class="BlogCard-module__h7P_Na__tags"><span class="BlogCard-module__h7P_Na__tag">grpc</span><span class="BlogCard-module__h7P_Na__tag">.net</span><span class="BlogCard-module__h7P_Na__tag">c#</span><span class="BlogCard-module__h7P_Na__tag">asp.net</span><span class="BlogCard-module__h7P_Na__tag">grpc-web</span><span class="BlogCard-module__h7P_Na__tag">rest</span><span class="BlogCard-module__h7P_Na__tag">nswag</span><span class="BlogCard-module__h7P_Na__tag">proto-files</span><span class="BlogCard-module__h7P_Na__tag">nuget</span><span class="BlogCard-module__h7P_Na__tag">grpc-reflection</span><span class="BlogCard-module__h7P_Na__tag">bloomrpc</span></div></div></article><article class="BlogCard-module__h7P_Na__card"><a aria-label="Read Evolving your Windows Terminal using Powershell libraries" href="/blog/evolving-windows-terminal"><div class="BlogCard-module__h7P_Na__imageWrapper"><img alt="Evolving your Windows Terminal using Powershell libraries" loading="lazy" decoding="async" data-nimg="fill" class="BlogCard-module__h7P_Na__image" style="position:absolute;height:100%;width:100%;left:0;top:0;right:0;bottom:0;color:transparent" src="https://images.ctfassets.net/wjg1udsw901v/5WxA9oRmhEgKswEWyFjdbM/e0efe86ff8b93567fac16c1cfb7d951f/windowsterminalicon.jpg"/></div></a><div class="BlogCard-module__h7P_Na__content"><a href="/blog/evolving-windows-terminal"><h3 class="BlogCard-module__h7P_Na__title">Evolving your Windows Terminal using Powershell libraries</h3></a><div class="BlogCard-module__h7P_Na__meta"><time class="BlogCard-module__h7P_Na__date" dateTime="2020-07-25T00:00+01:00">📅 <!-- -->July 24, 2020</time><span class="BlogCard-module__h7P_Na__separator">•</span><span class="BlogCard-module__h7P_Na__readingTime">⏱️ <!-- -->4 min read</span></div><p class="BlogCard-module__h7P_Na__excerpt">As a windows user the terminal experience has always been lacking, up till the new windows terminal was released. Incorporating WSL (Windows Subsystem...</p><div class="BlogCard-module__h7P_Na__tags"><span class="BlogCard-module__h7P_Na__tag">powershell</span><span class="BlogCard-module__h7P_Na__tag">wsl</span><span class="BlogCard-module__h7P_Na__tag">windows-terminal</span><span class="BlogCard-module__h7P_Na__tag">powershell-gallery</span></div></div></article><article class="BlogCard-module__h7P_Na__card"><a aria-label="Read GatsbyJS SEO and Open Graph with Helmet" href="/blog/gatsby-seo-opengraph-helmet"><div class="BlogCard-module__h7P_Na__imageWrapper"><img alt="GatsbyJS SEO and Open Graph with Helmet" loading="lazy" decoding="async" data-nimg="fill" class="BlogCard-module__h7P_Na__image" style="position:absolute;height:100%;width:100%;left:0;top:0;right:0;bottom:0;color:transparent" src="https://images.ctfassets.net/wjg1udsw901v/6BwwZovIUzXkE7j7ZeVxM6/f7eed6871e869df95a84ef57d8df7ed6/gladiator-1931077_1280.jpg"/></div></a><div class="BlogCard-module__h7P_Na__content"><a href="/blog/gatsby-seo-opengraph-helmet"><h3 class="BlogCard-module__h7P_Na__title">GatsbyJS SEO and Open Graph with Helmet</h3></a><div class="BlogCard-module__h7P_Na__meta"><time class="BlogCard-module__h7P_Na__date" dateTime="2020-07-12T00:00+01:00">📅 <!-- -->July 11, 2020</time><span class="BlogCard-module__h7P_Na__separator">•</span><span class="BlogCard-module__h7P_Na__readingTime">⏱️ <!-- -->6 min read</span></div><p class="BlogCard-module__h7P_Na__excerpt">I recently recreated my blog in GatsbyJs, you can download a template of it here gatsby-techblog-starter. In the joy of sharing its simplicity to the...</p><div class="BlogCard-module__h7P_Na__tags"><span class="BlogCard-module__h7P_Na__tag">helmet</span><span class="BlogCard-module__h7P_Na__tag">twitter</span><span class="BlogCard-module__h7P_Na__tag">seo</span><span class="BlogCard-module__h7P_Na__tag">linked-data</span><span class="BlogCard-module__h7P_Na__tag">gatsbyjs</span><span class="BlogCard-module__h7P_Na__tag">json-ld</span><span class="BlogCard-module__h7P_Na__tag">open-graph</span></div></div></article><article class="BlogCard-module__h7P_Na__card"><a aria-label="Read Creating my dream tech blog with GatsbyJS" href="/blog/gatsby-tech-blog-starter"><div class="BlogCard-module__h7P_Na__imageWrapper"><img alt="Creating my dream tech blog with GatsbyJS" loading="lazy" decoding="async" data-nimg="fill" class="BlogCard-module__h7P_Na__image" style="position:absolute;height:100%;width:100%;left:0;top:0;right:0;bottom:0;color:transparent" src="https://images.ctfassets.net/wjg1udsw901v/6hjsGXkoyitmyiEuBdeTP2/c77e74af9235ac775f18836e2de07cac/gatsby-logo.jpg"/></div></a><div class="BlogCard-module__h7P_Na__content"><a href="/blog/gatsby-tech-blog-starter"><h3 class="BlogCard-module__h7P_Na__title">Creating my dream tech blog with GatsbyJS</h3></a><div class="BlogCard-module__h7P_Na__meta"><time class="BlogCard-module__h7P_Na__date" dateTime="2020-07-08T00:00+01:00">📅 <!-- -->July 7, 2020</time><span class="BlogCard-module__h7P_Na__separator">•</span><span class="BlogCard-module__h7P_Na__readingTime">⏱️ <!-- -->7 min read</span></div><p class="BlogCard-module__h7P_Na__excerpt">I'm someone who's always had my own tech blog, I've gone through two revisions already with the last revision updating out of a 1997 style book. How m...</p><div class="BlogCard-module__h7P_Na__tags"><span class="BlogCard-module__h7P_Na__tag">contentful</span><span class="BlogCard-module__h7P_Na__tag">disqus</span><span class="BlogCard-module__h7P_Na__tag">google-analytics</span><span class="BlogCard-module__h7P_Na__tag">blog</span><span class="BlogCard-module__h7P_Na__tag">react</span><span class="BlogCard-module__h7P_Na__tag">graphql</span></div></div></article><article class="BlogCard-module__h7P_Na__card"><a aria-label="Read Making a Azure poison queue Slack notifier" href="/blog/azure-poison-queue-notifier"><div class="BlogCard-module__h7P_Na__imageWrapper"><img alt="Making a Azure poison queue Slack notifier" loading="lazy" decoding="async" data-nimg="fill" class="BlogCard-module__h7P_Na__image" style="position:absolute;height:100%;width:100%;left:0;top:0;right:0;bottom:0;color:transparent" src="https://images.ctfassets.net/wjg1udsw901v/UMa2shO53yjhwxv5PF0go/cbf2e4489e801053a91d77a038dcbde9/tobias-tullius-4dKy7d3lkKM-unsplash.jpg"/></div></a><div class="BlogCard-module__h7P_Na__content"><a href="/blog/azure-poison-queue-notifier"><h3 class="BlogCard-module__h7P_Na__title">Making a Azure poison queue Slack notifier</h3></a><div class="BlogCard-module__h7P_Na__meta"><time class="BlogCard-module__h7P_Na__date" dateTime="2017-09-23T00:00+01:00">📅 <!-- -->September 22, 2017</time><span class="BlogCard-module__h7P_Na__separator">•</span><span class="BlogCard-module__h7P_Na__readingTime">⏱️ <!-- -->6 min read</span></div><p class="BlogCard-module__h7P_Na__excerpt">I'm currently working at a place were we are using queue triggered Webjobs to handle the sending of messages like email and SMS (using Send Grid and T...</p><div class="BlogCard-module__h7P_Na__tags"><span class="BlogCard-module__h7P_Na__tag">azure</span><span class="BlogCard-module__h7P_Na__tag">poison queue</span><span class="BlogCard-module__h7P_Na__tag">monitoring</span><span class="BlogCard-module__h7P_Na__tag">slack</span><span class="BlogCard-module__h7P_Na__tag">azure-queues</span></div></div></article><article class="BlogCard-module__h7P_Na__card"><a aria-label="Read Fix poor project structure with Convention Based Programming" href="/blog/convention-based-programming"><div class="BlogCard-module__h7P_Na__imageWrapper"><img alt="Fix poor project structure with Convention Based Programming" loading="lazy" decoding="async" data-nimg="fill" class="BlogCard-module__h7P_Na__image" style="position:absolute;height:100%;width:100%;left:0;top:0;right:0;bottom:0;color:transparent" src="https://images.ctfassets.net/wjg1udsw901v/27s4Gn7WXRTKhSaaWBU2RN/c057b731733a4d8943365bdeaeb71147/alain-pham-P_qvsF7Yodw-unsplash.jpg"/></div></a><div class="BlogCard-module__h7P_Na__content"><a href="/blog/convention-based-programming"><h3 class="BlogCard-module__h7P_Na__title">Fix poor project structure with Convention Based Programming</h3></a><div class="BlogCard-module__h7P_Na__meta"><time class="BlogCard-module__h7P_Na__date" dateTime="2017-08-20T00:00+01:00">📅 <!-- -->August 19, 2017</time><span class="BlogCard-module__h7P_Na__separator">•</span><span class="BlogCard-module__h7P_Na__readingTime">⏱️ <!-- -->5 min read</span></div><p class="BlogCard-module__h7P_Na__excerpt">Having looked at a number of projects in my lifetime, I always come across classes named something like "CustomerService" with similar variations (usu...</p><div class="BlogCard-module__h7P_Na__tags"><span class="BlogCard-module__h7P_Na__tag">convention</span><span class="BlogCard-module__h7P_Na__tag">unit-test</span><span class="BlogCard-module__h7P_Na__tag">project-structure</span></div></div></article><article class="BlogCard-module__h7P_Na__card"><a aria-label="Read Splitting NUnit Unit Tests With TeamCity To Decrease CI Time" href="/blog/nunit-test-ci-split"><div class="BlogCard-module__h7P_Na__imageWrapper"><img alt="Splitting NUnit Unit Tests With TeamCity To Decrease CI Time" loading="lazy" decoding="async" data-nimg="fill" class="BlogCard-module__h7P_Na__image" style="position:absolute;height:100%;width:100%;left:0;top:0;right:0;bottom:0;color:transparent" src="https://images.ctfassets.net/wjg1udsw901v/3YSq2wLiYV0f3KvoXUXjXL/19aa4d78b6d63287928c6d40f2e36d99/harshal-desai-0hCIrw8dVfE-unsplash.jpg"/></div></a><div class="BlogCard-module__h7P_Na__content"><a href="/blog/nunit-test-ci-split"><h3 class="BlogCard-module__h7P_Na__title">Splitting NUnit Unit Tests With TeamCity To Decrease CI Time</h3></a><div class="BlogCard-module__h7P_Na__meta"><time class="BlogCard-module__h7P_Na__date" dateTime="2017-04-01T00:00+01:00">📅 <!-- -->March 31, 2017</time><span class="BlogCard-module__h7P_Na__separator">•</span><span class="BlogCard-module__h7P_Na__readingTime">⏱️ <!-- -->2 min read</span></div><p class="BlogCard-module__h7P_Na__excerpt">This is a quick guide on how to split unit tests into different categories to decrease the time it takes for your CI build to run. The categories can...</p><div class="BlogCard-module__h7P_Na__tags"><span class="BlogCard-module__h7P_Na__tag">nunit</span><span class="BlogCard-module__h7P_Na__tag">unit-tests</span><span class="BlogCard-module__h7P_Na__tag">continuous-integration</span><span class="BlogCard-module__h7P_Na__tag">ci</span><span class="BlogCard-module__h7P_Na__tag">teamcity</span></div></div></article></div></div><!--$--><!--/$--></main><footer class="Footer-module__S6Hkya__footer"><div class="Footer-module__S6Hkya__container"><div class="Footer-module__S6Hkya__content"><nav class="Footer-module__S6Hkya__links" aria-label="Footer navigation"><a class="Footer-module__S6Hkya__link" href="/blog">Blog</a><a class="Footer-module__S6Hkya__link" href="/projects">Projects</a><a class="Footer-module__S6Hkya__link" href="/about">About</a><a class="Footer-module__S6Hkya__link" href="/contact">Contact</a><a href="/feed.xml" class="Footer-module__S6Hkya__rssLink" aria-label="RSS Feed" title="RSS Feed"><svg xmlns="http://www.w3.org/2000/svg" viewBox="0 0 24 24" width="16" height="16" fill="currentColor" class="RssIcon-module__Zq2JtW__icon " aria-hidden="true"><circle cx="6.18" cy="17.82" r="2.18"></circle><path d="M4 4.44v2.83c7.03 0 12.73 5.7 12.73 12.73h2.83c0-8.59-6.97-15.56-15.56-15.56zm0 5.66v2.83c3.9 0 7.07 3.17 7.07 7.07h2.83c0-5.47-4.43-9.9-9.9-9.9z"></path></svg><span>RSS</span></a></nav><p class="Footer-module__S6Hkya__copyright">© <!-- -->2026<!-- --> Faesel Saeed. All rights reserved. Code snippets are MIT licensed unless stated otherwise.</p></div></div></footer><script src="/_next/static/chunks/ba947f6798c3c403.js" id="_R_" async=""></script><script>(self.__next_f=self.__next_f||[]).push([0])</script><script>self.__next_f.push([1,"1:\"$Sreact.fragment\"\n2:I[31362,[\"/_next/static/chunks/d2b88760aa36d453.js\"],\"default\"]\n3:I[2971,[\"/_next/static/chunks/d2b88760aa36d453.js\"],\"default\"]\n4:I[39756,[\"/_next/static/chunks/ff1a16fafef87110.js\",\"/_next/static/chunks/708205fa81a1891d.js\"],\"default\"]\n5:I[37457,[\"/_next/static/chunks/ff1a16fafef87110.js\",\"/_next/static/chunks/708205fa81a1891d.js\"],\"default\"]\n6:I[22016,[\"/_next/static/chunks/d2b88760aa36d453.js\"],\"\"]\n8:I[97367,[\"/_next/static/chunks/ff1a16fafef87110.js\",\"/_next/static/chunks/708205fa81a1891d.js\"],\"OutletBoundary\"]\n9:\"$Sreact.suspense\"\nc:I[68027,[\"/_next/static/chunks/ff1a16fafef87110.js\",\"/_next/static/chunks/708205fa81a1891d.js\"],\"default\"]\n:HL[\"/_next/static/chunks/438fe2dbbbfd829d.css\",\"style\"]\n:HL[\"/_next/static/chunks/9ba9b719c4b6976c.css\",\"style\"]\n:HL[\"/_next/static/chunks/578ca6ed020117e9.css\",\"style\"]\n"])</script><script>self.__next_f.push([1,"0:{\"P\":null,\"b\":\"bCxGb8r55jQv5QEKHT2iM\",\"c\":[\"\",\"blog\"],\"q\":\"\",\"i\":false,\"f\":[[[\"\",{\"children\":[\"blog\",{\"children\":[\"__PAGE__\",{}]}]},\"$undefined\",\"$undefined\",true],[[\"$\",\"$1\",\"c\",{\"children\":[[[\"$\",\"link\",\"0\",{\"rel\":\"stylesheet\",\"href\":\"/_next/static/chunks/438fe2dbbbfd829d.css\",\"precedence\":\"next\",\"crossOrigin\":\"$undefined\",\"nonce\":\"$undefined\"}],[\"$\",\"script\",\"script-0\",{\"src\":\"/_next/static/chunks/d2b88760aa36d453.js\",\"async\":true,\"nonce\":\"$undefined\"}]],[\"$\",\"html\",null,{\"lang\":\"en\",\"children\":[[\"$\",\"head\",null,{\"children\":[[\"$\",\"script\",null,{\"type\":\"application/ld+json\",\"dangerouslySetInnerHTML\":{\"__html\":\"{\\\"@context\\\":\\\"https://schema.org\\\",\\\"@type\\\":\\\"Organization\\\",\\\"name\\\":\\\"Faesel Saeed\\\",\\\"url\\\":\\\"https://www.faesel.com\\\",\\\"logo\\\":{\\\"@type\\\":\\\"ImageObject\\\",\\\"url\\\":\\\"https://www.faesel.com/images/logo.png\\\"},\\\"sameAs\\\":[\\\"https://github.com/faesel\\\",\\\"https://www.linkedin.com/in/faesel-saeed-a97b1614\\\"]}\"}}],[\"$\",\"script\",null,{\"type\":\"application/ld+json\",\"dangerouslySetInnerHTML\":{\"__html\":\"{\\\"@context\\\":\\\"https://schema.org\\\",\\\"@type\\\":\\\"WebSite\\\",\\\"name\\\":\\\"FAESEL.COM\\\",\\\"url\\\":\\\"https://www.faesel.com\\\",\\\"description\\\":\\\"A modern tech blog exploring technology, coding, and digital innovation\\\",\\\"publisher\\\":{\\\"@type\\\":\\\"Organization\\\",\\\"name\\\":\\\"Faesel Saeed\\\",\\\"url\\\":\\\"https://www.faesel.com\\\"}}\"}}]]}],[\"$\",\"body\",null,{\"children\":[[\"$\",\"$L2\",null,{\"gaId\":\"G-Y039CLFJME\"}],[\"$\",\"a\",null,{\"href\":\"#main-content\",\"className\":\"skip-to-content\",\"children\":\"Skip to content\"}],[\"$\",\"$L3\",null,{}],[\"$\",\"main\",null,{\"id\":\"main-content\",\"style\":{\"minHeight\":\"70vh\"},\"children\":[\"$\",\"$L4\",null,{\"parallelRouterKey\":\"children\",\"error\":\"$undefined\",\"errorStyles\":\"$undefined\",\"errorScripts\":\"$undefined\",\"template\":[\"$\",\"$L5\",null,{}],\"templateStyles\":\"$undefined\",\"templateScripts\":\"$undefined\",\"notFound\":[[\"$\",\"div\",null,{\"className\":\"not-found-module__HS70Aa__container\",\"children\":[[\"$\",\"h1\",null,{\"className\":\"not-found-module__HS70Aa__title\",\"children\":\"404\"}],[\"$\",\"h2\",null,{\"className\":\"not-found-module__HS70Aa__subtitle\",\"children\":\"Page Not Found\"}],[\"$\",\"p\",null,{\"className\":\"not-found-module__HS70Aa__message\",\"children\":\"Sorry, the page you're looking for doesn't exist.\"}],[\"$\",\"$L6\",null,{\"href\":\"/\",\"className\":\"not-found-module__HS70Aa__homeLink\",\"children\":\"Go Home\"}]]}],[[\"$\",\"link\",\"0\",{\"rel\":\"stylesheet\",\"href\":\"/_next/static/chunks/578ca6ed020117e9.css\",\"precedence\":\"next\",\"crossOrigin\":\"$undefined\",\"nonce\":\"$undefined\"}]]],\"forbidden\":\"$undefined\",\"unauthorized\":\"$undefined\"}]}],[\"$\",\"footer\",null,{\"className\":\"Footer-module__S6Hkya__footer\",\"children\":[\"$\",\"div\",null,{\"className\":\"Footer-module__S6Hkya__container\",\"children\":[\"$\",\"div\",null,{\"className\":\"Footer-module__S6Hkya__content\",\"children\":[[\"$\",\"nav\",null,{\"className\":\"Footer-module__S6Hkya__links\",\"aria-label\":\"Footer navigation\",\"children\":[[\"$\",\"$L6\",null,{\"href\":\"/blog\",\"className\":\"Footer-module__S6Hkya__link\",\"children\":\"Blog\"}],[\"$\",\"$L6\",null,{\"href\":\"/projects\",\"className\":\"Footer-module__S6Hkya__link\",\"children\":\"Projects\"}],[\"$\",\"$L6\",null,{\"href\":\"/about\",\"className\":\"Footer-module__S6Hkya__link\",\"children\":\"About\"}],[\"$\",\"$L6\",null,{\"href\":\"/contact\",\"className\":\"Footer-module__S6Hkya__link\",\"children\":\"Contact\"}],[\"$\",\"a\",null,{\"href\":\"/feed.xml\",\"className\":\"Footer-module__S6Hkya__rssLink\",\"aria-label\":\"RSS Feed\",\"title\":\"RSS Feed\",\"children\":[[\"$\",\"svg\",null,{\"xmlns\":\"http://www.w3.org/2000/svg\",\"viewBox\":\"0 0 24 24\",\"width\":16,\"height\":16,\"fill\":\"currentColor\",\"className\":\"RssIcon-module__Zq2JtW__icon \",\"aria-hidden\":\"true\",\"children\":[[\"$\",\"circle\",null,{\"cx\":\"6.18\",\"cy\":\"17.82\",\"r\":\"2.18\"}],[\"$\",\"path\",null,{\"d\":\"M4 4.44v2.83c7.03 0 12.73 5.7 12.73 12.73h2.83c0-8.59-6.97-15.56-15.56-15.56zm0 5.66v2.83c3.9 0 7.07 3.17 7.07 7.07h2.83c0-5.47-4.43-9.9-9.9-9.9z\"}]]}],[\"$\",\"span\",null,{\"children\":\"RSS\"}]]}]]}],[\"$\",\"p\",null,{\"className\":\"Footer-module__S6Hkya__copyright\",\"children\":[\"© \",2026,\" Faesel Saeed. All rights reserved. Code snippets are MIT licensed unless stated otherwise.\"]}]]}]}]}]]}]]}]]}],{\"children\":[[\"$\",\"$1\",\"c\",{\"children\":[null,[\"$\",\"$L4\",null,{\"parallelRouterKey\":\"children\",\"error\":\"$undefined\",\"errorStyles\":\"$undefined\",\"errorScripts\":\"$undefined\",\"template\":[\"$\",\"$L5\",null,{}],\"templateStyles\":\"$undefined\",\"templateScripts\":\"$undefined\",\"notFound\":\"$undefined\",\"forbidden\":\"$undefined\",\"unauthorized\":\"$undefined\"}]]}],{\"children\":[[\"$\",\"$1\",\"c\",{\"children\":[\"$L7\",[[\"$\",\"link\",\"0\",{\"rel\":\"stylesheet\",\"href\":\"/_next/static/chunks/9ba9b719c4b6976c.css\",\"precedence\":\"next\",\"crossOrigin\":\"$undefined\",\"nonce\":\"$undefined\"}],[\"$\",\"script\",\"script-0\",{\"src\":\"/_next/static/chunks/cc81a65f641a0c5f.js\",\"async\":true,\"nonce\":\"$undefined\"}]],[\"$\",\"$L8\",null,{\"children\":[\"$\",\"$9\",null,{\"name\":\"Next.MetadataOutlet\",\"children\":\"$@a\"}]}]]}],{},null,false,false]},null,false,false]},null,false,false],\"$Lb\",false]],\"m\":\"$undefined\",\"G\":[\"$c\",[]],\"S\":true}\n"])</script><script>self.__next_f.push([1,"d:I[97367,[\"/_next/static/chunks/ff1a16fafef87110.js\",\"/_next/static/chunks/708205fa81a1891d.js\"],\"ViewportBoundary\"]\nf:I[97367,[\"/_next/static/chunks/ff1a16fafef87110.js\",\"/_next/static/chunks/708205fa81a1891d.js\"],\"MetadataBoundary\"]\nb:[\"$\",\"$1\",\"h\",{\"children\":[null,[\"$\",\"$Ld\",null,{\"children\":\"$Le\"}],[\"$\",\"div\",null,{\"hidden\":true,\"children\":[\"$\",\"$Lf\",null,{\"children\":[\"$\",\"$9\",null,{\"name\":\"Next.Metadata\",\"children\":\"$L10\"}]}]}],null]}]\n"])</script><script>self.__next_f.push([1,"e:[[\"$\",\"meta\",\"0\",{\"charSet\":\"utf-8\"}],[\"$\",\"meta\",\"1\",{\"name\":\"viewport\",\"content\":\"width=device-width, initial-scale=1\"}]]\n"])</script><script>self.__next_f.push([1,"11:I[27201,[\"/_next/static/chunks/ff1a16fafef87110.js\",\"/_next/static/chunks/708205fa81a1891d.js\"],\"IconMark\"]\na:null\n"])</script><script>self.__next_f.push([1,"10:[[\"$\",\"title\",\"0\",{\"children\":\"Blog | Tech Blog | FAESEL.COM\"}],[\"$\",\"meta\",\"1\",{\"name\":\"description\",\"content\":\"Read the latest articles about technology, coding, and digital innovation\"}],[\"$\",\"link\",\"2\",{\"rel\":\"author\",\"href\":\"https://www.faesel.com/about\"}],[\"$\",\"meta\",\"3\",{\"name\":\"author\",\"content\":\"Faesel Saeed\"}],[\"$\",\"meta\",\"4\",{\"name\":\"keywords\",\"content\":\"blog,technology,web development,programming,software engineering\"}],[\"$\",\"link\",\"5\",{\"rel\":\"alternate\",\"type\":\"application/rss+xml\",\"href\":\"https://www.faesel.com/feed.xml\"}],[\"$\",\"meta\",\"6\",{\"property\":\"og:title\",\"content\":\"Blog | Tech Blog\"}],[\"$\",\"meta\",\"7\",{\"property\":\"og:description\",\"content\":\"Read the latest articles about technology, coding, and digital innovation\"}],[\"$\",\"meta\",\"8\",{\"property\":\"og:type\",\"content\":\"website\"}],[\"$\",\"meta\",\"9\",{\"name\":\"twitter:card\",\"content\":\"summary_large_image\"}],[\"$\",\"meta\",\"10\",{\"name\":\"twitter:site\",\"content\":\"@faeselsaeed\"}],[\"$\",\"meta\",\"11\",{\"name\":\"twitter:creator\",\"content\":\"@faeselsaeed\"}],[\"$\",\"meta\",\"12\",{\"name\":\"twitter:title\",\"content\":\"Blog | Tech Blog\"}],[\"$\",\"meta\",\"13\",{\"name\":\"twitter:description\",\"content\":\"Read the latest articles about technology, coding, and digital innovation\"}],[\"$\",\"link\",\"14\",{\"rel\":\"shortcut icon\",\"href\":\"/favicon.ico\"}],[\"$\",\"link\",\"15\",{\"rel\":\"icon\",\"href\":\"/favicon.ico\"}],[\"$\",\"link\",\"16\",{\"rel\":\"apple-touch-icon\",\"href\":\"/favicon.ico\"}],[\"$\",\"$L11\",\"17\",{}]]\n"])</script><script>self.__next_f.push([1,"12:I[29971,[\"/_next/static/chunks/d2b88760aa36d453.js\",\"/_next/static/chunks/cc81a65f641a0c5f.js\"],\"default\"]\n13:T3dc3,"])</script><script>self.__next_f.push([1,"## The context wall nobody warns you about\n\nHere's something that took me longer to learn than I'd like to admit: Copilot CLI has varied context window caps depending on the model your using, and you start paying for it long before you ever type a prompt.\n\nEvery skill you've enabled, every MCP server you've installed... they all quietly load into that window first. Then your conversation history piles on top. By the time you're halfway through a decent session vibe coding that multi million idea, you're a lot closer to the edge than you think, and the first sign of trouble is usually a compaction kicking in and quietly eating half your plan.\n\nI built GridWatch partly to stop flying blind on this. And here's the thing that took me a while to properly appreciate: most of the saving doesn't happen mid-session at all — it happens *before you even start a session*. So these days I do most of my token housekeeping up front, before I kick a session off. \n\nThis is less a feature tour and more a write-up of how I actually use it to keep that starting position lean. None of this is rocket science — it's mostly just being able to *see* where the tokens are going.\n\n## First, know where you stand — the session token bars\n\nYou can't optimise what you can't see, so this is where I start.\n\nOpen any session in GridWatch and you'll find a **TOKEN UTILISATION** panel with two bars: __Initial__ and __Peak__. Each shows a percentage of that session's context window alongside the actual token count. The Peak bar is the high-water mark, the closest the session got to the wall. But the bar I've come to care about most is the Initial one: it's how full your context window already was at the very first turn, before you'd typed a single useful word. That number is your skills, your MCP servers, your LSPs and your instructions file all added up to the standing cost of just showing up. If the Initial bar is already uncomfortably long, that's your housekeeping telling you it needs doing.\n\n\n\nThere's a great talk by Matt Pocock on AI coding workflows where he reckons that once you cross around 40% of your context window, you're heading into what he half-jokingly calls the \"dumb zone\" — output quality starts to slide well before you've technically run out of room. I wouldn't treat 40% as gospel, but it matches what I see, a fuller window means worse answers, not just a closer limit. So I watch the Peak bar, and the moment a session is creeping into that territory, that's my cue to wrap it up and start fresh rather than push my luck. A initial session that runs high gets you to 40% quicker!\n\n\u003ciframe width=\"560\" height=\"315\" src=\"https://www.youtube.com/embed/-QFHIoCo-Ko\" title=\"Matt Pocock — Full Walkthrough: Workflow for AI Coding\" frameborder=\"0\" allow=\"accelerometer; autoplay; clipboard-write; encrypted-media; gyroscope; picture-in-picture; web-share\" allowfullscreen\u003e\u003c/iframe\u003e\n\nAnd to be clear on why I'd rather start fresh than let a session compact: compaction isn't a clean reset, it's a lossy summary you don't control. Copilot crunches your older messages into a short recap to claw back space, so you keep the gist but lose the specifics — and you've already paid full token price for all that history right up to the moment it compacts. Starting fresh flips that around: *you* choose what carries over, and you get a near-empty window back instead of a fuzzy summary that might've dropped the one detail you needed.\n\n## The big one — trim and toggle your skills\n\nThis is where most of my savings have come from, by a mile.\n\nEvery enabled skill ships its `SKILL.md` straight into your context window before you've done anything. Those files live in `~/.copilot/skills/`, and one or two lean ones is fine. But if you're anything like me you accumulate them — a commit helper here, a package auditor there, a couple of review agents — and suddenly a meaningful slice of your window is gone on instructions you might not even need for the task in front of you.\n\nThe Skills panel shows an estimated token cost next to each skill, plus a running **ENABLED SKILLS COST** total for everything currently switched on. That total was a bit of a wake-up call the first time I saw it.\n\n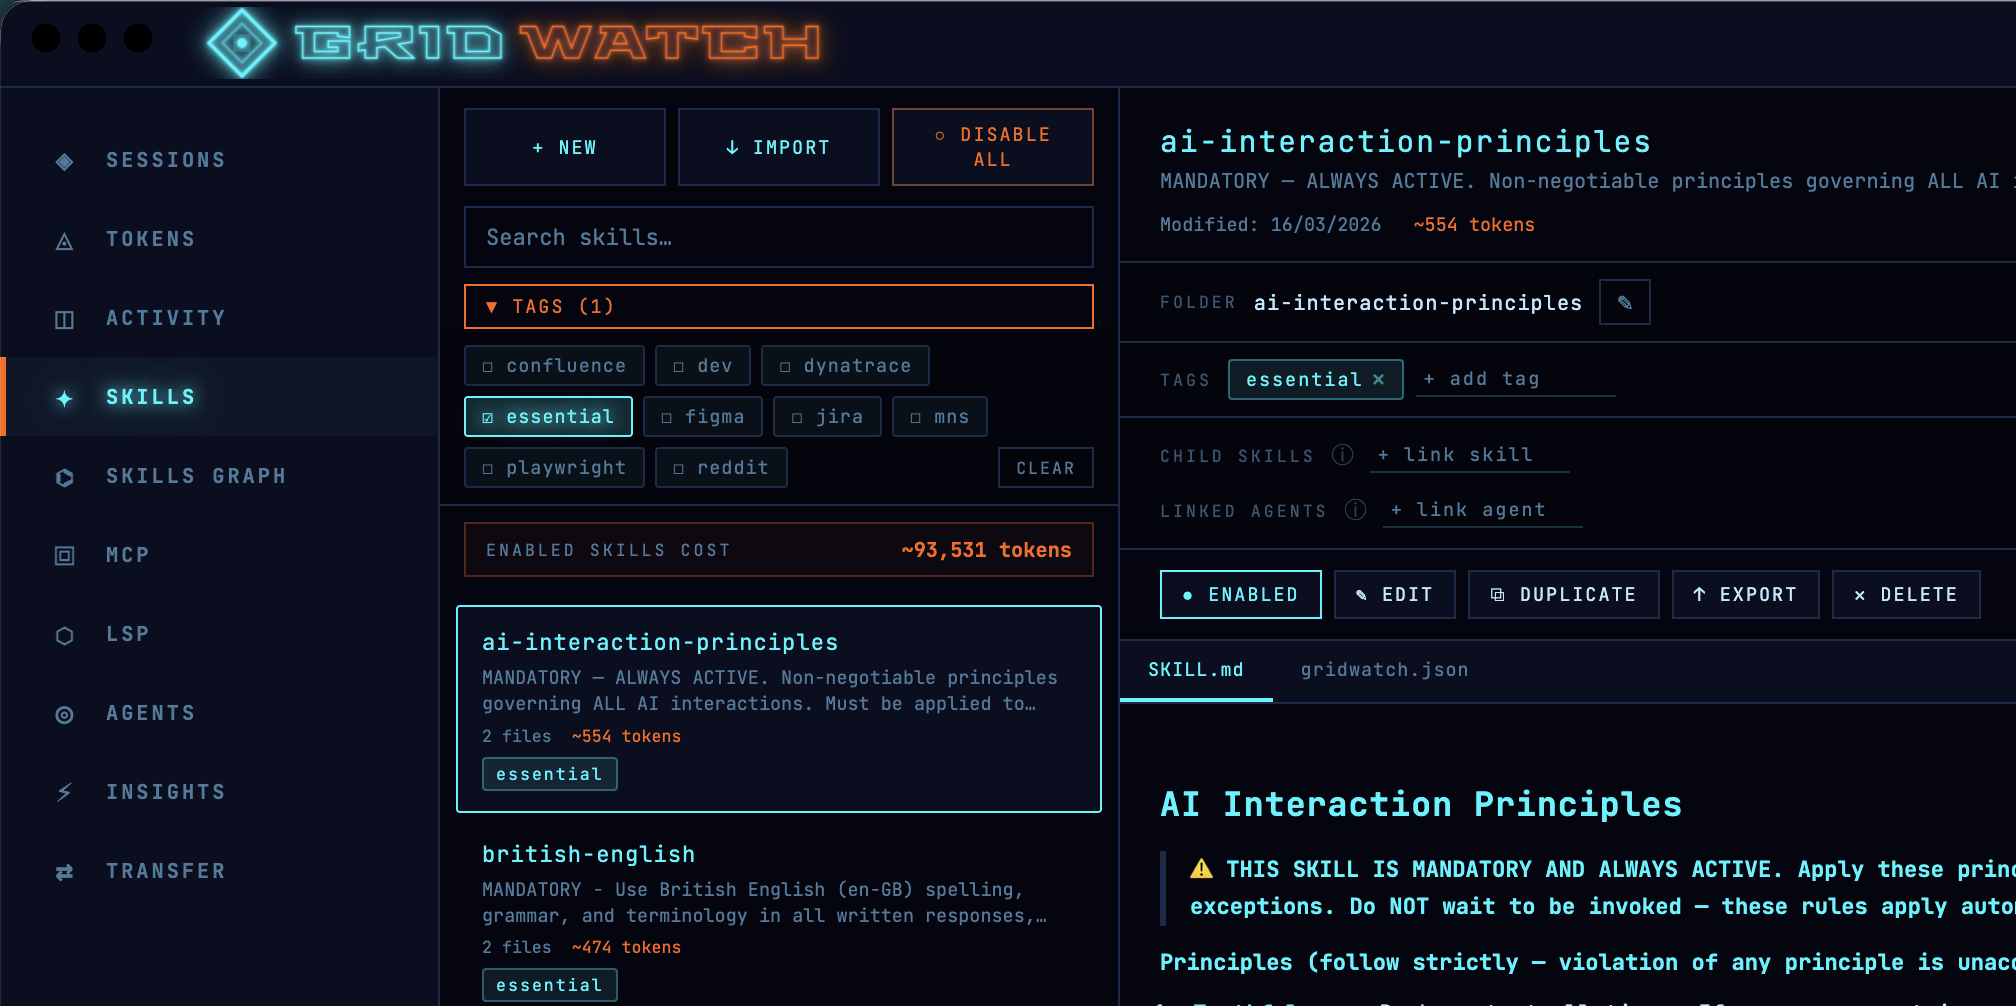\n\nSo now I do two things:\n\n1. **Toggle off what I don't need.** I have some atlassian skills to work with Jira and Confluence, but if I'm not working on a task that needs them, I switch them off. Gridwatch helps with quick enable and disable, I usually filter by a tag like `Jira` then hit disable all.\n\n2. **Trim the verbose ones.** Seeing the per-skill estimate pushed me to go back through my chunkier skills and cut the fat — redundant instructions, three examples where one would do, that sort of thing. A skill that does the same job with half the tokens is just a better skill.\n\nThe estimates aren't gospel, they're an approximation of what each skill costs in a session as a relative guide for \"what's expensive and what isn't\", they're more than good enough to act on.\n\nI had a skill that aliased Copilot as Alfred so I can address it like Batman. Harmless fun... except it sat in every single session quietly costing tokens. Seeing it listed with a real number next to it was the nudge that it sadly needed culling.\n\n## Prune your MCP servers — they're hungrier than you think\n\nIf skills are the obvious culprit, MCP servers are the sneaky one — and pound for pound, they're usually far greedier.\n\nA skill is a single `SKILL.md`. An MCP server is a whole catalogue: every tool it exposes is loaded into context with its name (the [Atlassian MCP](https://www.atlassian.com/blog/announcements/remote-mcp-server) for example has 73 tools), description and full parameter schema, and a busy server can carry dozens of them. So one server you barely touch can cost you more than several skills combined, before you've asked it to do a single thing. That's the part that catches people out.\n\nThe MCP dashboard lists all your servers, local and remote, and lets you enable or disable each one on the fly. GridWatch queries them live to show the full tool list, so you can see exactly what each one is bringing to the party. When I'm doing focused work, I switch off anything I'm not actively using, and I genuinely notice the difference in how much room I've got to play with.\n\nHere's a trick worth knowing: if you only ever use one or two tools from a heavy server, you often don't need the server at all. You can replace it with a small skill that does just that one job — you keep the capability and hand back the rest of the catalogue's tokens. Converting a chunky MCP server into a lean skill has been one of my better context wins.\n\n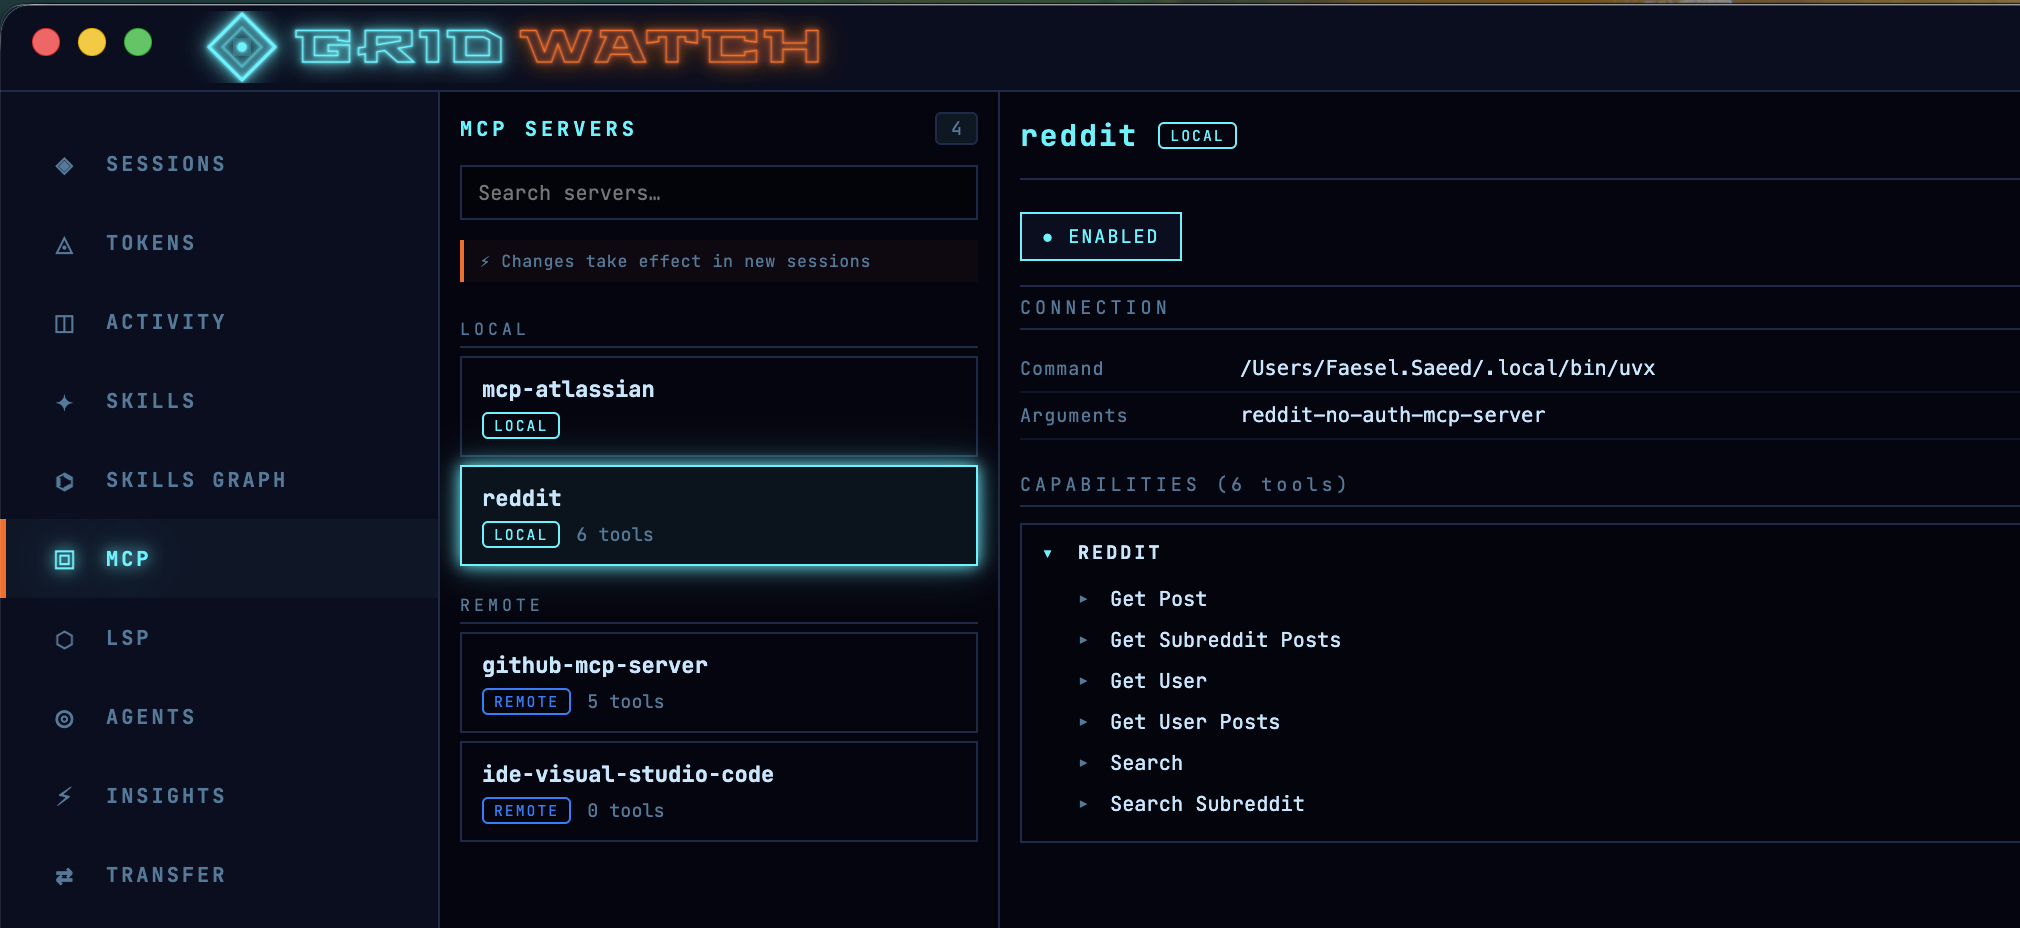\n\n## LSP servers — the ones that actually *save* you tokens\n\nThis is the one I had backwards for ages, so it's worth being clear: LSP servers aren't dead weight you should be switching off to save tokens. Used properly, they're one of the few things on this list that *earns* you tokens back.\n\nHere's the reasoning, and I'm leaning on a sharp write-up over at [Claude Fast](https://claudefa.st/blog/tools/mcp-extensions/lsp-mcp-server) for it. Without code intelligence, when the model needs to find something in a large codebase it falls back to grep. As Anthropic put it in their own large-codebase guide:\n\n\u003e Grep for a common function name in a large codebase returns thousands of matches and Claude burns context opening files to determine which result is relevant.\n\nThat's the expensive bit, not the search itself, but the model opening file after file to work out which of the 3,000 string hits actually matter, eating context the whole way.\n\nAn LSP server understands your code as a graph of typed symbols rather than a wall of text. Ask it for the references to a function and it hands back the three real ones, not every place the word appears in comments, tests and fixtures. The Claude Fast piece puts hard numbers on it: the same \"find every reference\" query on a six-figure-line repo runs to roughly 35,000–60,000 tokens via grep-and-open, versus under 500 tokens through LSP. As they nicely sum it up:\n\n\u003e Filtering before the model reads anything means the irrelevant 2,997 matches never enter the context window.\n\nThis isn't just a third-party claim, either — GitHub call it out directly in their [Copilot CLI LSP docs](https://docs.github.com/en/copilot/concepts/agents/copilot-cli/lsp-servers#benefits-of-lsp-servers), listing token efficiency as a headline benefit:\n\n\u003e Token efficiency: Operations like \"list all symbols\" or \"find references\" return compact structured results instead of requiring the agent to read entire files into the conversation.\n\nAnd the best part is you don't have to do anything to trigger it. As GitHub puts it, \"when LSP servers are available, Copilot CLI uses them automatically\"! it reaches for the language server instead of text search whenever it can, so the saving is just there in the background.\n\nGridWatch’s LSP panel isn’t for saving tokens by turning things off—it’s for making sure the right language servers are enabled. Keeping LSP on for the languages you actually use reduces wasted context, since it avoids blind code searches. Only disable servers for languages not in your project; otherwise, leaving LSP enabled is the more efficient (and cheaper) option.\n\n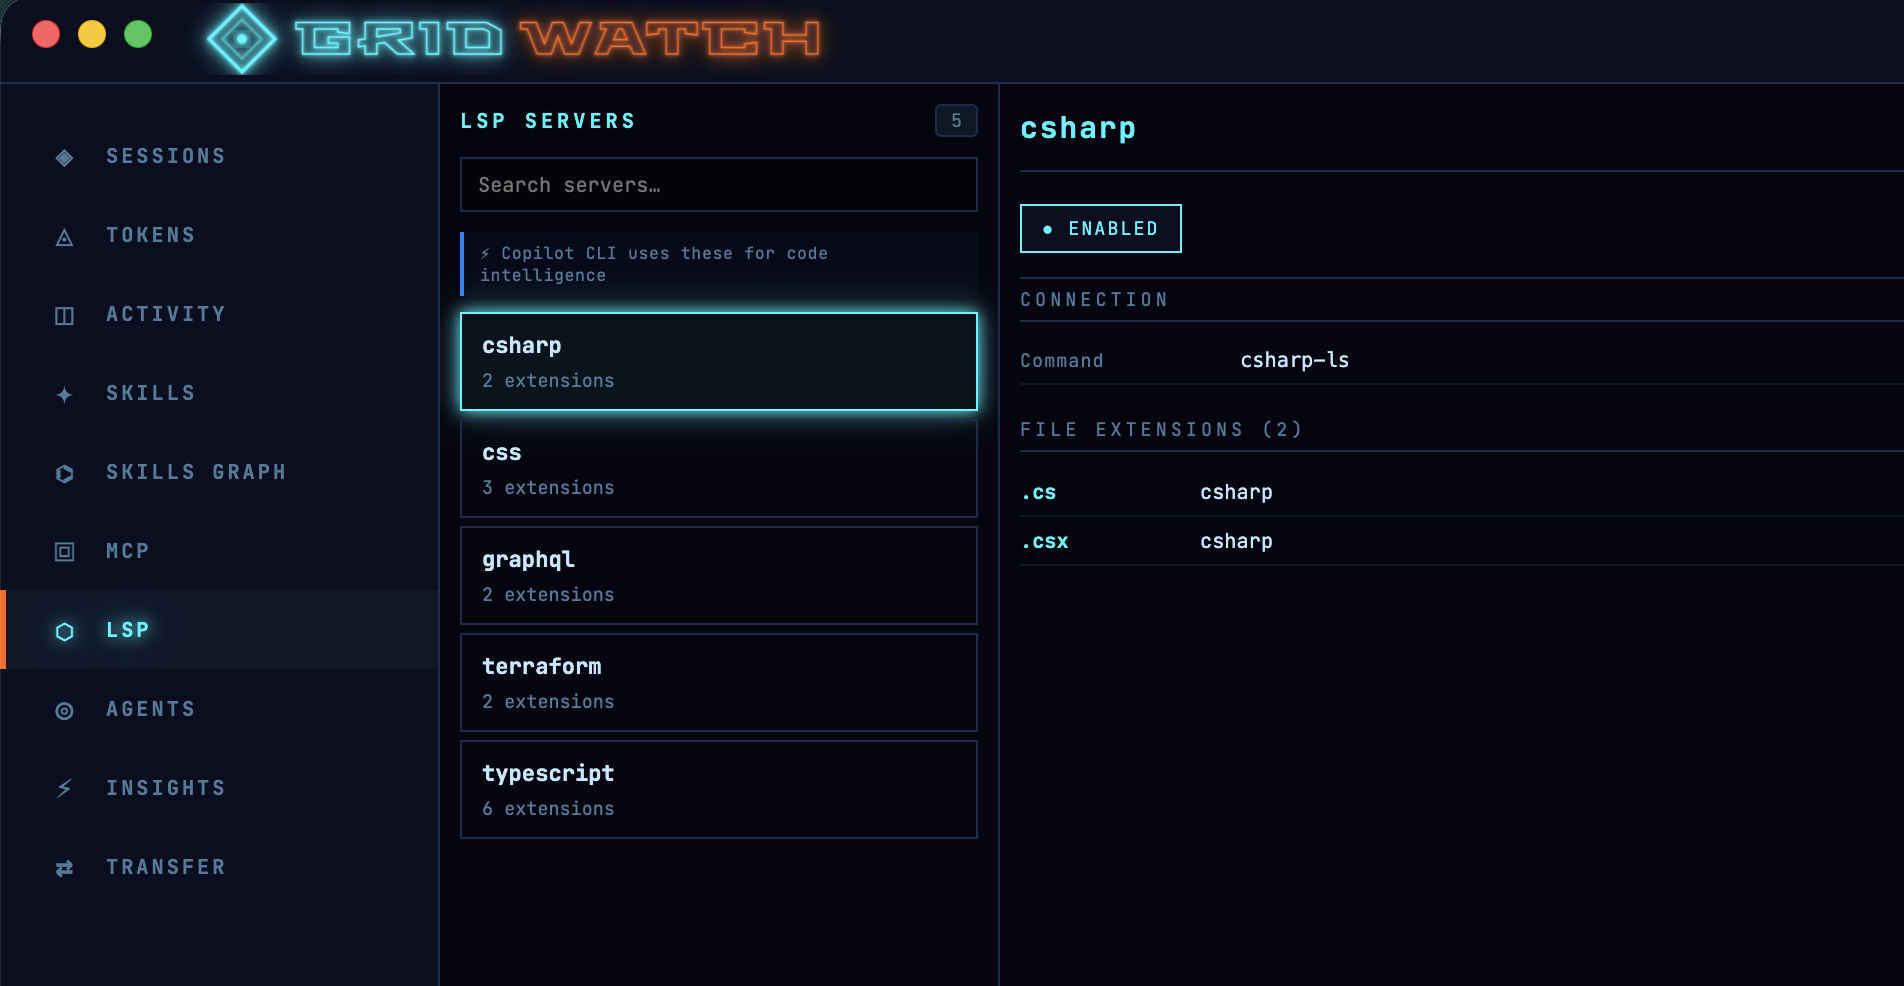\n\n## Mind your instructions file\n\nHere's one almost nobody thinks about: your repo's `.github/copilot-instructions.md`. It gets pulled into every session you run in that project, so a bloated instructions file is a tax you pay on absolutely everything — quietly, every time.\n\nGridWatch surfaces this directly. Open a session and the **CONTEXT COST** panel breaks down what's being loaded before you even start, with `copilot-instructions.md` and its estimated token cost sitting right there (GridWatch estimates it the same way it does skills — roughly four characters to a token). The first time I saw mine, it was chunkier than I'd assumed, and trimming it paid off across every session in the repo at once.\n\nIt's worth getting this file right rather than just short. GitHub's has created a prompt for generating an instructions file [here](https://docs.github.com/en/copilot/how-tos/copilot-on-github/customize-copilot/add-custom-instructions/add-repository-instructions#creating-repository-wide-custom-instructions) which makes interesting reading.\n\nIt also steers you towards durable facts — the layout and architecture of the codebase, and validated build and test steps — so the agent can find its way around \"with minimal searching\". In other words: high-signal context the model genuinely needs on every task, not a dumping ground. Lean and factual beats long and waffly, and now you can actually see what each line is costing you.\n\n\n*(Taken from GridWatch's session details window)*\n\n## Start fresh without losing your work — Session Transfers\n\nWhen a session does fill up, Copilot compacts it. I treat a compaction like a warning light on a dashboard — open any session in GridWatch and you'll see its compaction history. If one's compacted two or three times, that's the tool telling me I've been running it far too hot, and the answer is rarely \"keep going\". It's \"start a clean session and bring only what matters across\".\n\nThe trouble is, starting a new session usually means losing your context. Session Transfers is GridWatch's answer to that, and it's probably the single biggest thing you can do for your token budget.\n\nHere's how it actually works, because it's not a feature you'd stumble onto. GridWatch has a dedicated **Transfer** page where you pick a *source* session and a *target* session. It gathers the source's plan, its checkpoint history, your notes and tags, and then gives you two options:\n\n- **Transfer as-is** — it bundles that plan, history and notes into a tidy markdown file and drops it into the target session.\n- **Generate and transfer** — using your own GitHub token, it asks a model to condense everything into a short, actionable brief: what was being built, the key decisions, the current state, and the next steps. That summary is what gets written across.\n\nEither way, the result lands as a `transfer-\u003ctimestamp\u003e.md` file inside the target session's folder under `~/.copilot/session-state/`. So when you open that session in Copilot, your plan is already sitting there priming it — except you're starting with a near-empty window instead of one that's three-quarters full. I do my planning in one session and the implementation in a fresh one precisely because of this. Clean slate, plan intact, loads of headroom.\n\n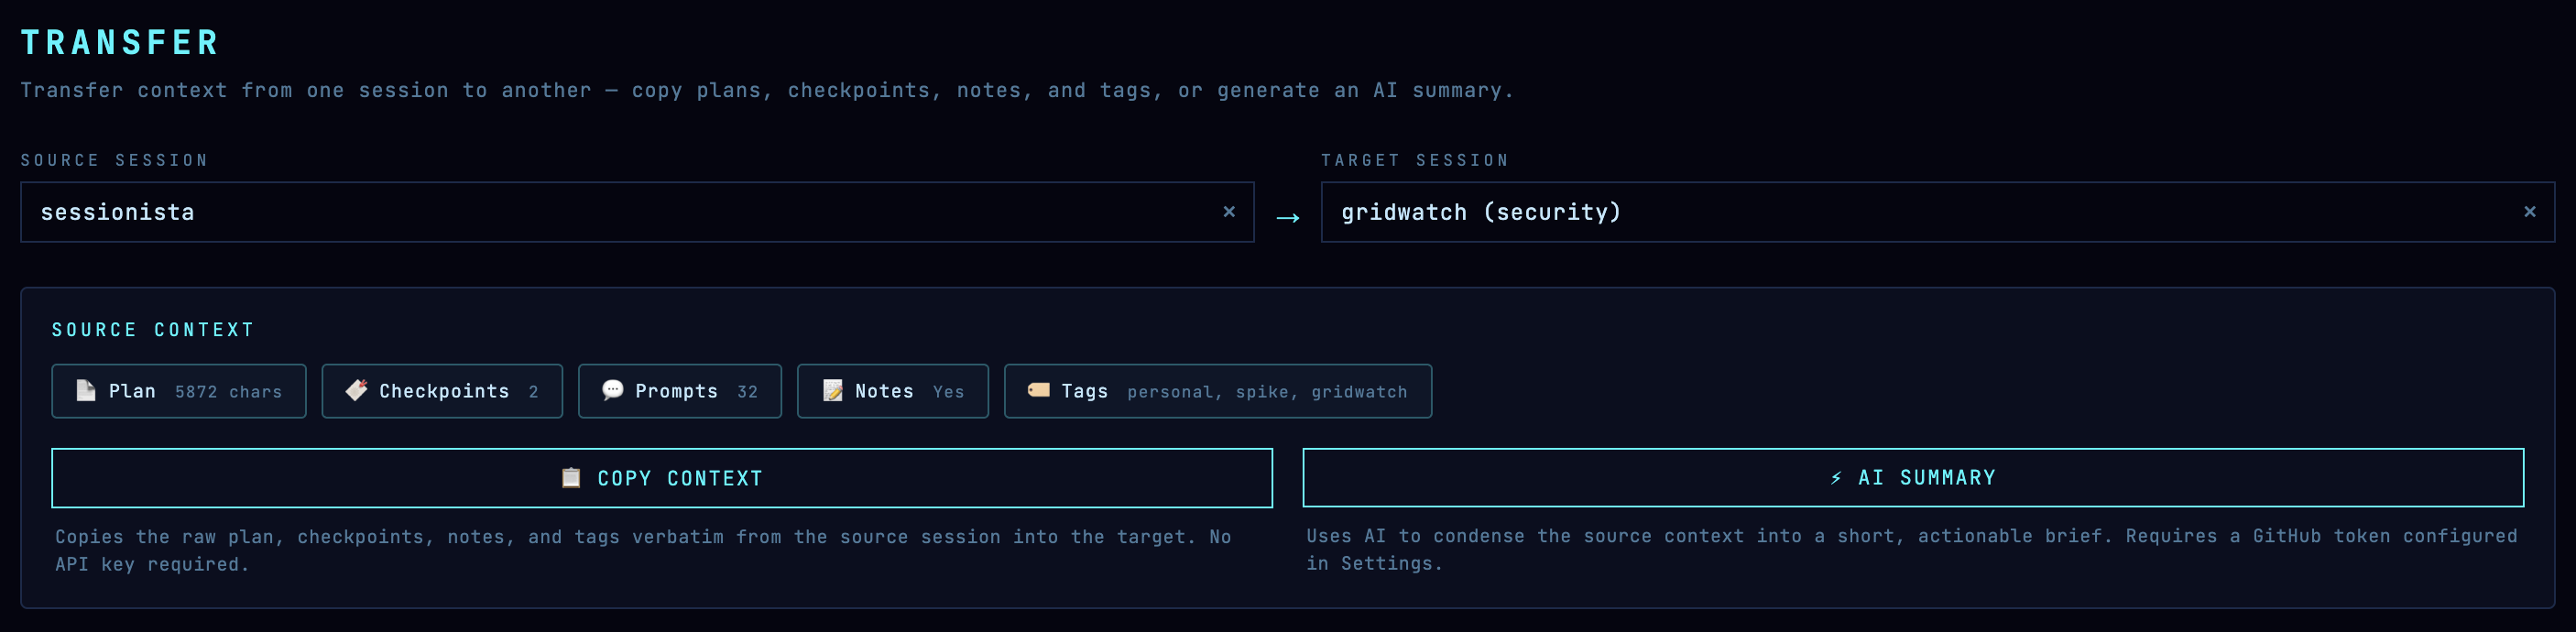\n\n## The cheapest tokens are the ones you never spend — Insights\n\nLast one, and it's a slightly different angle. The fastest way to waste tokens isn't a heavy skill or a chatty MCP server — it's a vague prompt that sends Copilot off in the wrong direction for three turns before you correct it.\n\nThe Insights tab scores your prompts and suggests how to tighten them up. Better prompts mean fewer wasted turns, and fewer wasted turns mean fewer tokens. [GitHub's own prompt engineering guidance](https://github.com/resources/articles/what-is-prompt-engineering) lands in the same place. Its headline advice:\n\n\u003e Be clear and specific, Provide contex, Use formatting and structure, Add examples when helpful, Iterate and refine, Test for reliability and bias.\n\nThe bit I'd underline, though, is detail. GitHub's advice is blunt about it:\n\n\u003e Avoid ambiguous terms. Instead, be specific.\n\nA vague prompt isn't a free one — Copilot just guesses, and you pay in tokens for every wrong guess you have to walk back. A few extra words of context up front is almost always cheaper than three turns of correction afterwards.\n\n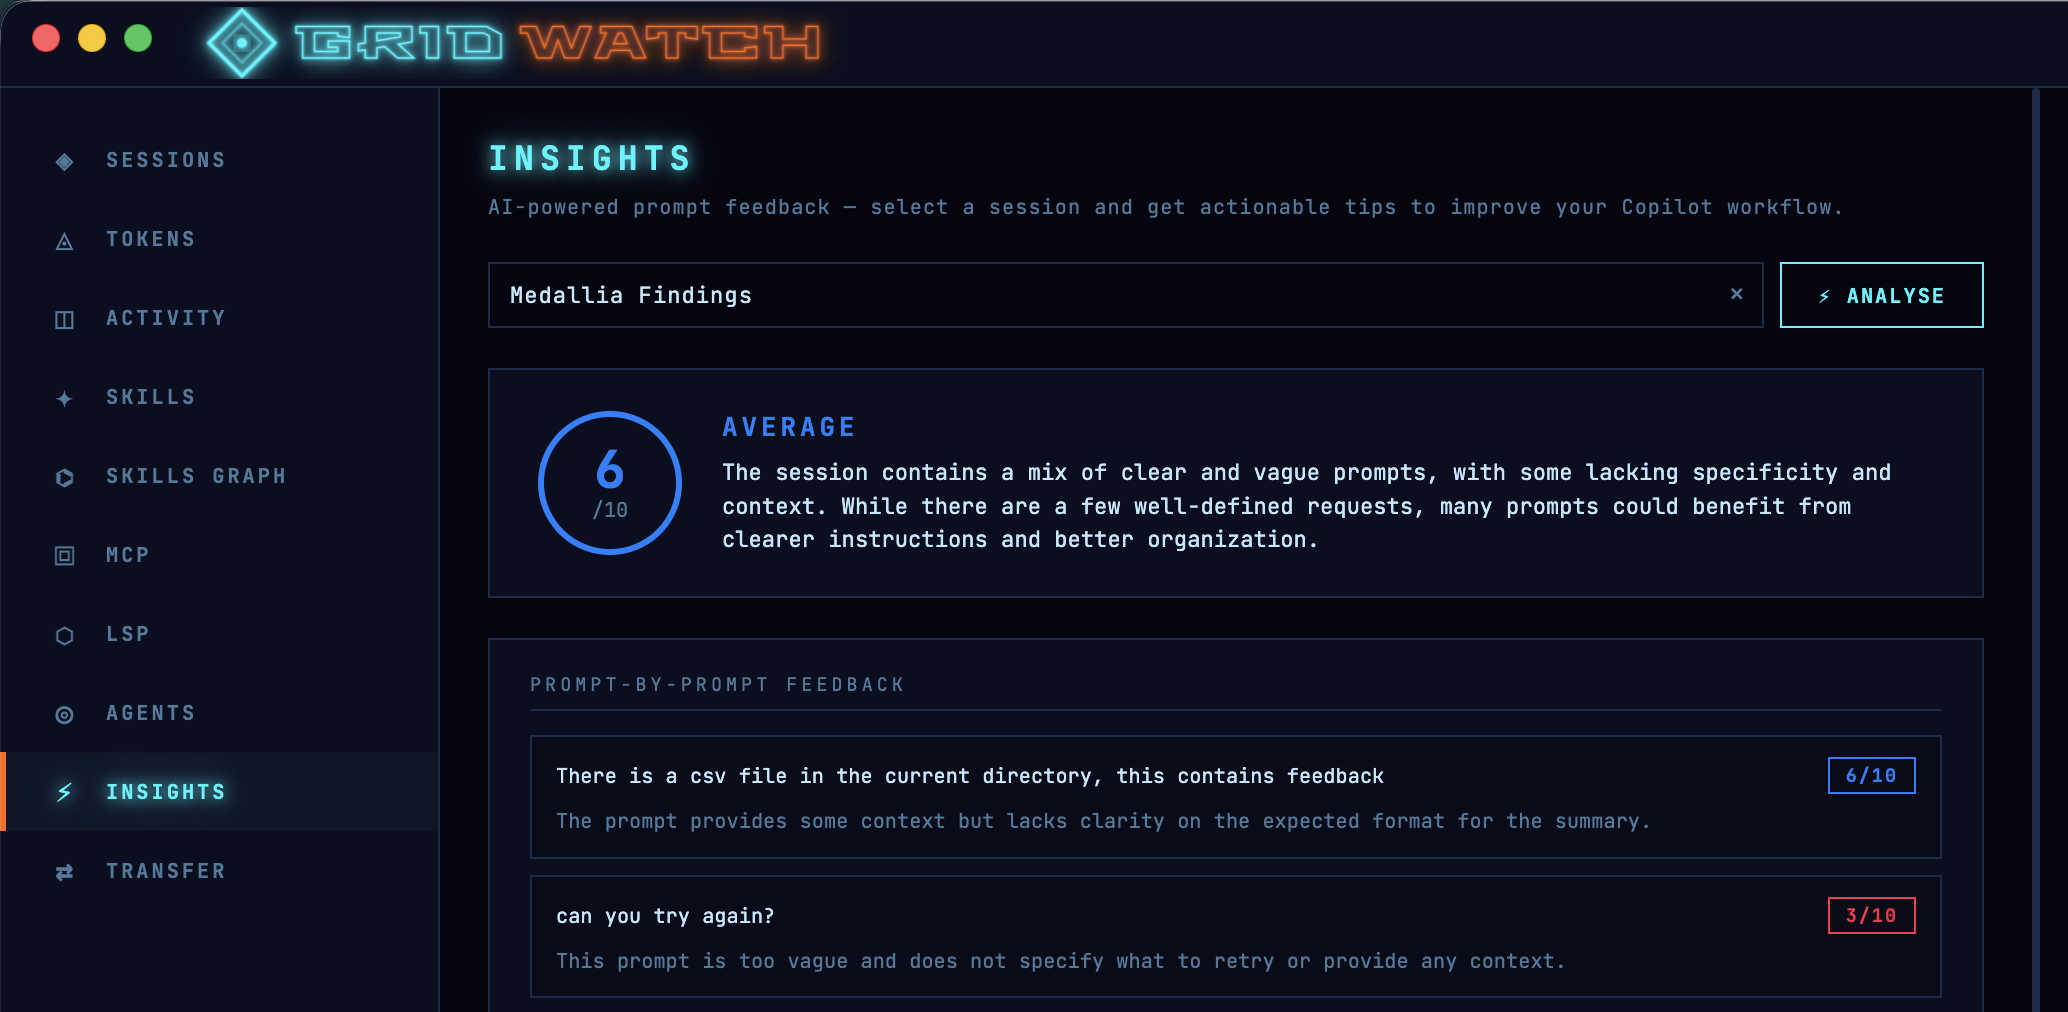\n\n## Pulling it together\n\nNone of this is complicated. It really comes down to a handful of habits, all of which GridWatch just makes visible — and most of which you do *before* a session even starts:\n\n- Only load the skills you actually need, and keep them lean.\n- Keep your `copilot-instructions.md` factual and trim — it's taxed on every session in the repo.\n- Switch off MCP servers you're not using, and turn greedy ones into small skills.\n- Keep the LSP servers on for the languages you actually code in — they save tokens by stopping Copilot grepping blindly.\n- Watch your peak utilisation, and don't wait for the wall — quality dips long before 100%.\n- Treat compactions as a signal, not a feature; plan in one session and implement in a fresh one via a transfer.\n- Write tighter prompts so you're not paying to be misunderstood.\n\nI built GridWatch for myself, so all of this is just how I work now rather than advice from on high. But if you're using Copilot CLI seriously, getting a feel for where your tokens actually go is one of those small changes that quietly makes everything else better.\n\nIt's free and open source — [give it a go here](https://github.com/faesel/gridwatch).\n"])</script><script>self.__next_f.push([1,"14:T2658,"])</script><script>self.__next_f.push([1,"## It started with curiosity, now I can't live without it\n\nA few months back I wrote about building [GridWatch](https://www.faesel.com/blog/gridwatch-copilot-session-manager) — a desktop dashboard for GitHub Copilot CLI sessions. At the time it was a fairly simple tool: browse your sessions, check token usage, see an activity heatmap, and transfer context between sessions. Handy, but admittedly a bit bare-bones.\n\nWell, things have changed. Quite a lot, actually!\n\nI use Copilot CLI every single day. It's become my default way of working — planning, coding, reviewing, researching. Because I use it so much, GridWatch has evolved alongside it. Almost every new feature exists because I personally hit a wall and thought \"I really wish I could see this\" or \"why can't I manage that from here?\" It's the beauty of building tools for yourself — you never run out of ideas, just time.\n\nVersion 0.28.0 is what I'd call the \"actually feature-complete\" release. Let me walk you through what's new.\n\n\n\nOh.. and I also updated the logo with a cool neon retro vibe,\n\n\n\n## Skills Management — Your Copilot Playbook\n\nOne of the biggest additions is a full skills management panel. If you've been using Copilot CLI skills (those `SKILL.md` files tucked away in `~/.copilot/skills/`), you'll know that managing them means bouncing between your file explorer and a text editor. Not exactly elegant.\n\nGridWatch now lets you browse, create, edit, duplicate, and delete skills right from the dashboard. You can toggle them on and off, tag them for easy filtering, import from files or folders, and even export them as zip archives. The rendered markdown preview also gives you a readable view of the skill.\n\nThere's also an estimated token usage indicator for each skill, which has been surprisingly useful. When you're working within a finite context window, knowing that one of your skills is chewing through a big chunk of it before you've even typed a prompt is valuable information. I've used this to trim down some of my more verbose skills — cutting out redundant instructions, tightening up examples, and generally making them leaner. It's one of those features that quietly makes everything else work better.\n\n\n\nOverall the skills pane is kind of feature that sounds small on paper but saves you a surprising amount of context-switching throughout the day.\n\n\n\n## MCP Server Dashboard — Taming the Context Window\n\nThis one's for anyone who's installed a few too many MCP servers and wondered why their context window is filling up before they've even started working.\n\nThe MCP dashboard gives you a complete view of all your installed Model Context Protocol servers — both local stdio and remote HTTP. You can enable and disable them on the fly, which is genuinely useful for managing context window bloat. Each server's full tool catalogue is displayed, grouped by category with descriptions and parameter schemas. GridWatch actually queries each server live via JSON-RPC `tools/list` to pull this information.\n\nYou also get to see environment variables (with secrets properly masked, don't worry), connection times, and command details. It's essentially a control panel for your entire MCP setup.\n\n\n\n## Agents Panel — Know Your Crew\n\nCopilot CLI has built-in agents — Research, Code Review, and Coding — and if you've been writing custom agents, those live in `~/.copilot/agents/`. GridWatch now surfaces all of them in a dedicated panel.\n\nYou can see session counts and usage stats per agent, with linked session history so you can trace exactly which sessions used which agent. Custom agents get an orange CUSTOM badge to distinguish them from the built-in ones, and there's a rendered markdown viewer for reading agent profiles.\n\nI find this especially useful for understanding which of my custom agents are actually pulling their weight and which ones are just... sitting there. We've all got that one agent we were really excited about for a week.\n\n\n\n## Session Type Detection — Research vs Review vs Code\n\nGridWatch now automatically identifies what kind of session you're looking at. Research sessions get a RESEARCH badge, code review sessions get a purple REVIEW badge (detected by spotting Copilot's `code-review` agent usage), and everything else falls under coding.\n\nCombined with the search and multi-select tag filtering that was already there, it makes finding that one session from last Tuesday where you researched that obscure API issue significantly less painful.\n\n## Compaction Tracking — Where'd My Context Go?\n\nEver been deep into a Copilot session and noticed it suddenly \"forgot\" something you told it earlier? That's compaction — Copilot compresses the conversation context when you're approaching the limit. It's necessary, but it can be disorienting.\n\nGridWatch now detects when compaction happens and shows you the trigger utilisation, how many messages were replaced, tokens saved, and the compacted summary. There's even an expandable checkpoint viewer so you can read the full checkpoint markdown inline. No more guessing about what Copilot decided to keep and what it threw away.\n\nThey say an elephant never forgets. Copilot, on the other hand, occasionally needs a spring clean — at least now you can see exactly what got tidied up.\n\n\n\n## Performance — Lightning Fast (No, Really)\n\nI'll be honest, earlier versions of GridWatch were... let's say \"enthusiastic\" about loading data. When you've got hundreds of sessions, eagerly parsing every single one on startup isn't exactly snappy.\n\nRecent releases have included significant performance upgrades. Session lists are now paginated at 20 per page, agent session lists default to the 5 most recent with a \"show all\" toggle, and MCP tool discovery results are cached locally. The result is a dashboard that feels genuinely responsive, even with a large session history.\n\nBehind the scenes I've also introduced memoization in each tab to stop re-redners of the screen.\n\nThe days of staring at a loading spinner while GridWatch parsed your entire Copilot history are firmly behind us.\n\n## Security — Because Best Practices Matter\n\nSecurity has been a first-class concern throughout the recent updates. The renderer process is fully sandboxed with context isolation — it communicates with the main process only through a typed `gridwatchAPI` bridge, with no generic IPC exposed. A strict Content Security Policy is applied in production (no inline scripts), and all IPC handlers validate session IDs as UUIDs with path traversal protection.\n\nYour GitHub PAT (if you use one for AI Insights ... totally optional) is encrypted at rest via Electron's `safeStorage`, which means macOS Keychain on Mac and DPAPI on Windows. The `shell.openExternal` call is limited to HTTP(S) URLs only, and macOS builds use hardened runtime for notarisation compatibility.\n\nIn short — your data stays local, your secrets stay encrypted, and GridWatch doesn't cut corners.\n\n## Other Quality-of-Life Improvements\n\nA few more things that didn't fit neatly into the sections above but are worth mentioning:\n\n- **Typeahead tag management** — tagging sessions and skills now features a typeahead search, so you can quickly find existing tags or create new ones without remembering exact names. It sounds minor, but when you've got dozens of tags across hundreds of sessions, the friction adds up fast.\n- **Copilot instructions context cost** — the session detail view now shows you the cost of your copilot instructions in terms of context window usage. If your `.github/copilot-instructions.md` is eating up a significant chunk of the window before the conversation even starts, you'll know about it.\n- **Token utilisation at init and peak** — every session now displays both the initial token utilisation (what the context window looks like when the session first spins up) and the peak utilisation (the highest it reached during the session). This gives you a much clearer picture of how your sessions are consuming context — and whether your instructions, skills, and MCP servers are leaving enough room for actual work.\n\n## Try It Out\n\nGridWatch is free, open source, and runs entirely on your machine. You can download the latest release from [GitHub](https://github.com/faesel/gridwatch/releases) — there are installers for both macOS (arm64 and x64) and Windows. Ive now tested on both platforms and all works great!\n\nIve built this tool for myself and others, there are no analytics or outward calls (except to check for new updated versions of Gridwatch).\n\nIf you use Copilot CLI regularly, I genuinely think you'll find it useful. And if you've got feature ideas or feedback, the [repo](https://github.com/faesel/gridwatch) is open for issues and contributions."])</script><script>self.__next_f.push([1,"15:T113d,"])</script><script>self.__next_f.push([1,"# Introduction\n\nIf you've been using GitHub Copilot CLI, you'll know it stores a surprising amount of data locally — session metadata, conversation history, token usage, tool calls, checkpoint snapshots. It's all sitting in `~/.copilot/session-state/`, but there's no built-in way to browse or make sense of it.\n\nI wanted to understand my usage patterns. How many sessions am I running? Which repos am I spending the most time in? How close am I getting to the 128K context window? So I built GridWatch — a desktop app that reads all of this local data and turns it into a real-time dashboard.\n\nI actually vibecoded this entire project in just 2 days. It's quite amazing how far Copilot has come. I do still need to test out the Windows version of the app, the mac version however works a treat!\n\n# What it does\n\nGridWatch scans the Copilot CLI session directories and parses `workspace.yaml`, `events.jsonl`, rewind snapshots, and log files to surface:\n\n- **Session list** with search, tag filtering, and status indicators\n (active/recent/old), captures every message you sent in a session, with model badges showing whether it was a premium request.\n- **Token usage charts** — line graphs tracking token consumption over time, bar\n charts for daily usage, and per-session peak utilisation\n- **Activity heatmap** — a GitHub-style contribution grid showing when you're most\n active with Copilot\n- **Insights** — Gives you insights on your prompts and gives you suggestions on how to improve them. You also get scored!\n- **Session Transfers** — Lets you transfer the context of a session from one session to the other.\n\nYou can see more screenshots [here](https://github.com/faesel/gridwatch?tab=readme-ov-file#-screenshots)\n\nMy favorite feature of all is the session transfers. If you do planning in one session and then you want to transfer it to another session, there's not really a way to do this. Gridwatch has these feature and works by compacting a plan of the session into an MD file and then transfers it into the other session copilot folder `~/.copilot/session-state/8b78b4f4-5804-4671-8540-5648f92786ed/transfer-2026-02-28T08\n -54-40.md`\n\n\n\nEverything runs locally. GridWatch only reads Copilot's files and never sends data anywhere. For insights there is a requirement for a github classic token.\n\n# The stack\n\nI went with **Electron + React 19 + TypeScript + Vite** for the app shell, I mostly went with electron because I have past experience with the framework and I know React extensively. Charts are rendered with **Recharts**. Styling uses CSS Modules with a set of CSS custom properties for the theme.\n\nThe architecture follows the standard Electron process model — the main process handles all file system access and IPC, the preload script exposes a typed API bridge, and the renderer is a pure React app with no direct Node.js access.\n\n# Design choices\n\nThe visual theme is inspired by Tron — neon cyan and electric blue accents on near-black backgrounds. Why tron? well ... all these AI processes felt like the programs from the movies.\n\nCheck out the red programs theme:\n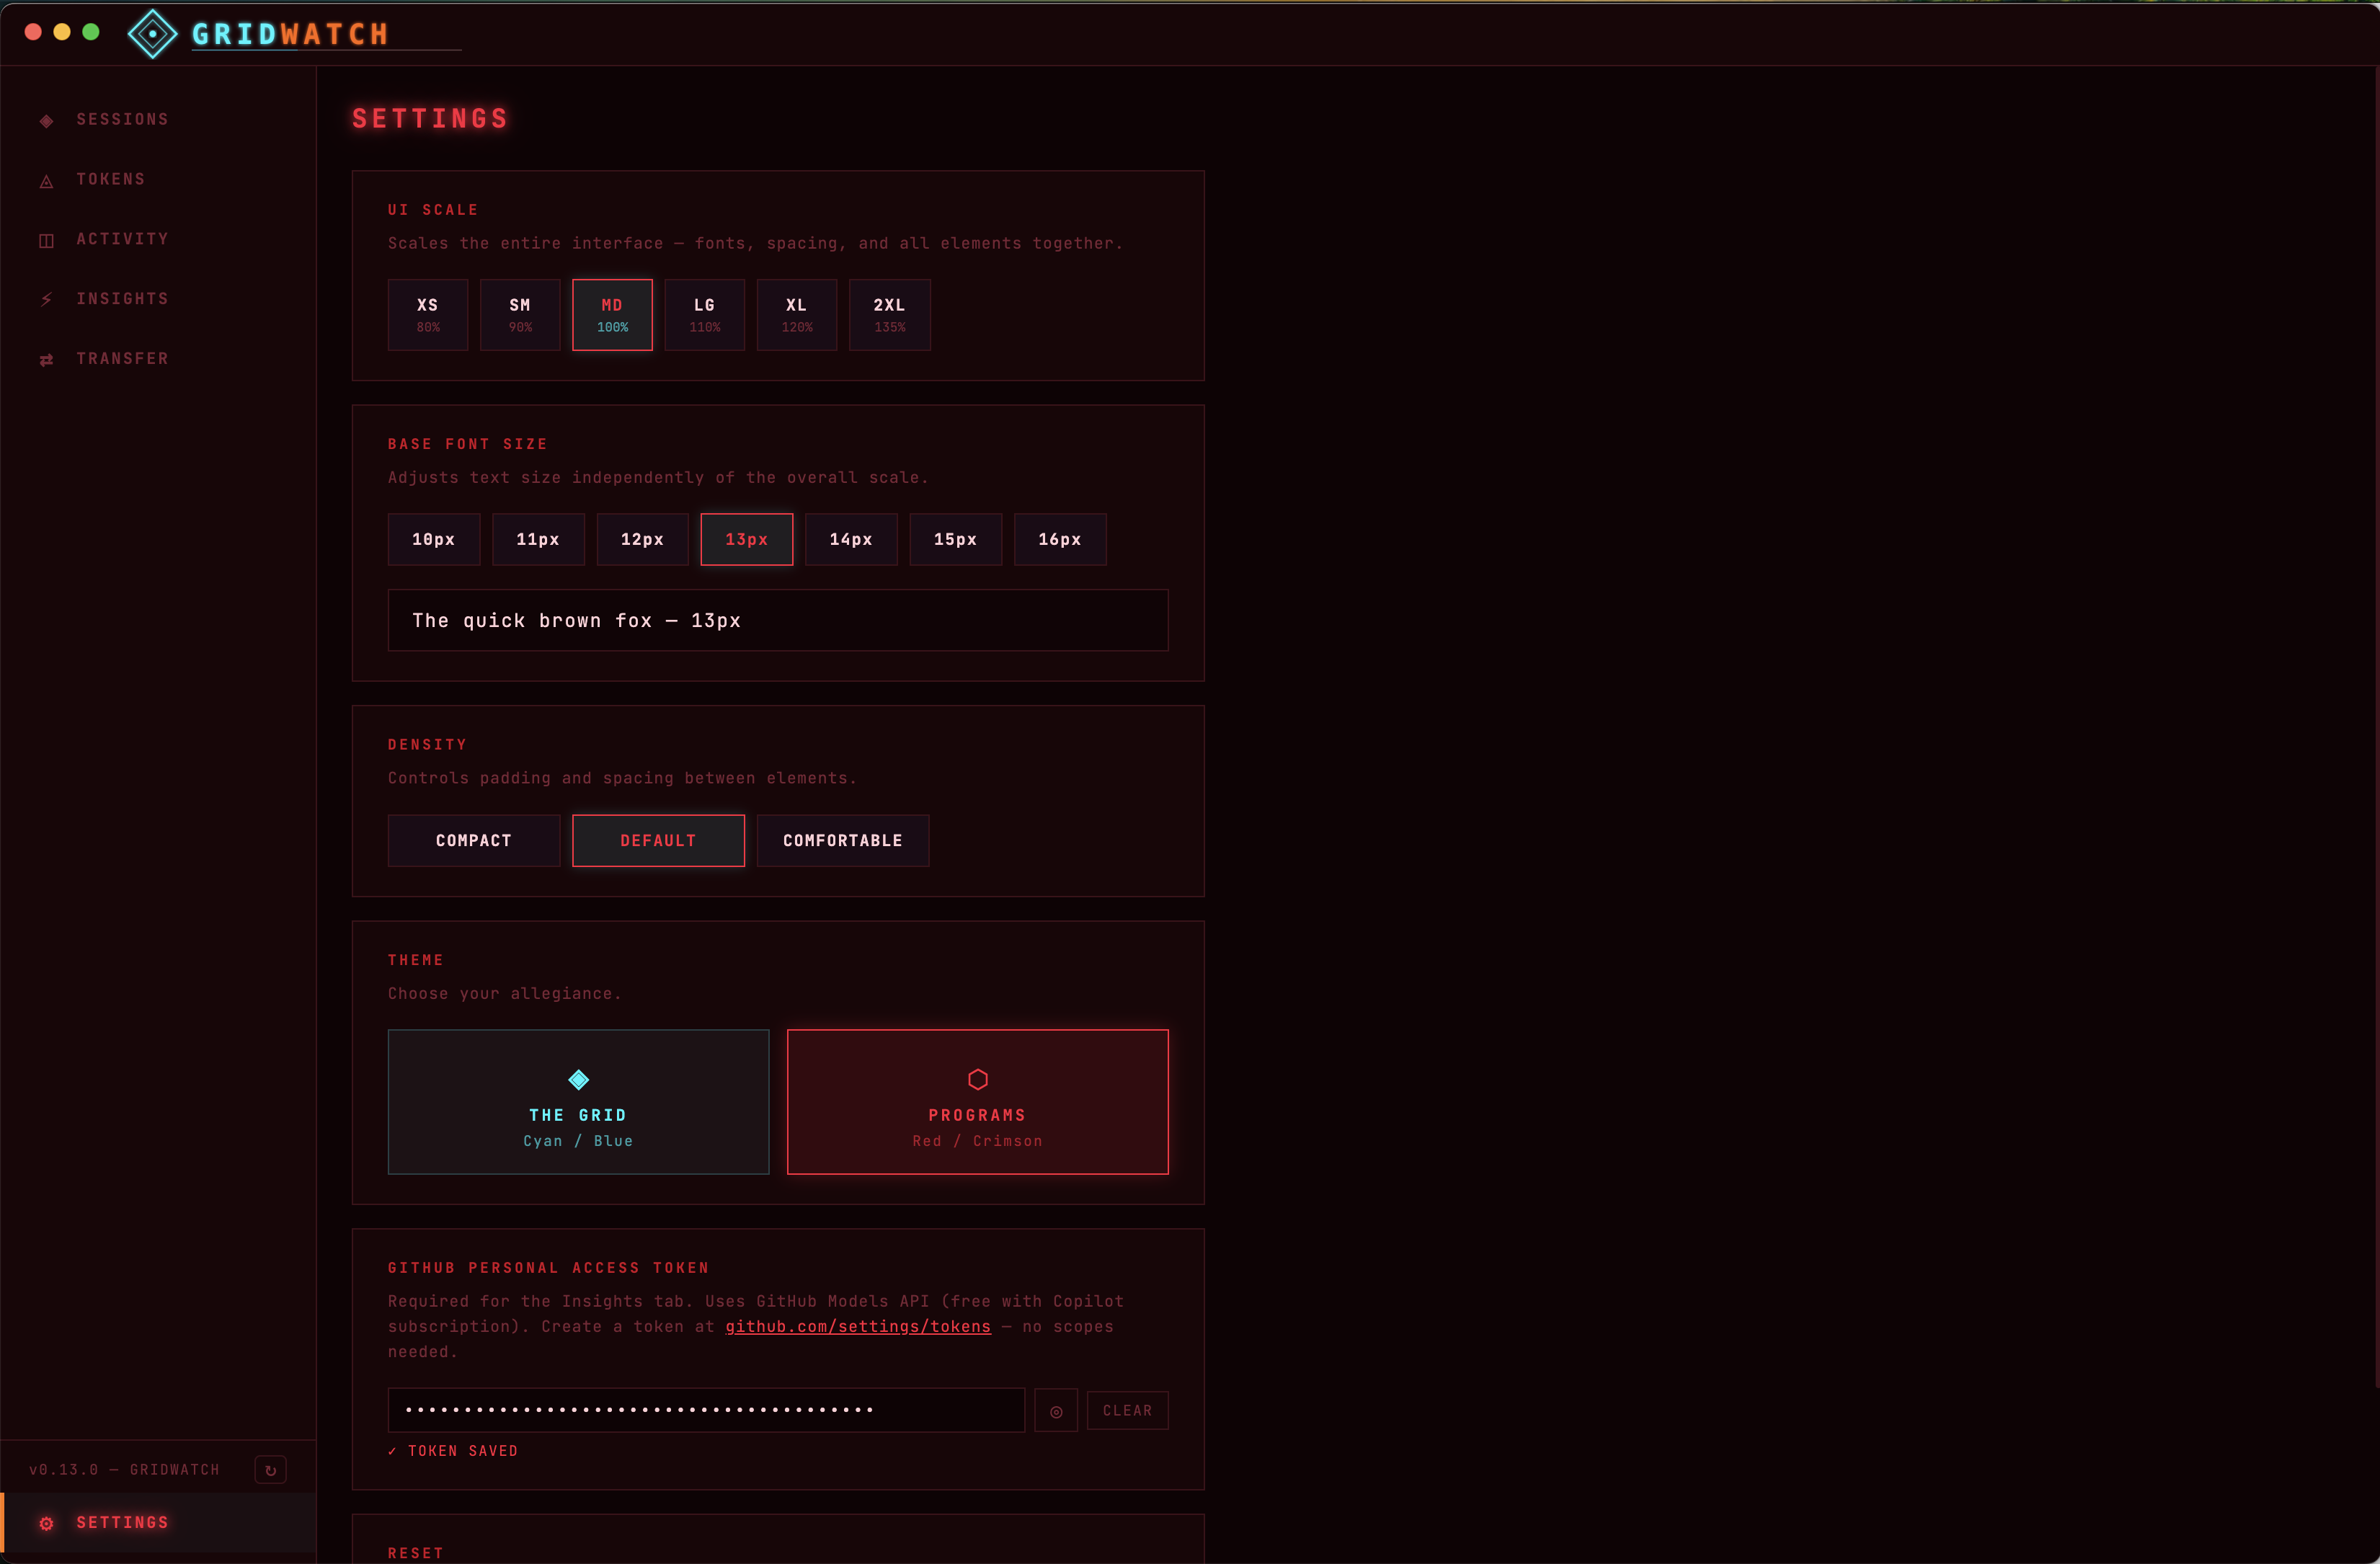\n\n# Optional Credentials\n\nThe app does store the users API key (git classic token) which is used for analysing the users prompts and how good they are.\n\n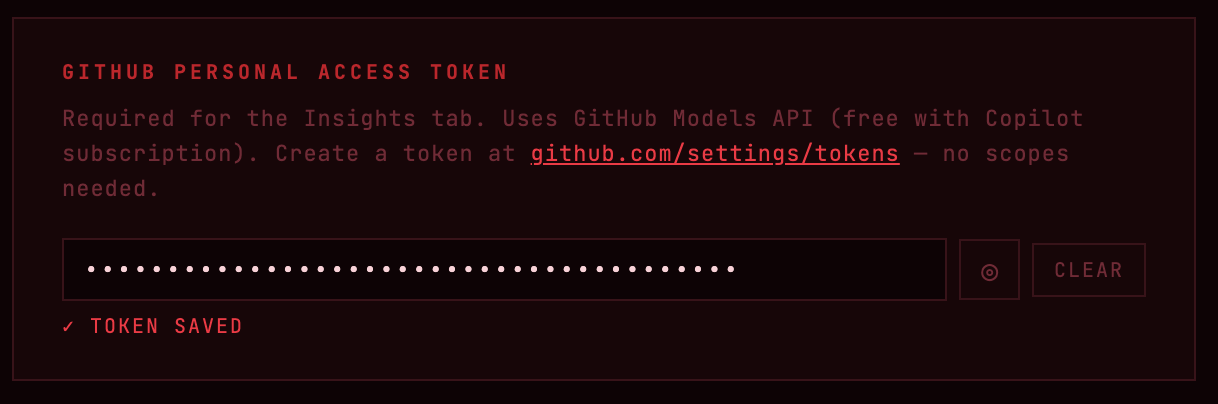\n\nFor security, the preload script only exposes specific typed methods (no generic `ipcRenderer` access). All IPC handlers validate session IDs as UUIDs and guard against path traversal. API keys are encrypted using Electron's `safeStorage` (macOS Keychain / Windows DPAPI) rather than stored in plaintext.\n\nThe credentials are not needed if your not going to make use of the insight tab.\n\n# What's next\n\nThe tool is free to use, but I might extend it so that it gets approved in the Mac and Windows app stores and just becomes readily available for any engineer to use for free.\n\nThe project is open source — check it out on [GitHub](https://github.com/faesel/gridwatch) if you're interested. Feedback and feature ideas are welcome!"])</script><script>self.__next_f.push([1,"16:T33ad,"])</script><script>self.__next_f.push([1,"# Introduction\n\nRecently, I’ve been using the [Nx](https://nx.dev/) monorepo framework quite extensively—but purely for frontend React projects. I’d always thought of Nx as a frontend-focused tool. Turns out, I was wrong (and about two years late to the party).\n\nI recently came across a [YouTube video - Nx + .NET with the nx-dotnet Plugin](https://www.youtube.com/watch?v=8zoR_NpW7io\u0026t=2829s) demonstrating first-class support for .NET applications inside an Nx workspace.\n\nAs a full-stack engineer, this genuinely blew my mind. For the first time, it feels possible to build a full-stack architecture that actively prevents one of the most common pain points in web development: broken contracts between frontend and backend. With Nx, API contracts can live in shared libraries with clear ownership, rather than being duplicated, manually synced, or quietly drifting out of alignment.\n\nIn this article, I’ll explore what a basic full-stack architecture looks like using Nx, React, and C#, and share what the developer experience is actually like in practice.\n\n# The basic setup\n\nNx works on the basic principle of two main folders: `apps` and `libs`. For this application, we'll be using the following folder structure:\n\n**apps/**\n- `web/` → Next.js frontend application \n- `api/` → ASP.NET Core Web API \n- `worker/` → .NET background worker (e.g. WebJob, more to show fullstackyness) \n\n**libs/**\n- `ui/` → Shared React UI components \n- `domain/` → Shared domain logic \n - Must be framework-agnostic \n - Must **not** reference ASP.NET Core, React, or Next.js \n- `contracts/` → Shared API contracts (DTOs / request \u0026 response models) \n- `api-client/` → Generated TypeScript client from OpenAPI\n\n## Step 1 - Create a mono repo\n\nLet's start by creating an empty Nx workspace. Note: this assumes you've already set up Nx, Node, .NET, and npm locally.\n\n```shell\nmkdir fullstack-demo\ncd fullstack-demo\nnpx create-nx-workspace@latest fullstack-demo --preset=npm --nxCloud=skip --interactive=false\n```\n\nNext, create the `apps/` and `libs/` folders, then we'll install our Nx dependencies. In my case ive gone for React however Nx supports quite a large array of languages and frameworks.\n\n```shell\ncd fullstack-demo\nmkdir -p apps libs\n\n# Install Nx dependencies for front end\nnpm install -D @nx/react\nnpm install -D @nx/next\n\n# Create the Next.js application and UI component library\nnpx nx g @nx/next:app web --directory=apps/web --no-interactive\nnpx nx g @nx/react:lib ui --directory=libs/ui --bundler=none --unitTestRunner=none --no-interactive\n```\n\nWith the front end done, we can now create the backend projects:\n\n```shell\n# Create .NET projects manually\ncd apps\ndotnet new webapi -n api -f net8.0\n// Mostly to show you we can host other apps in here, but you can skip this if you just want the API and Next.js frontend\ndotnet new worker -n worker -f net8.0\ncd ..\n```\n\n**Why not use Nx generators for .NET?**\n\nYou might wonder why we're using manual `dotnet` commands instead of the `@nx-dotnet/core` plugin. While Nx does have a .NET plugin, I encountered compatibility issues with the current version of Nx (v22.5.0+). The plugin depends on internal Nx modules that have been refactored or removed in recent versions, causing generation to fail.\n\nBy creating .NET projects manually and integrating them through custom `project.json` files, we get the same benefits:\n - Full Nx integration (build, serve, test commands)\n - Dependency graph visualization\n - Affected command support\n - Task caching\n\nThis approach is actually more flexible and keeps you in control of the .NET tooling, while still getting all the Nx monorepo benefits. So we don't really loose much aside from a simpler command to generate a new project. But I guess most people will be accustomed to the dotnet commands anyway.\n\nOnce the projects are created we can then create a `project.json` file for each .NET project to integrate Nx commands with dotnet CLI. The `project.json` file holds the projects configuration, it also allows Nx to map commands to dotnet which you will see later in the article, as well as control things like project dependencies. \n\n```json\n{\n \"name\": \"@fullstack-demo/api\",\n \"$schema\": \"../../node_modules/nx/schemas/project-schema.json\",\n \"projectType\": \"application\",\n \"sourceRoot\": \"apps/api\",\n \"tags\": [\"type:app\", \"platform:dotnet\", \"scope:backend\"],\n \"targets\": {\n \"build\": {\n \"executor\": \"nx:run-commands\",\n \"options\": {\n \"command\": \"dotnet build\",\n \"cwd\": \"apps/api\"\n }\n },\n \"serve\": {\n \"executor\": \"nx:run-commands\",\n \"options\": {\n \"command\": \"dotnet run\",\n \"cwd\": \"apps/api\"\n }\n },\n \"test\": {\n \"executor\": \"nx:run-commands\",\n \"options\": {\n \"command\": \"dotnet test\",\n \"cwd\": \"apps/api\"\n }\n },\n \"clean\": {\n \"executor\": \"nx:run-commands\",\n \"options\": {\n \"command\": \"dotnet clean\",\n \"cwd\": \"apps/api\"\n }\n }\n }\n}\n```\n\nWith this configuration, we can now run these commands through Nx `nx run @fullstack-demo/api:build`! It all connects up and triggers your standard dotnet build.\n\nNow let's generate all the shared libraries:\n\n```shell\nnpx nx g @nx/js:lib domain --directory=libs/domain --bundler=none --unitTestRunner=none --no-interactive\nnpx nx g @nx/js:lib api-client --directory=libs/api-client --bundler=none --unitTestRunner=none --no-interactive\n```\n\nOnce complete we should have this basic structure\n\n\n\n## Backend API Implementation\n\nNow that we got a basic app setup let's add Swashbuckle to enable OpenAPI/Swagger documentation. These steps are no different from any other dotnet api project and can be skipped if your familiar with it.\n\n```shell\ncd apps/api \u0026\u0026 dotnet add package Swashbuckle.AspNetCore\n```\n\nAlso ensure you add these lines to `Program.cs`:\n\n```csharp\nbuilder.Services.AddControllers();\nbuilder.Services.AddSwaggerGen();\n\n// ... later in the file\napp.MapControllers();\n```\n\nCreate a basic items model in `Models/Item.cs`,\n\n```csharp\nnamespace Api.Models;\n\npublic class Item\n{\n public string Id { get; set; } = string.Empty;\n public string Name { get; set; } = string.Empty;\n public string Description { get; set; } = string.Empty;\n public DateTime CreatedAt { get; set; }\n}\n\npublic class ItemsResponse\n{\n public List\u003cItem\u003e Items { get; set; } = new();\n public int Total { get; set; }\n}\n```\n\nNow let's create a basic controller to handle the requests in `Controllers/ItemsController.cs`,\n\n```csharp\nusing Api.Models;\nusing Microsoft.AspNetCore.Mvc;\n\nnamespace Api.Controllers;\n\n[ApiController]\n[Route(\"api/[controller]\")]\npublic class ItemsController : ControllerBase\n{\n /// \u003csummary\u003e\n /// Get all items\n /// \u003c/summary\u003e\n /// \u003creturns\u003eA list of items\u003c/returns\u003e\n [HttpGet]\n [ProducesResponseType(typeof(ItemsResponse), StatusCodes.Status200OK)]\n public ActionResult\u003cItemsResponse\u003e GetItems()\n {\n var items = new List\u003cItem\u003e\n {\n new Item\n {\n Id = \"1\",\n Name = \"Item 1\",\n Description = \"First sample item\",\n CreatedAt = DateTime.UtcNow.AddDays(-2)\n },\n new Item\n {\n Id = \"2\",\n Name = \"Item 2\",\n Description = \"Second sample item\",\n CreatedAt = DateTime.UtcNow.AddDays(-1)\n },\n new Item\n {\n Id = \"3\",\n Name = \"Item 3\",\n Description = \"Third sample item\",\n CreatedAt = DateTime.UtcNow\n }\n };\n\n var response = new ItemsResponse\n {\n Items = items,\n Total = items.Count\n };\n\n return Ok(response);\n }\n}\n\n```\n\nDon't forget to wire up the controllers in `Program.cs`:\n\n```csharp\nbuilder.Services.AddControllers();\n// ... later in the file\napp.MapControllers();\n```\n\nYou can now test the API by spinning it up in Nx\n\n```shell\nnx run @fullstack-demo/api:serve\n```\n\n## Getting generated types \n\nWe'll use `openapi-typescript` to generate a type-safe TypeScript interfaces directly from your API's OpenAPI json definition. This ensures your frontend stays in sync with backend changes.\n\n```shell\nnpm install -D openapi-typescript\n```\n\nGenerate a script file in `scripts/generate-openapi.sh`, this script is going to be responsible for, \n\n1. Running the dotnet API\n2. Download the open API json generated based on controller actions\n3. Place the file into the API clients directory, the file can then be used to generate types with.\n\n```\n#!/bin/bash\nset -e\n\nSCRIPT_DIR=\"$(cd \"$(dirname \"${BASH_SOURCE[0]}\")\" \u0026\u0026 pwd)\"\nPROJECT_ROOT=\"$(cd \"$SCRIPT_DIR/..\" \u0026\u0026 pwd)\"\n\ncd \"$PROJECT_ROOT\"\n\necho \"Building API...\"\ncd apps/api\ndotnet build --nologo -v q\n\necho \"Starting API...\"\nASPNETCORE_ENVIRONMENT=Development dotnet run --no-launch-profile --urls \"http://localhost:5000\" \u003e /dev/null 2\u003e\u00261 \u0026\nAPI_PID=$!\n\necho \"Waiting for API to start (PID: $API_PID)...\"\nsleep 8\n\necho \"Downloading OpenAPI spec...\"\ncurl -s http://localhost:5000/swagger/v1/swagger.json -o ../../libs/api-client/openapi.json\n\necho \"Stopping API...\"\nkill $API_PID 2\u003e/dev/null || true\n\necho \"OpenAPI spec generated successfully at libs/api-client/openapi.json\"\n```\n\nOnce the script is created we can add it to the `project.json` in the API project. Create a new target to run the script and begin generation. This allows us to execute a command like `nx run @fullstack-demo/api:openapi:generate` to run the step. However as Nx allows you to create dependencies in projects we are not going to run this command explicitly.\n\n```json\n\"openapi:generate\": {\n \"executor\": \"nx:run-commands\",\n \"options\": {\n \"command\": \"bash scripts/generate-openapi.sh\"\n },\n \"outputs\": [\"{workspaceRoot}/libs/api-client/openapi.json\"]\n}\n```\n\nWe can also now update the `api-client/project.json` file to convert the `openapi.json` file into TypeScript types. Note how this command has a dependency on the previous command we created.\n\n```json\n\"generate\": {\n \"executor\": \"nx:run-commands\",\n \"options\": {\n \"command\": \"npx openapi-typescript libs/api-client/openapi.json -o libs/api-client/src/generated/schema.ts\"\n },\n \"dependsOn\": [\"@fullstack-demo/api:openapi:generate\"],\n \"inputs\": [\"{projectRoot}/openapi.json\"],\n \"outputs\": [\"{projectRoot}/src/generated\"]\n}\n```\n\nNow, with a single Nx command, we can generate TypeScript types from our C# models:\n\n```shell\nnx run @fullstack-demo/api-client:generate\n```\n\n## Integrate front end and backend\n\nNow we can create a Next.js page that fetches data from our backend API. This part of the article just just to demonstrate the complete solution. First step create a basic page `apps/web/src/app/items/page.tsx`, and with this we can use Nx imports to reference the `api-client` project\n\n```typescript\nimport { apiClient, type Item } from '@fullstack-demo/api-client';\n\nexport default async function ItemsPage() {\n const data = await apiClient.getItems();\n\n return (\n \u003cdiv style={{ padding: '2rem' }}\u003e\n \u003ch1\u003eItems from API\u003c/h1\u003e\n \u003cp\u003eTotal: {data.total}\u003c/p\u003e\n\n \u003cul\u003e\n {data.items?.map((item: Item) =\u003e (\n \u003cli key={item.id} style={{ marginBottom: '1rem' }}\u003e\n \u003ch3\u003e{item.name}\u003c/h3\u003e\n \u003cp\u003e{item.description}\u003c/p\u003e\n \u003csmall\u003e\n {item.createdAt ? new Date(item.createdAt).toLocaleDateString() : 'N/A'}\n \u003c/small\u003e\n \u003c/li\u003e\n ))}\n \u003c/ul\u003e\n \u003c/div\u003e\n );\n}\n```\n\n## Running the app \n\nOnce everything is set up, you can run both the frontend and backend using the following Nx commands,\n\n```shell\n# Terminal 1 - Start the backend API\nnx run @fullstack-demo/api:serve\n\n# Terminal 2 - Start the frontend\nnx run @fullstack-demo/web:dev\n```\n\n## Conclusion\n\nUsing Nx to manage a monorepo with .NET and React is a promising combination — the tooling brings solid cross-stack project organisation, making it easier to house both frontend and backend in one workspace. That said, Nx introduces extra complexity that teams will need to invest time in understanding. As the ecosystem matures, improvements to Nx's generators should help streamline the developer experience further.\n\nBeyond structure and shared contracts, one of the biggest long-term advantages of this setup is how Nx’s affected graph and caching dramatically optimise your workflow. As your monorepo grows, Nx intelligently determines exactly which projects are impacted by a change and only rebuilds or retests those — whether that’s the React frontend, the ASP.NET Core API, or shared domain libraries. Combined with local and remote caching, this significantly reduces CI times, lowers infrastructure costs, and improves developer feedback loops. In a mixed React + .NET environment, this dependency awareness prevents unnecessary rebuilds while still guaranteeing correctness, making the architecture not just scalable in code organisation, but scalable in build performance as well.\n\nWould I use it for a full stack project? I think the answer would be a yes!"])</script><script>self.__next_f.push([1,"17:T2bcd,"])</script><script>self.__next_f.push([1,"\n# Introduction\n\nRecently I encountered a scenario where I needed to integrate New Relic into my Electron application. New Relic supports a number of integration types our the box, some of the more heavily used ones are,\n\n- APM Agents - Primary used for backend tracking, most of the documentation will point to integrating in this style.\n- Browser Agent - Used for front end client side logging.\n\nIntegrating the browser agent was a simple task of adding a logging script to the HTML page hosting the app ... easy so far. Because Electron is effectively loading up a chromium browser, the browser agent should work as normal. The APM Agent on the other hand was a different story, after having scoured the internet I found that its currently not supported with Electron. In fact if you look at the documentation for Electron, there is a suspicious absence of logging documentation. This might be down to the unique way Electrons IPC channels (inter-process-communication, allows for backend and front end communication using an event based model) work.\n\nDue to this I knew we would require a manual approach to logging, this is where Open Telemetry comes into play. Using Open Telemetry we can bootstrap the app on startup and start manually adding tracing logs in any backend IPC handler. Since most logging providers now support Open Telemetry, including New Relic we have a mechanism to export out logs out.\n\nThis article was created as a complete guide to the approach mentioned above. Due to the lack of examples and documentation online I hope this article comes in use for someone. In the example below I was using Electron with Vite and Typescript.\n\n# Installing Dependencies\n\nTo get started open telemetry has a couple of packages that need installing,\n\n```bash\nnpm install @opentelemetry/api\nnpm install @opentelemetry/auto-instrumentations-node\nnpm install @opentelemetry/exporter-trace-otlp-http\nnpm install @opentelemetry/instrumentation\nnpm install @opentelemetry/resources\nnpm install @opentelemetry/semantic-conventions\n```\n\n# Bootstrapping the App\n\nThe first step to integration is to connect into the startup process of Electron and instrument our Open Telemetry tracer. As Open Telemetry allows you to export your logs to multiple 3rd parties the example below will first show you how to get started with Jaeger an open source tracing sink and then expand this to New Relic.\n\n## Hooking into Startup\n\nThe first part of coding is to hook into the startup process your application. Electron conveniently has a `whenReady()` function that is called when electron has finished initialising. We can make use of this function to register our tracer.\n\nLet's first start by creating a `tracing.ts` file in the root of the application. In this file we will have two functions, one to register a tracer and another to get the tracer. We are also going to pass through some useful information to the tracer like the application version, and operating system so that all our logs have some base information they can relay back to New Relic.\n\n```javascript\nexport const registerTracer = (appVersion: string, operatingSystem: string): void =\u003e {\n\t//Registration code here\n}\n\nexport const getTracer = (): Tracer =\u003e {\n\t//Code to get tracer here\n}\n```\n\nNext we can call the register function on startup,\n\n```javascript\nimport { app } from \"electron\"\n\napp.whenReady().then(() =\u003e {\n\t//For me this is the version defined in my package.json\n\tconst appVersion = app.getVersion();\n\t//Part of NodeJS's way of detirmining the platform\n\tconst operatingSystem = process.platform;\n\n\tregisterTracer(appVersion, operatingSystem);\n});\n```\n\n## Configuring the Tracer\n\nNow that we have some functions to hook into we can flesh them out with our configuration. For ease of copy and paste im going to first code dump and the file then explain each part.\n\n```javascript\n/*tracing.ts*/\nimport { BatchSpanProcessor } from \"@opentelemetry/sdk-trace-base\";\nimport { Resource } from \"@opentelemetry/resources\";\nimport { SemanticResourceAttributes } from \"@opentelemetry/semantic-conventions\";\nimport {\n NodeTracerProvider,\n SimpleSpanProcessor,\n} from \"@opentelemetry/sdk-trace-node\";\nimport { registerInstrumentations } from \"@opentelemetry/instrumentation\";\nimport { OTLPTraceExporter } from \"@opentelemetry/exporter-trace-otlp-http\";\n\nimport opentelemetry, { Tracer } from \"@opentelemetry/api\";\nimport { getNodeAutoInstrumentations } from \"@opentelemetry/auto-instrumentations-node\";\n\nconst NEWRELIC_APP_NAME = \"APP NAME GOES HERE\";\nconst IS_DEVELOPMENT = import.meta.env.DEV;\n\nexport const registerTracer = (appVersion: string, operatingSystem: string): void =\u003e {\n registerInstrumentations({\n instrumentations: [\n getNodeAutoInstrumentations(),\n //TODO: Add an instrumentation library here when electron is supported\n ],\n });\n\n const resource = Resource.default().merge(\n new Resource({\n [SemanticResourceAttributes.SERVICE_NAME]: NEWRELIC_APP_NAME,\n [SemanticResourceAttributes.SERVICE_VERSION]: appVersion,\n [SemanticResourceAttributes.OS_NAME]: operatingSystem,\n })\n );\n\n const provider = new NodeTracerProvider({\n resource: resource,\n });\n\n const otlpExporter = new OTLPTraceExporter({\n\t//Jaeger tracing url\n\turl: 'http://localhost:4318/v1/traces'\n });\n\n const processor = IS_DEVELOPMENT\n ? new SimpleSpanProcessor(otlpExporter)\n : new BatchSpanProcessor(otlpExporter);\n\n provider.addSpanProcessor(processor);\n provider.register();\n};\n```\n\n*Note `import.meta.env` is just Vite's way of getting hold of environment variables.*\n\nYou might firstly notice that there is a `TODO` in the code, if and when Electron supports a plugin style integration with open telemetry, the `instrumentations` array will be the place to add it. For now we are manually instrumenting the app.\n\nThe resources section is given to use using the `@opentelemetry/resources` and `@opentelemetry/semantic-conventions` packages. It allows us to define some base properties we want to show in all our tracing logs. Obvious things like the app version, and operating systems (especially if your targeting multiple systems) are really useful bits of information to add. There are also some built in attributes for Kubernetes and oddly enough AWS (with some generic ones for other cloud providers).\n\nIn terms of the `OTLPTraceExporter` block, as we opted to do our tracing using HTTP (GRPC is also an option) with the package `@opentelemetry/exporter-trace-otlp-http` i have added some basic settings for Jaeger. Note that you can add a number of exporters here, and we will also be extending this to include New Relic.\n\nThe final part in question is the processors themselves, open telemetry has a few options on how you might want to push your logs to 3rd parties. Ive opted to use a `SimpleSpanProcessor` when running the app locally so that my logs are immediately pushed to the servers when testing things out. However in production im making use of a `BatchSpanProcessor` that batches a group of logs and then pushes them in one go. This helps reduce network traffic of the app.\n\n## Exposing a Tracer\n\nIn order to get an actual tracer we can get an instance from the global tracing provider using the `getTracer()` function. This tracer object then allows us to create logs in the shape of a `snap`. It is advised to call `getTracer` every time you need to start logging as opposed to maintaining your own instance.\n\n```javascript\nexport const GetTracer = () : Tracer =\u003e {\n return opentelemetry.trace.getTracer(NEWRELIC_APP_NAME);\n}\n```\n\n# Adding a Tracing Example\n\nNow that we have added all our logging code we can finally create an actual log entry. To do this we can create a new span, in which we can raise new events and record exceptions. In the example below i've added some logging to an IPC handler.\n\n```javascript\nimport { ipcMain } from 'electron'\nimport { GetTracer } from './tracing'\n\nconst createWindow = () =\u003e {\n\t//Create new browser window\n\tipcMain.handle(\"getDinosaurs\", async () =\u003e {\n\t\tawait GetTracer().startActiveSpan(\"getDinosaurs\", async (span) =\u003e {\n\t\t\t//await getDinosaurs()\n\n\t\t\t//Record one or many events in your code blocks\n\t\t\tspan.addEvent(\"receivedDinosaur\", { name: dinoName });\n\t\t\t//Record exceptions in your code block\n\t\t\tspan.recordException(new Error(`Ops their all extinct!`));\n\t\t\tspan.end();\n\t\t});\n\t});\n}\n```\n\n# Testing with Jaeger\n\nTo test this out with Jaeger you can first execute the following docker command to create a new instance of Jaeger with OTLP enabled.\n\n```bash\ndocker run -d --name jaeger \\\n -e COLLECTOR_ZIPKIN_HOST_PORT=:9411 \\\n -e COLLECTOR_OTLP_ENABLED=true \\\n -p 6831:6831/udp \\\n -p 6832:6832/udp \\\n -p 5778:5778 \\\n -p 16686:16686 \\\n -p 4317:4317 \\\n -p 4318:4318 \\\n -p 14250:14250 \\\n -p 14268:14268 \\\n -p 14269:14269 \\\n -p 9411:9411 \\\n jaegertracing/all-in-one:latest\n```\n\nOnce up and running you can navigate to the default UI url http://localhost:16686/ to start viewing your logs. It order to get something showing up you will need to run the app and begin pushing some logs to Jaeger.\n\n# Setting up New Relic\n\nEverything is now setup from a code perspective, its time to create everything we need in New Relic. This step is quite quick and painless, a new key can be created from the API Keys section. Once there follow the **Create a Key** button. The form requires the following,\n\n- Account - Set this to whatever you want\n- Key Type - Set this to **Ingest - Licence**\n- Name - Set this to whatever you want, however it does make sense to match this up with the service name set in the section \"Configuring the Tracer\"\n\n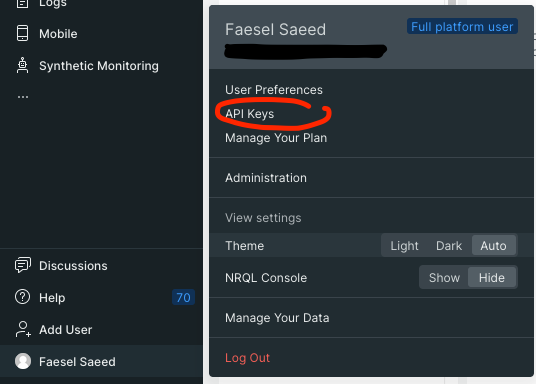\n\nOnce thats created you should get an option to copy the key which is passed into your `OTLPTraceExporter`. As for the URL you can find New Relics OTLP endpoints on this [link](https://docs.newrelic.com/docs/more-integrations/open-source-telemetry-integrations/opentelemetry/get-started/opentelemetry-set-up-your-app/). Now that we have the settings needed we can change the `OTLPTraceExporter` to include the New Relic settings.\n\n```javascript \nconst otlpExporter = new OTLPTraceExporter({\n\turl: 'https://otlp.nr-data.net:443',\n\theaders: {\n\t \"api-key\": `API KEY GOES HERE`,\n\t},\n});\n```\n\nOnce setup you will need to send your first log before anything appears in New Relic. Once you have results will show up in APM \u0026 Services \u003e Services - OpenTelemetry \u003e Click on your app name \u003e Distributed Tracing. You can drill down to view the span events and attributes.\n\nNew Relic also has a second method of viewing your logs through the use of NRQL queries. You can query your data by visiting **Query Your Data** and entering the following query,\n\n```sql\nSELECT *\nFROM SpanEvent WHERE span.id IN ( \n\tSELECT id FROM Span WHERE otel.library.name = 'YOUR APP NAME HERE'\n)\n```\n\nAnd thats it, hope this was useful for someone! Before you get integrating note that there might be some logging providers that have a much easier integration with New Relic, [sentry.io](https://docs.sentry.io/platforms/javascript/guides/electron/) seems like one of them."])</script><script>self.__next_f.push([1,"18:T31b5,"])</script><script>self.__next_f.push([1,"As a engineer learning new languages, tools frameworks etc is just part and parcel of the job. Over time the spectrum of knowledge a full stack engineer has to learn has increased dramatically. Maintaining a cognitive memory across all the different CLI's, languages/frameworks etc in today's setting is no small feat.\n\nOver time i've found that if you want something to stick you have to write it down, and if it doesn't stick (or un-sticks over time) you need some notes to look back at it. As my brain 🧠 ages these notes have become invaluable, and the need for quality notes over rushed pasted snippets has become more of a priority.\n\nDue to this I decided to revisit and reassess how I learn, and in doing so I ended up discovering [Obsidian](https://obsidian.md/) which has been a game changer for me. This article is an engineers perspective of creating dev notes to aid in learning and recollection.\n\n# My old setup\n\nPrior to [Obsidian](https://obsidian.md/) my note taking activities all occurred in OneNote, I had both my personal notes as well as learning notes around different technologies all in one place split by sections.\n\n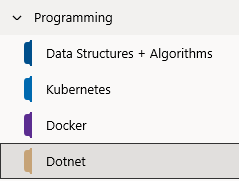\n_My programming category would contain a new section per technology_\n\nThe notes themself's contained a mixture of,\n\n- Images (mostly diagrams)\n- Paragraphs\n- Code snippets (sure you can use gists or a repo, but i want context with my code snippets and i want it to be searchable)\n- Links to articles, tools, documentation links ect.\n- Youtube links usually tutorials\n\nHowever I realized that there are some serious shortcomings with OneNote, and these problems are replicated across its competitors too, like Notion or Evernote. Heres my list,\n\n- Code pasted in is never pure code, they always add markup on top to render which means copying and pasting out adds characters or unwanted proprietary formatting\n- Diagrams are always disconnected, hard to edit. They are usually pasted in images from other tools.\n- I don't have any version tracking, history or backup.\n- Pasting and editing is distracting with as styling gets pasted in from the source.\n- There are no connections in my notes, linking is not possible.\n- I dont truly own any of the content, i will forever be tied to whatever I write in.\n\nThe list can go on, but you get the idea...\n\n# How Obsidian makes it better\n\nObsidian is part of a next generation in IDE's designed specifically for research and note taking in their own words they describe it as,\n\n\u003e A second brain, for you, forever. Obsidian is a powerful knowledge base that works on top of a local folder of plain text Markdown files.\n\nIts the VS code of markdown... no quite literally. At its base it provides a really smooth cross platform writing experience with some key features,\n\n- Markdown editing, you get all the benefits of being able to easily style without leaving your keyboard, as well as encorperating code snippets easily.\n- Tagging and creating links (backlinks) across your markdown files\n- Graph view (more on that later)\n- Powerful built in search\n\nAnd just like VS code its got a rich plugin ecosystem that's powered by opensource github projects that greatly extend its usability and allows you to mold the app to your liking.\n\n## You own what you write\n\nObsidian uses local markdown files that are stored on your own computers file system. There is no proprietary formatting, encoding etc, what you create is just standard markdown files (.md) and a bunch of folders.\n\n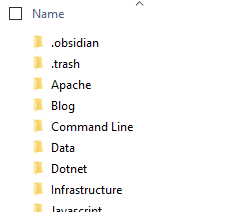\n\nWhy is this important you might ask?\n\n- It means the notes you painstakingly curate are not locked into a single echo-system, you can shift between them as long as whatever your shifting to supports markdown.\n- You also get greater control over how you backup and manage change tracking.\n- You have greater control over the privacy of what you write, in a world full of breaches a shift away from centralized cloud storage is refreshing. _harshibar_ sums it up nicely with this video,\n\n\u003ciframe width=\"560\" height=\"315\" src=\"https://www.youtube.com/embed/HhWUjp5pD0g?si=VUqwn7aI9on1WU2i\" title=\"YouTube video player\" frameborder=\"0\" allow=\"accelerometer; autoplay; clipboard-write; encrypted-media; gyroscope; picture-in-picture; web-share\" referrerpolicy=\"strict-origin-when-cross-origin\" allowfullscreen\u003e\u003c/iframe\u003e\n\n## Works with git\n\nObsidian doesn't support git right out the box, it requires a community plugin called [Obsidian Git](https://github.com/denolehov/obsidian-git). However after having installed the plugin you end up with the greatest change tracking/archiving tool at your disposal.\n\n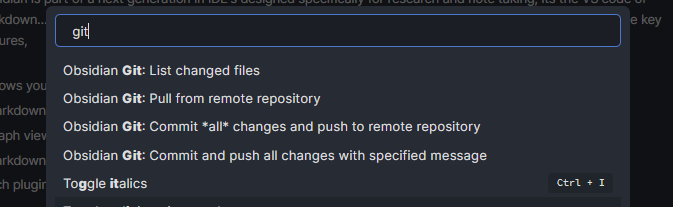\n\nWhilst the extension is fairly simple in that its mainly for pushing changes to a selected branch. It offers enough functionality to be out of your way. Dealing with more advanced scenarios like merge conflicts might need to resort to the CLI.\n\n## Mermaid\n\nAs a visual thinker who thinks takes more information in from pictures than words the expression _a picture speaks a thousand words_ really hits home. In the past I would always use free tools like [draw.io](www/draw.io) to make diagrams then paste in the exported jpg's into my notes.\n\nAs a process I always found this really disconnected, and its even more jarring when you need to make edits and go through the whole export to jpeg flow all over again. I also find with these tools getting boxes to line up with connecting lines in a way that doesn't look a mess is incredibly fiddly and time consuming.\n\nOne later evolution of this was [Plant UML](https://plantuml.com/) which moves away from drawing diagrams to scripting, take this plantUML file as an example,\n\n```\n@startuml\n\nleft to right direction\n\nactor Guest as g\n\npackage Professional {\n actor Chef as c\n actor \"Food Critic\" as fc\n}\n\npackage Restaurant {\n usecase \"Eat Food\" as UC1\n usecase \"Pay for Food\" as UC2\n usecase \"Drink\" as UC3\n usecase \"Review\" as UC4\n}\n\nfc --\u003e UC4\ng --\u003e UC1\ng --\u003e UC2\ng --\u003e UC3\n\n@enduml\n```\n\n_Taken from the plantUML's [usecase examples](https://plantuml.com/use-case-diagram)_\n\nThe above script produces the following diagram, note that the formatting/spacing and styling is all governed by plantUML syntax... there is absolutely no drawing involved.\n\n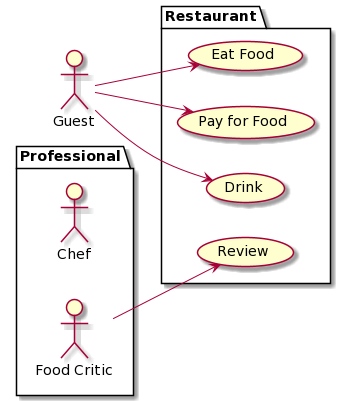\n\nThe benefit of this approach is you now have a change tracked diagram that can sit somewhere with your documentation (and as a bonus it formats everything for you). Aside from exporting the script as a .png making edits couldn't be easier.\n\nWhilst PlantUML is great it still take you away from your markdown document as you need to separately create the diagram and later paste in a link to the exported image. A later evolution on this is [Mermaid](https://mermaid-js.github.io/mermaid/#/) which is similar to PlantUML but works within markdown as a code block. Having diagrams integrated means you no longer need to export diagrams to jpeg when adding to a markdown file... their just there. Here is an example,\n\n```\nstateDiagram-v2\n[*] --\u003e Still\nStill --\u003e [*]\n\nStill --\u003e Moving\nMoving --\u003e Still\nMoving --\u003e Crash\nCrash --\u003e [*]\n```\n\n_Taken from Mermaids [state diagram example](https://mermaid-js.github.io/mermaid/#/stateDiagram)_\n\nThe script produces the following diagram, note that this screenshot was taken directly from Obsidian as it supports Mermaid out right out the box.\n\n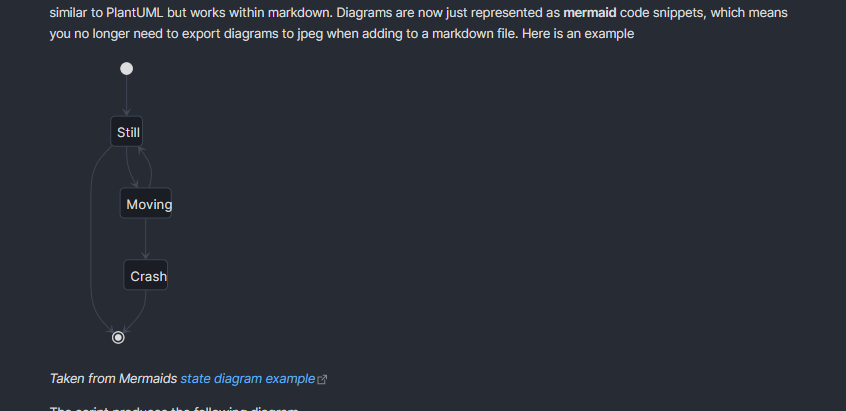\n\n## Creating a open graph of knowledge!\n\nObsidian has the ability of collating all the connections through back-linking and tagging your document to produce a networked graph. Take a look at my graph so far,\n\n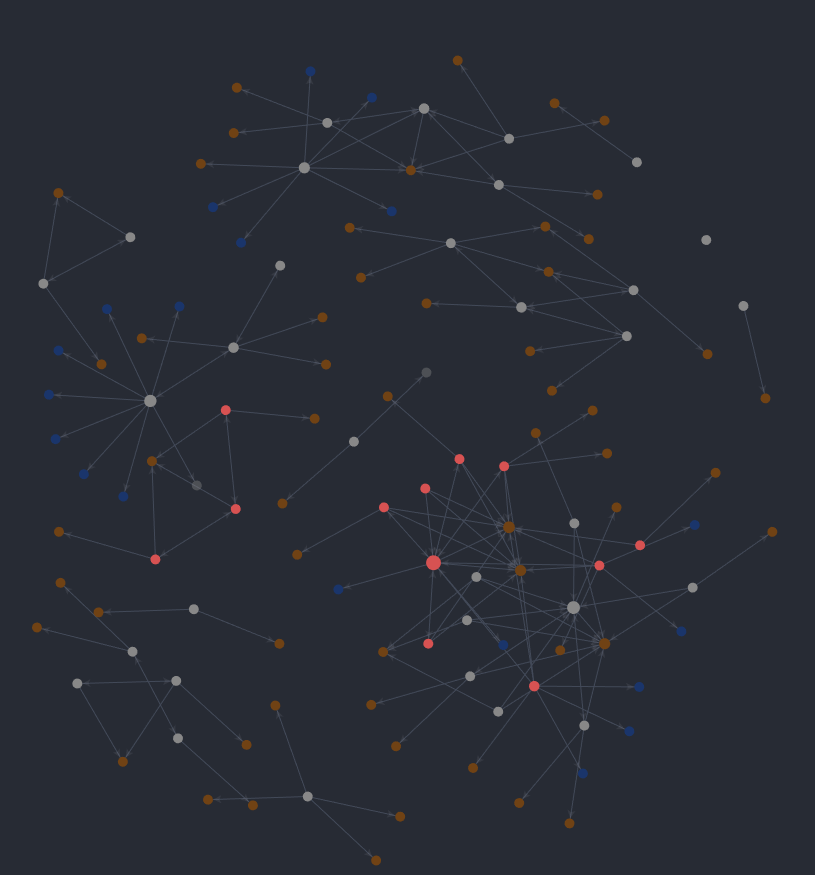\n\nHere's another picture of it zoomed in, you can see all the connecting notes, as well all the connecting hash tags.\n\n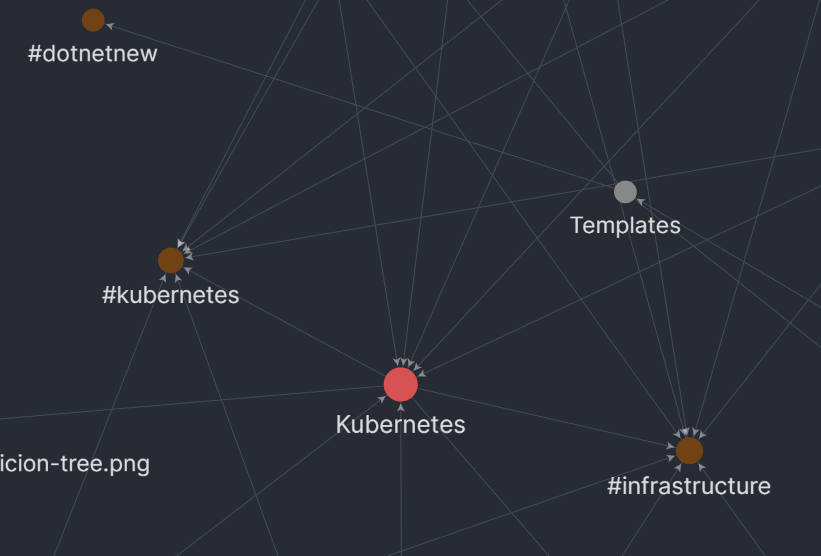\n\nAdmittedly whilst this looks really cool i haven't made much use out of this so far. It could be because I always target specific topics to learn and research into them rather than just free write so there's no real discovery of connections happening. In a team setting however the graph view could be really useful for content discovery especially when its cross cutting (like filtering on any article that's tagged with infrastructure).\n\n# Plugins\n\nObsidian has a wide list of plugins, I thought it would be useful for someone new to Obsidian to get a sense of how its functionality can be extended. Below are some choice selections I use personally,\n\n| Name | Description | Github Link |\n| ------------------------ | -------------------------------------------------------------------------- | ------------------------------------------------------------------------------------ |\n| Advanced Tables | Adds better navigation and formatting for markdown tables | [advanced-tables-obsidian](https://github.com/tgrosinger/advanced-tables-obsidian) |\n| Syntax Highlight | Adds highlighting of code blocks within the editor view | [Syntax Highlight](https://github.com/deathau/cm-editor-syntax-highlight-obsidian) |\n| Markdown prettifier | Fixes and formats your markdown file | [Markdown prettifier](https://github.com/cristianvasquez/obsidian-prettify) |\n| Mind Map | Creates mind map view of your document | [Mind Map](https://github.com/lynchjames/obsidian-mind-map) |\n| Natural Language Dates | Allows you to easily add dates into your markdown file | [Natural Language Dates](https://github.com/argenos/nldates-obsidian) |\n| Note Refactor | Allows you to extract a piece of markdown into its own file | [Note Refactor](https://github.com/lynchjames/note-refactor-obsidian) |\n| Obsidian Git | Adds support for git, allows you to push changes to your repository | [Obsidian Git](https://github.com/denolehov/obsidian-git) |\n| Outliner | Adds better list manipulation, also allows you to fold lists | [Outliner](https://github.com/vslinko/obsidian-outliner) |\n| Paste URL into selection | Allows you to paste a link over text and auto format it | [Paste URL into selection](https://github.com/denolehov/obsidian-url-into-selection) |\n| Reading Time | More for the blog authors, gives you a reading time for your markdown file | [Readming Time](https://github.com/avr/obsidian-reading-time) |\n| Recent Files | Adds a panel showing recent opened files | [Recent Files](https://github.com/tgrosinger/recent-files-obsidian) |\n| Sliding Panes | More of a UI change, allows you to slide between files | [Sliding Panes](https://github.com/deathau/sliding-panes-obsidian) |\n\n# Themes\n\nObsidian also supports a bunch of themes and looks utterly glorious, I use a theme called _Atom_.\n\n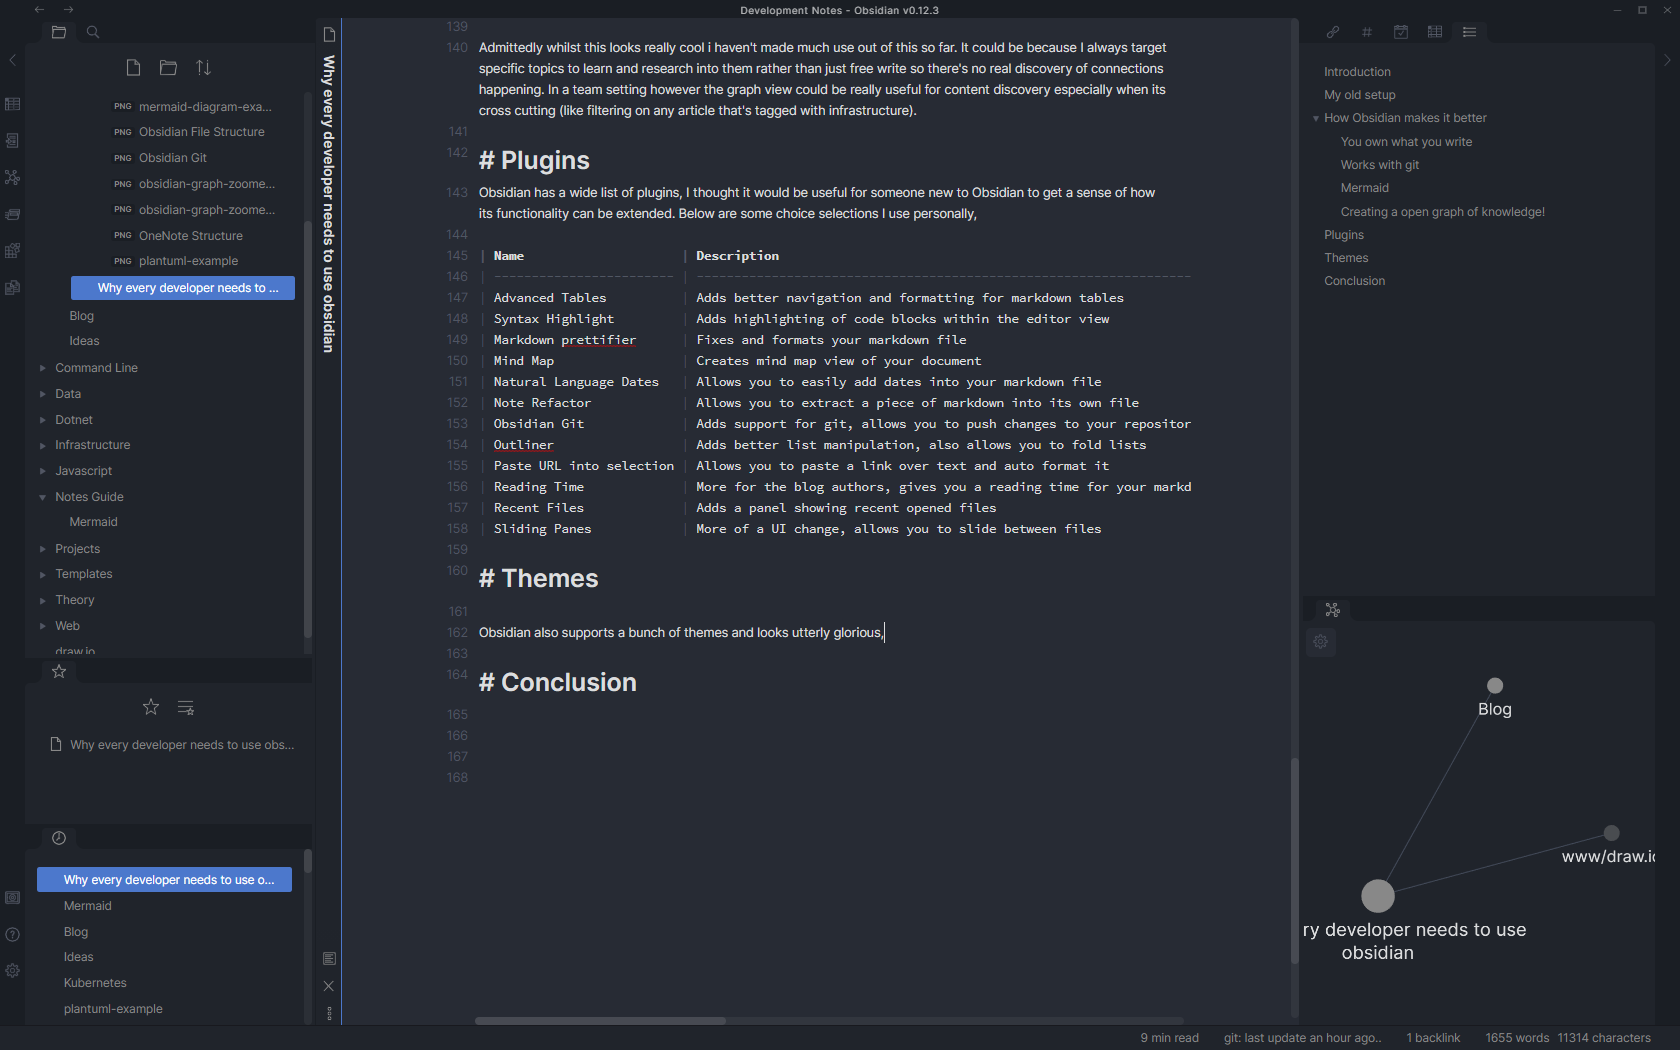\n\n# Conclusion\n\nObsidian has really refreshed how I work to a modern standard. Hopefully this has given a good overview of the benefits from a engineers perspective.\n\nThe only caveat to Obsidian is the lack of mobile apps (its currently being worked on, check out there roadmap on [Trello](https://trello.com/b/Psqfqp7I/obsidian-roadmap)). But to be honest I haven't really felt the need for it as im always learning whilst on my computer.\n\nObsidian is free try use (and fully functional with its free tier), they also have some paid tiers and boltons, so do check it out!"])</script><script>self.__next_f.push([1,"19:T9f3,"])</script><script>self.__next_f.push([1,"I've been using C# for about a decade now, and every now and again I discover something that surprises me. This week it's the ability to deconstruct as we do in Javascript (and I'm not talking about using Tuples!).\n\nBelow is a simple example of deconstruction taking place to draw out the power, and defence property for our Trex object,\n\n```\nconst trex = {\n statistics: {\n power: 10,\n defence: 2\n },\n name: \"T-Rex\", \n};\n\nconst { power, defence } = trex.statistics;\n\nconsole.log(`Power ${power}, Defence ${defence}`);\n//Power 10, Defence 2\n\n//Better than doing:\n//const power = trex.statistics.power;\n//const defence = trex.statistics.defence;\n```\n\nAs Mozilla's definition states,\n\n\u003e The destructuring assignment syntax is a JavaScript expression that makes it possible to unpack values from arrays, or properties from objects, into distinct variables - [Destructuring assignment](https://developer.mozilla.org/en-US/docs/Web/JavaScript/Reference/Operators/Destructuring_assignment).\n\nIt's a powerful syntactical sugar, especially in the scenarios where you have a nested object with long names. As deconstruction can lead to cleaner, more readable code its uses are great on large object types. Now let's take a look at the same thing but in C#,\n\n```\nnamespace deconstruction\n{\n public record Statistics(int Power, int Defence);\n\n public class Trex\n {\n public Statistics Statistics;\n public string Name;\n\n public Trex()\n {\n Name = \"T-Rex\";\n Statistics = new Statistics(10, 5);\n }\n\n // Return the first and last name.\n public void Deconstruct(out int power, out int defence)\n {\n power = Statistics.Power;\n defence = Statistics.Defence;\n }\n }\n}\n```\n\nOk admittedly it's not as elegant as its Javascript counterpart as we need to define what we want to deconstruct upfront as well as have a function for each combination 😬! but it's still got its uses... check it out,\n\n```\nusing System;\n\nnamespace deconstruction\n{\n class Program\n {\n static void Main(string[] args)\n {\n var trex = new Trex();\n var (power, defence) = trex;\n\n Console.WriteLine($\"Power: {power}, Defence: {defence}\");\n //Power: 10, Defence: 5\n\n //Better than doing:\n //var power = trex.statistics.power;\n //var defence = trex.statistics.defence;\n }\n }\n}\n```\n\nWho knows what other hidden gems 💎 lie buried with the Microsoft docs!"])</script><script>self.__next_f.push([1,"1a:T4738,"])</script><script>self.__next_f.push([1,"# Starting my journey with GraphQL\n\nUp till now, I've always heavily relied on RESTfull services to power API's, this recently got widened with GRPC which you can read about in my article [.NET \u0026 GRPC What they forgot to tell you](https://www.faesel.com/blog/dotnet-grpc-forgot-to-tell-you). GraphQL was the third final frontier that needed exploring 🥾...until now.\n\nHaving looked at it a year back the implementations for .NET were in their infancy, which meant that your server would only be as good as the framework you choose. Fast forward to 2021, [Chilli Creams Hotchocolate](https://github.com/ChilliCream/hotchocolate) has gained some serious ground and makes GraphQL an appealing proposition for developers.\n\nIn this article I hope to cover two main points,\n\n- How REST is designed to break backend engineers\n- How GraphQL saves the day\n\n# Your typical REST scenario\n\nLet's paint the scene, your a backend engineer who's creating an endpoint for showing a list of cats. With your battle-tested REST knowledge, you set out to create your first basic endpoint in the `CatsController` that returns all cats and the front end engineer is ready to integrate it into his UI.\n\n```\n// api/cats\n[HttpGet]\npublic async Task\u003cIActionResult\u003e GetCats()\n{\n using (var context = contextFactory.CreateDbContext())\n {\n var cats = await context.Cats.ToListAsync();\n\n if(cat != null)\n return Ok(cats);\n }\n\n return NoContent();\n}\n```\n\nThe app soon becomes a hit! your product manager decides to expand the functionality to filter by cat descriptions and to create a new cat information page. Getting to work you expand the endpoints for the front end engineers to use.\n\n```\n//api/cats/1\n[HttpGet]\n[Route(\"{id}\")]\npublic async Task\u003cIActionResult\u003e GetCatsById([FromRoute] int id)\n{\n using (var context = contextFactory.CreateDbContext())\n {\n var cats = await context.Cats.FirstOrDefaultAsync(x =\u003e x.Id == id);\n\n if(cats != null)\n return Ok(cats);\n }\n\n return NoContent();\n}\n\n// api/cats/description/brown\n[HttpGet]\n[Route(\"description/{description}\")]\npublic async Task\u003cIActionResult\u003e GetCatsByDescription([FromRoute] string description)\n{\n using (var context = contextFactory.CreateDbContext())\n {\n var cats = await context.Cats.Where(x =\u003e x.Description.Contains(description)).ToListAsync();\n\n if(cats != null)\n return Ok(payload);\n }\n\n return NoContent();\n}\n```\n\nThe cycle continues with product owners coming up with more feature requests and at the bottom of the pile, you got the backend engineer being reactive to all the changes. By the time you've wrapped up the project your left with a code smell of 10+ endpoints 💩.\n\nThe situation further degrades after a year when the UI gets redesigned and features are culled based on user usage. You end up with random floating endpoints because quite frankly no one audits their endpoints for dead code.\n\nThis is where GraphQL steps in, it switches the responsibility of an engineer from anticipating and creating endpoints to simply upfront displaying everything that's available with declarative meaning.\n\n# Hot Chocolate (.NET GraphQL server framework)\n\nHot chocolate is one of the leading implementations of a GraphQL server, one important thing to note when choosing a framework is that your implementation will only be as good as the framework you choose. As the [GraphQL specification](http://spec.graphql.org/) progresses you want a framework that keeps up to date with the changes... Hot Chocolate does that.\n\nTo understand the basics of Hot Chocolate I recommend [**Les Jackson's**](https://www.youtube.com/user/binarythistle) free course on youtube. It is a bit lengthy at 3 Hours and 45 Minutes but it allows you to create an ASP.NET implementation from scratch and understand basic concepts like Querys, Mutations and Subscriptions. By the end of the course, you have a GraphQL service that can do CRUD actions (do 👍 his video it's great!).\n\nhttps://www.youtube.com/watch?v=HuN94qNwQmM\n\nThe source code he produces can also be found on his [github repo](https://github.com/binarythistle/S04E01---.NET-5-GraphQL-API). The source code is a great starting point as it creates a docker image containing an MSSQL database. The solution itself already has Entity Framework and Hot Chocolate bootstrapped, with two entities to test with.\n\nOn top of this [Banana Cake Pop 🍌](https://github.com/ChilliCream/hotchocolate/blob/main/src/BananaCakePop) is also integrated which allows you to query your server through a browser (similar to swagger).\n\nAs well as [GraphQL Voyager 🚀](https://github.com/APIs-guru/graphql-voyager) (do checkout the [live demo](https://apis.guru/graphql-voyager/)).\n\nTo understand the remainder of the article it's important to have some basic knowledge of Hot Chocolate.\n\n# GraphQl Voyager\n\nWhilst this is an addition to what's being discussed, it's worth briefly mentioning. Voyager helps facilitate the move of a backend engineer from creating and documenting prescriptive REST endpoints to simply becoming a harbour of documentation and entities.\n\n\u003eThe marker of a quality API has shifted from creating a subjectively RESTfull API and how well it's documented to ... just how well it's documented 📝.\n\nHere's a taste of what is looks like for our API,\n\n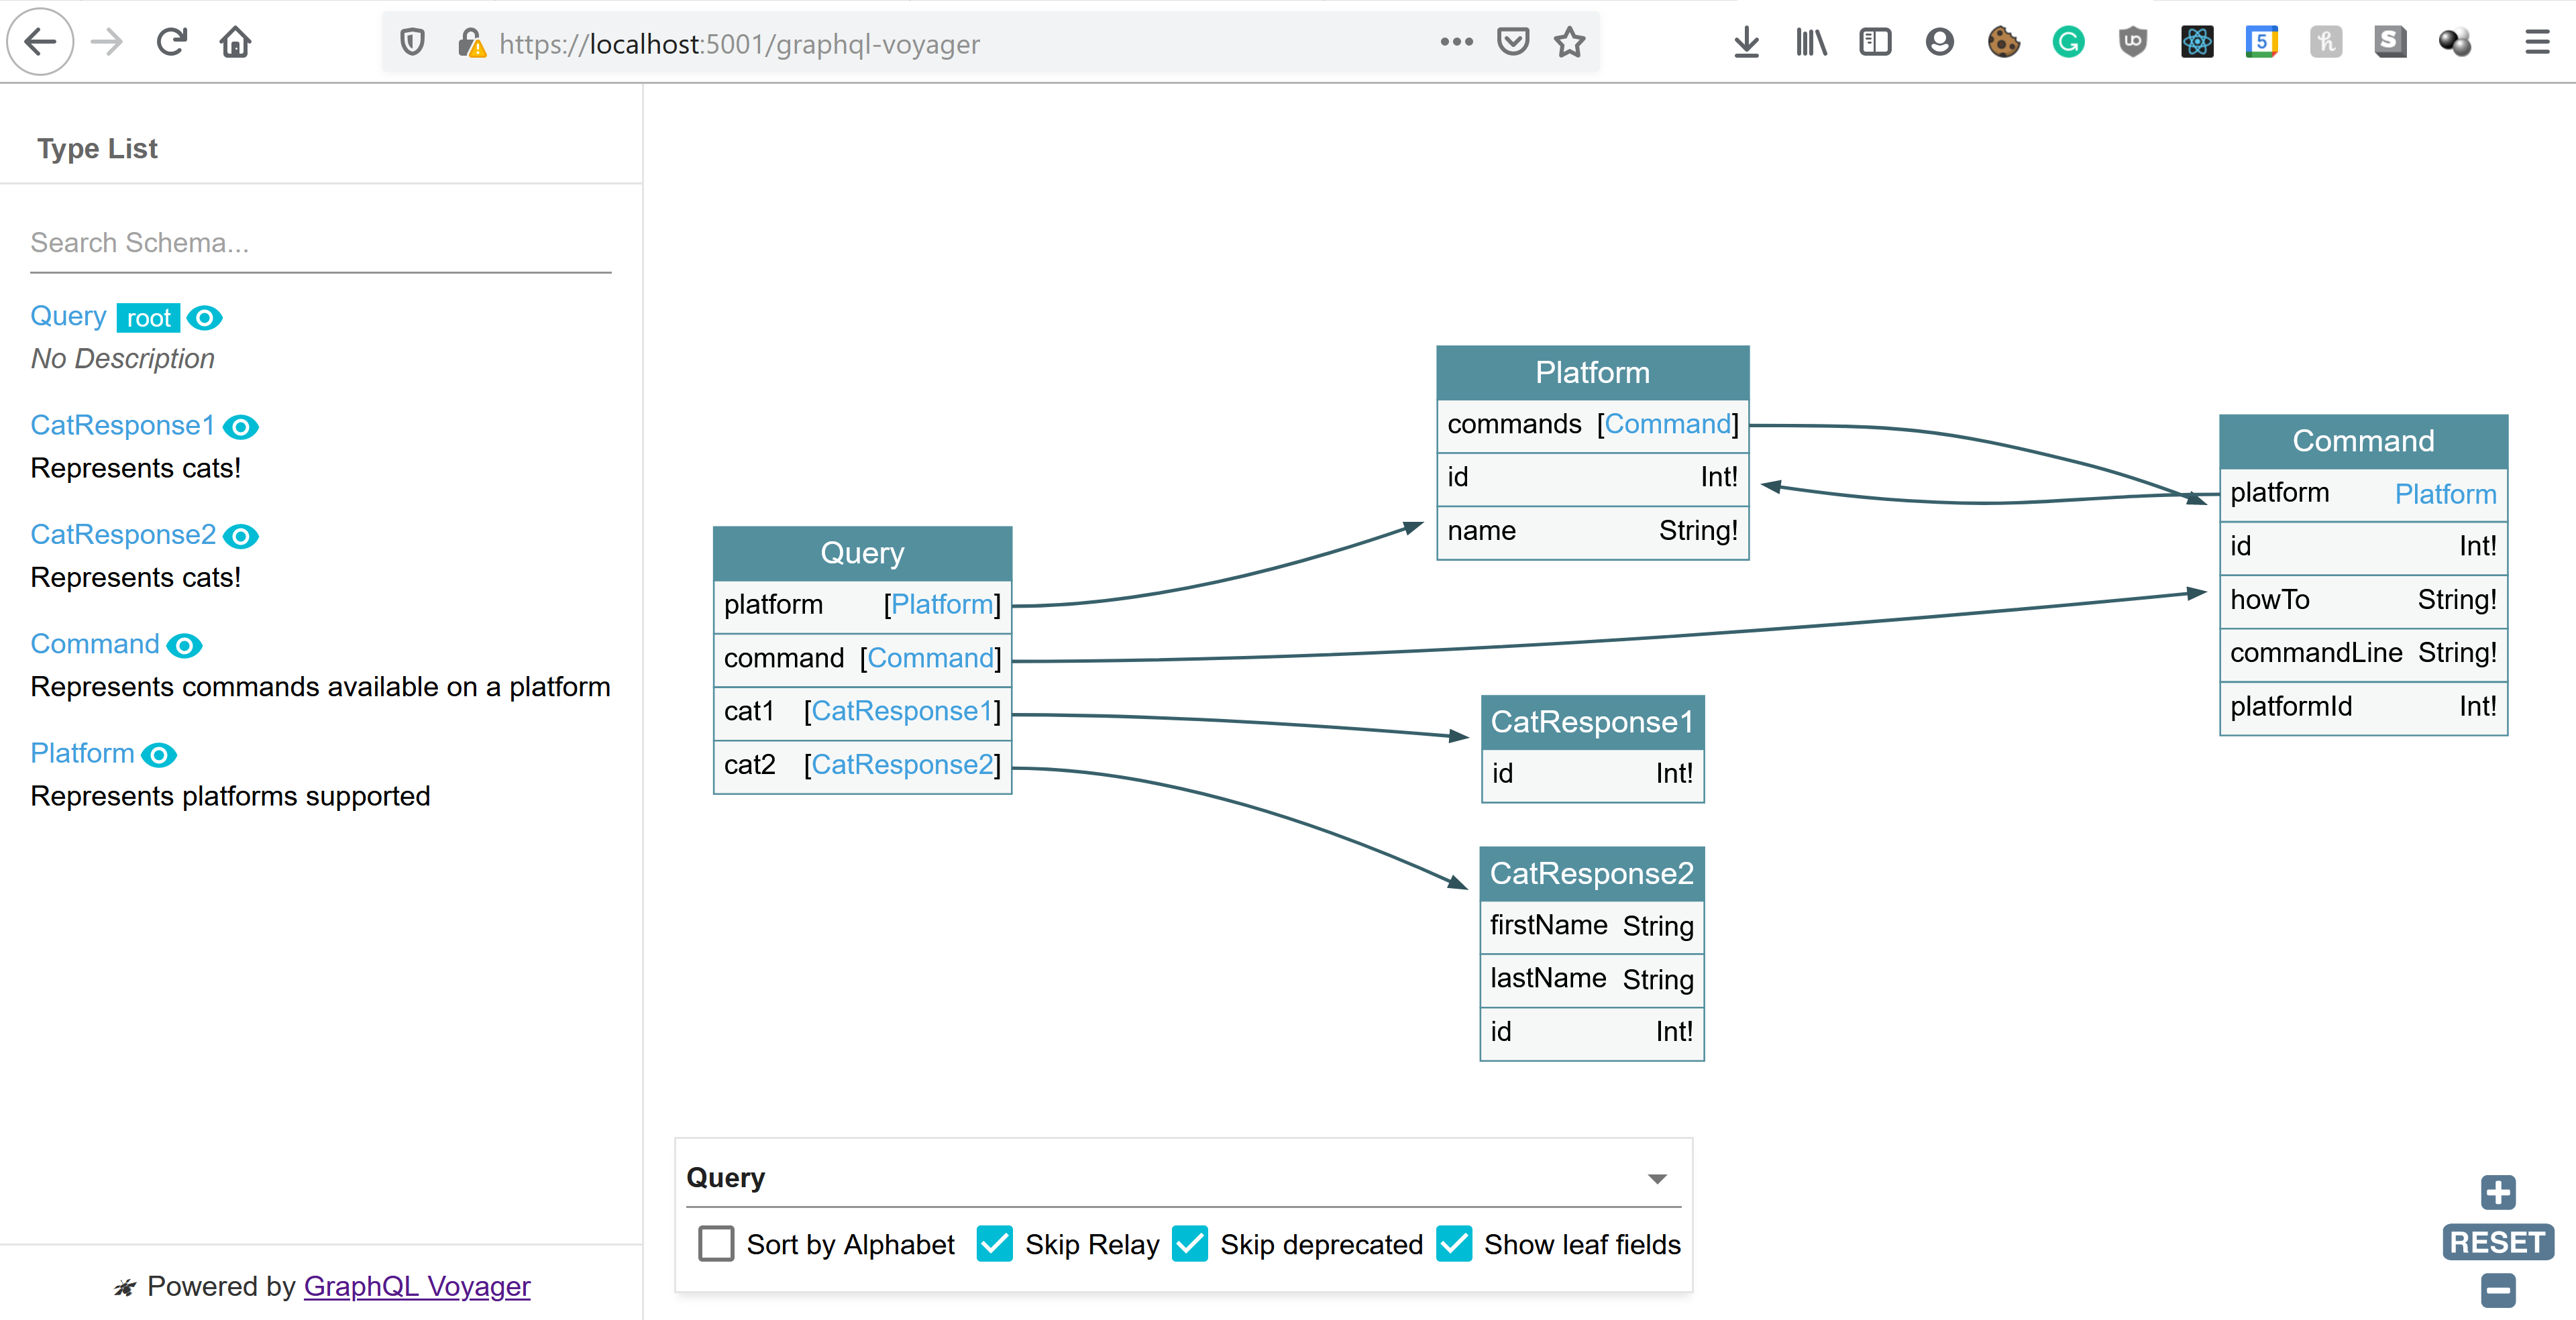\n\n# What they forgot to mention\n\nUp till now what we have discussed fits the 80% CRUD usecase, however as we know API's that are in the wild also deal with a range of other responsibilities. The remainder of this article is to shed some light on how this is done.\n\n## How to version your API\n\nThe typical versioning strategy for REST is to version using URLs `https://api.cats.com/v1` (when developers can be bothered). However with GraphQL as your only ever posting to a single endpoint that strategy is no longer a prefered solution.\n\n\u003eWhile there's nothing that prevents a GraphQL service from being versioned just like any other REST API, GraphQL takes a strong opinion on avoiding versioning by providing the tools for the continuous evolution of a GraphQL schema.\n*[Taken from GraphQL Best Practices](https://graphql.org/learn/best-practices/)*\n\nBefore we begin on how to version, there are some distinct points to note.\n\nNon-breaking changes can continue as they would with REST, adding properties to entities (as you would with response models in REST), continues to be a way to evolve your API. Similarly adding new query types to your GraphQL server is also deemed as a non-breaking change, and is equivalent to adding new endpoints in REST.\n\nGraphQL aids in breaking changes caused due to nullability as **everything** unless specified is treated as nullable. This leads to upfront resilience on the front end to missing data, the `id: Int!` in the example below cannot be null.\n\n```\ntype Cats {\n id: Int!\n name: String\n}\n```\n\nEventually, we do still hit circumstances where a breaking change is needed. In these situations we have two strategies. The first as [Chilli Cream Docs](https://chillicream.com/docs/hotchocolate/defining-a-schema/versioning/) specify is to add deprecated flags to old properties and begin to shift usage to new versions.\n\n```\n\npublic class CatsType : ObjectType\u003cCats\u003e\n{\n protected override void Configure(IObjectTypeDescriptor\u003cCats\u003e descriptor)\n {\n descriptor.Description(\"Represents commands available on a platform\");\n\n descriptor.Field(x =\u003e x.Name).Deprecated(\"This is no longer used, use FirstName and LastName\");\n descriptor.Field(x =\u003e x.FirstName);\n descriptor.Field(x =\u003e x.LastName);\n }\n}\n```\n\nFor client developers, this then creates warnings when using a deprecated property.\n\n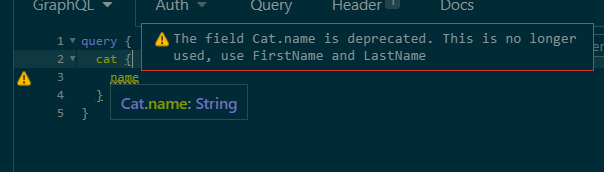\n\nWhilst this approach works over time it could create a lot of noise if you have many deprecated properties, an alternative approach is to split the entity entirely, use different classes between the two versions. Here is an example, we start by creating two query types,\n\n```\npublic record CatResponse1(int Id, string Name);\npublic record CatResponse2(int Id, string FirstName, string LastName);\n```\n\nBoth of these would contain their own Code First type files\n\n```\npublic class CatType1 : ObjectType\u003cCatResponse1\u003e\n{\n protected override void Configure(IObjectTypeDescriptor\u003cCatResponse1\u003e descriptor)\n {\n descriptor.Description(\"Represents cats!\");\n\n descriptor.Field(x =\u003e x.Name)\n .Description(\"Represents the name of the cat\")\n .Deprecated(\"This is no longer used, use FirstName and LastName from Cat2\");\n }\n}\n\npublic class CatType2 : ObjectType\u003cCatResponse2\u003e\n{\n protected override void Configure(IObjectTypeDescriptor\u003cCatResponse2\u003e descriptor)\n {\n descriptor.Description(\"Represents cats!\");\n\n descriptor.Field(x =\u003e x.FirstName)\n .Description(\"Represents the name firstname of the cat\");\n descriptor.Field(x =\u003e x.LastName)\n .Description(\"Represents the name lastname of the cat\");\n }\n}\n```\n\nThe final piece of code is to use the intermediary response models. Under the hood we are still using the same EF entity.\n\n```\npublic class Query\n{\n [UseDbContext(typeof(AppDbContext))]\n [UseFiltering]\n [UseSorting]\n public IQueryable\u003cCatResponse1\u003e GetCat1([ScopedService] AppDbContext context)\n {\n var cats = context.Cats;\n\n return cats.Select(x =\u003e new CatResponse1(x.Id, x.Name));\n }\n\n [UseDbContext(typeof(AppDbContext))]\n [UseFiltering]\n [UseSorting]\n public IQueryable\u003cCatResponse2\u003e GetCat2([ScopedService] AppDbContext context)\n {\n var cats = context.Cats;\n\n return cats.Select(x =\u003e new CatResponse2(x.Id, x.FirstName, x.LastName));\n }\n}\n\n```\n\nThese changes now allow us to split our models, the two can be queried independently.\n\n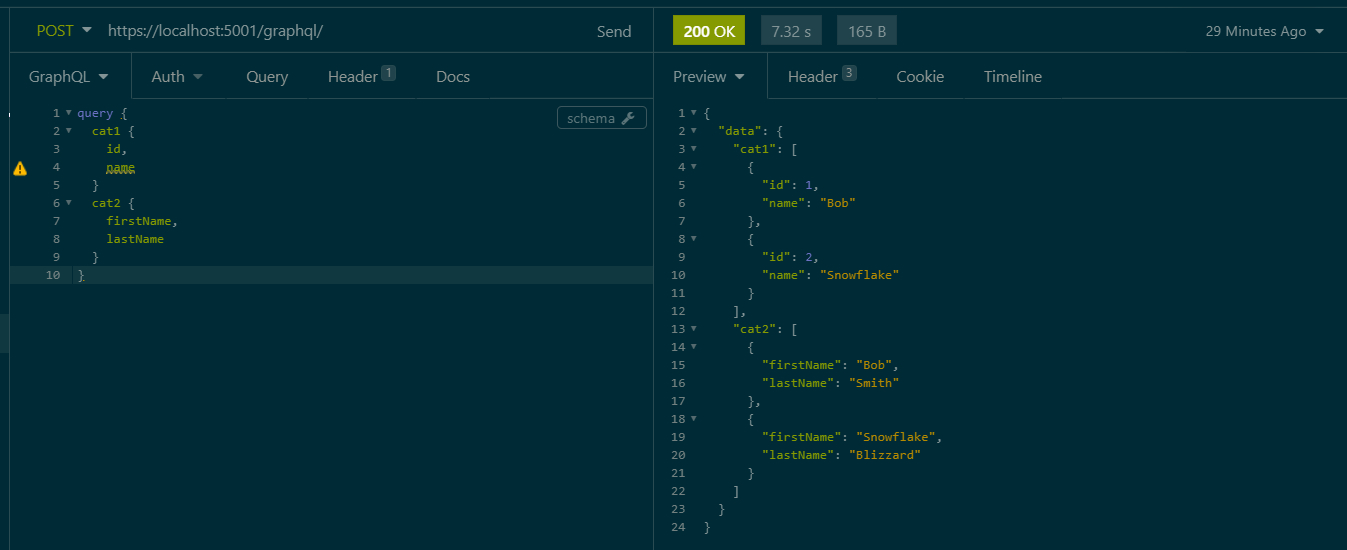\n\n## How to do Authentication\n\nSince Hot Chocolate works on top of ASP.NET we can leverage on all the traditional Authentication pipelines we use for REST, nothing changes! To demonstrate this I'm going to extend the base implementation with a basic authentication mechanism using a header value `x-api-key` and a key defined in the `appsettings.json`.\n\n### Adding key-based authentication\n\nTo begin let's first add basic app settings to hold our authentication key (this represents the key the client will pass to the server to authentication their request), and create a class to deserialise into using `IOptions` interface.\n\n```\n//Code goes into appsettings.json\n\"AuthenticationSettings\": {\n \"AuthenticationToken\": \"secret123\"\n}\n\n//New class to serialize into\npublic class AuthenticationSettings\n{\n public string AuthenticationToken { get; set; }\n}\n\n//Register the configuration in Startup.cs \u003e ConfigureServices function\nservices.Configure\u003cAuthenticationSettings\u003e(Configuration.GetSection(nameof(AuthenticationSettings)));\n```\n\nNext we will create authentication scheme options as follows,\n\n```\npublic class ApiKeyAuthenticationOptions : AuthenticationSchemeOptions\n{\n public const string DefaultScheme = \"KeyBasedScheme\";\n public string Scheme =\u003e DefaultScheme;\n public string AuthenticationType = DefaultScheme;\n}\n```\n\nThe next part is where the crux of the code is, the `AuthenticationHandler` is what determines whether the request was correctly authenticated. On a successful attempt, it populates the ClaimsPrinciple.\n\n```\npublic class ApiKeyAuthenticationHandler : AuthenticationHandler\u003cApiKeyAuthenticationOptions\u003e\n{\n private const string ProblemDetailsContentType = \"application/problem+json\";\n private const string AuthenticationHeaderName = \"x-api-key\";\n private readonly AuthenticationSettings AuthenticationSettings;\n\n public ApiKeyAuthenticationHandler(\n IOptionsMonitor\u003cApiKeyAuthenticationOptions\u003e options,\n ILoggerFactory logger,\n UrlEncoder encoder,\n ISystemClock clock,\n IOptions\u003cAuthenticationSettings\u003e authenticationSettings) : base(options, logger, encoder, clock)\n {\n AuthenticationSettings = authenticationSettings.Value;\n }\n\n protected override Task\u003cAuthenticateResult\u003e HandleAuthenticateAsync()\n {\n if (!Request.Headers.TryGetValue(AuthenticationHeaderName, out var apiKeyHeaderValues))\n {\n return Task.FromResult(AuthenticateResult.NoResult());\n }\n\n var providedApiKey = apiKeyHeaderValues.FirstOrDefault();\n\n if (apiKeyHeaderValues.Count == 0 || string.IsNullOrWhiteSpace(providedApiKey))\n {\n return Task.FromResult(AuthenticateResult.NoResult());\n }\n\n var isMatchingKey = providedApiKey.Equals(AuthenticationSettings.AuthenticationToken);\n\n if (isMatchingKey)\n {\n var claims = new List\u003cClaim\u003e {\n //Add your claims here\n };\n var identity = new ClaimsIdentity(claims, Options.AuthenticationType);\n var identities = new List\u003cClaimsIdentity\u003e { identity };\n var principal = new ClaimsPrincipal(identities);\n var ticket = new AuthenticationTicket(principal, Options.Scheme);\n\n return Task.FromResult(AuthenticateResult.Success(ticket));\n }\n\n return Task.FromResult(AuthenticateResult.Fail(\"Invalid API Key provided.\"));\n }\n\n protected override async Task HandleChallengeAsync(AuthenticationProperties properties)\n {\n Response.StatusCode = (int)HttpStatusCode.Unauthorized;\n Response.ContentType = ProblemDetailsContentType;\n var problemDetails = new { Information = \"Unauthorized\" };\n\n await Response.WriteAsync(JsonSerializer.Serialize(problemDetails));\n }\n\n protected override async Task HandleForbiddenAsync(AuthenticationProperties properties)\n {\n Response.StatusCode = (int)HttpStatusCode.Forbidden;\n Response.ContentType = ProblemDetailsContentType;\n var problemDetails = new { Information = \"Forbidden\" };\n\n await Response.WriteAsync(JsonSerializer.Serialize(problemDetails));\n }\n}\n```\n\nThe final part need is to register this in our startup class, below are the two bits of code needed. Once we have this in place the `[Authorize]` tag will work for regular REST requests, any request sent without an `x-api-key` value of 'secret123' will be rejected. The next step is to see how we replicate this in GraphQL.\n\n```\npublic void ConfigureServices(IServiceCollection services)\n{\n ...\n services.AddAuthentication(options =\u003e\n {\n options.DefaultAuthenticateScheme = ApiKeyAuthenticationOptions.DefaultScheme;\n options.DefaultChallengeScheme = ApiKeyAuthenticationOptions.DefaultScheme;\n }).AddScheme\u003cApiKeyAuthenticationOptions, ApiKeyAuthenticationHandler\u003e(\n ApiKeyAuthenticationOptions.DefaultScheme,\n null\n );\n services.AddAuthorization();\n}\n\npublic void Configure(IApplicationBuilder app, IWebHostEnvironment env)\n{\n ...\n app.UseAuthentication();\n app.UseAuthorization();\n}\n```\n\n### Authenticating a GraphQl Entity\n\nAuthentication in GraphQL works by authorizing individual models, to begin we first need to add the HotChocolate Authorization package `HotChocolate.AspNetCore.Authorization` and enable it in the `Startup.cs` class, its a one-liner,\n\n```\nservices.AddAuthorizeDirectiveType()\n```\n\nNow similar to the `[Authorize]` tag we use for REST we can enable Authorization in for our individual ObjectTypes by adding a simple `descriptor.Authorize()` call.\n\n```\npublic class CatType1 : ObjectType\u003cCatResponse1\u003e\n{\n protected override void Configure(IObjectTypeDescriptor\u003cCatResponse1\u003e descriptor)\n {\n descriptor.Authorize();\n ...\n }\n}\n```\n\nOnce this has been added making calls without the header will return an unauthenticated result that looks like this,\n\n```\n{\n \"errors\": [\n {\n \"message\": \"The current user is not authorized to access this resource.\",\n \"locations\": [\n {\n \"line\": 3,\n \"column\": 5\n }\n ],\n \"path\": [\n \"cat1\",\n 1,\n \"id\"\n ],\n \"extensions\": {\n \"code\": \"AUTH_NOT_AUTHENTICATED\"\n }\n },\n ...\n```\n\n## How to do Authorisation\n\nExtending the code to work with Authorization is also a quick change, in this example we will authorize based on the user's role. To begin we will extend our `ApiKeyAuthenticationHandler` to populate a claim when the authentication key has matched,\n\n```\nvar claims = new List\u003cClaim\u003e {\n new Claim(\"http://schemas.microsoft.com/ws/2008/06/identity/claims/role\", \"Admin\")\n};\n```\n\nNext we can pass a list of accepted roles into the ObjectType `CatType1`, in this example I have intentionally added a role that doesn't exist.\n\n```\nvar roles = new string[] { \"NotAdmin\" };\ndescriptor.Authorize(roles);\n```\n\nMaking a request now will spark an unauthorized error,\n\n```\n{\n \"errors\": [\n {\n \"message\": \"The current user is not authorized to access this resource.\",\n \"locations\": [\n {\n \"line\": 3,\n \"column\": 5\n }\n ],\n \"path\": [\n \"cat1\",\n 1,\n \"id\"\n ],\n \"extensions\": {\n \"code\": \"AUTH_NOT_AUTHORIZED\"\n }\n },\n ...\n```\n\n## How does logging work\n\nRegarding logging Chilli Cream has created a guide to adding an `AddDiagnosticEventListener` that's able to trace incoming requests, check out the article [Log Your Queries While Building a GraphQL Server](https://chillicream.com/blog/2021/01/10/hot-chocolate-logging). It would be interesting to create an example that's `OpenTelemetry` compliant... perhaps that's one for another day (this articles getting a bit long 😩).\n\n# Conclusion\n\nThat's it folks! We've seen that the Hot Chocolate implementation nicely fulfils not just the 80% crud use case but can also deal with the other responsibilities we typically see with our REST services in the wild."])</script><script>self.__next_f.push([1,"1b:T3753,"])</script><script>self.__next_f.push([1,"Recently I started working on a project that was created from the **ASP.NET SPA template for react**. It's one of the templates you get by default with dotnet and can be created by running `dotnet new react`.\n\nThe template creates a dotnet webapp which is designed to be an API backend and links it with a react project to power the UI. When running the project from dotnet, static files are built from the react project and served up.\n\nIn terms of running the application with different environments, the dotnet perspective is fairly straight forward as we can simply use the environment variable `ASPNETCORE_ENVIRONMENT`. But the question is how do we pass this variable to the SPA so that we can shift between different environments?\n\nHaving trawled the internet I didn't see any examples, so I decided to create my own!\n\n# Understanding the ASP.NET spa template 🔍\nLet's begin by creating a boilerplate solution with `dotnet new react`. Once the solution is created we end up with a backend API with a `WeatherForecastController`, and a front end app located in the `ClientApp` folder.\n\n\n\nSince this is an integrated spa, from the root of the project we are able to `dotnet run` and spin up not only the dotnet project but also the react spa.\n\n## Client App\n\nThe client app itself is in a completely segregated app, there's nothing special added here to make it all connect up. All your standard commands to `npm install/build` are all available to you. In fact, the template has been build based on the implementation of `create-react-app`.\n\nYou can also start up the project from here with `npm run start` command which will spin up a development server **independent of your backend code**. The execution and configuration is handled for us using `react-scripts` which was designed to help set up react projects without stress, featuring things like hot module reloading, deployment builds etc ... all standard-issue so far. So you get these npm scripts setup for you,\n\n```\n \"scripts\": {\n \"start\": \"rimraf ./build \u0026\u0026 react-scripts start\",\n \"build\": \"react-scripts build\",\n \"test\": \"cross-env CI=true react-scripts test --env=jsdom\",\n \"eject\": \"react-scripts eject\",\n \"lint\": \"eslint ./src/\"\n },\n```\n\n## Startup Class\n\nThe glue that connects the backend to the frontend can be found in the `Startup.cs` class. Working from top down the first code block of interest is within the *ConfigureServices* function,\n\n```\nservices.AddSpaStaticFiles(configuration =\u003e\n{\n configuration.RootPath = \"ClientApp/build\";\n});\n```\n\nThis block essentially tells your dotnet app where to find the static resources (production builds) of your spa within its bin folder. So running the command `dotnet publish --configuration Release` creates a **ClientApp/Build** folder with a production optimised (ie npm run build) version of our SPA, the root path simply points to this.\n\n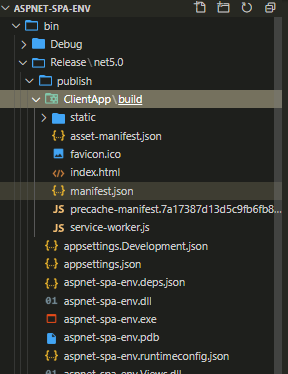\n\nThe next block to notice is in the *Configure* function,\n\n```\napp.UseEndpoints(endpoints =\u003e\n{\n endpoints.MapControllerRoute(\n name: \"default\",\n pattern: \"{controller}/{action=Index}/{id?}\");\n});\n\napp.UseSpa(spa =\u003e\n{\n spa.Options.SourcePath = \"ClientApp\";\n\n if (env.IsDevelopment())\n {\n spa.UseReactDevelopmentServer(npmScript: \"start\");\n }\n});\n```\n\nThere are two things that are happening here, the first is that we have dotnet server side routing connected up (with app.UseEndpoints() middleware), this means that upon receiving a HTTP request server-side routing will always take priority over client-side routing. If server-side routes fall through without matching an endpoint, we use the app.UseSpa() middleware to redirect all requests to the default page (which is your index.html file triggering the spa to load).\n\nThe next point is that from here we can also configure the location of our client-side source code, and the command we need to use to run our react spa as a development server when debugging.\n\n## MSBuild \u0026 Running NPM Commands\n\nThe remaining magic is all located in the .csproj file we got 2 core components here the first is the Debug target,\n\n```\n\u003cTarget Name=\"DebugEnsureNodeEnv\" BeforeTargets=\"Build\" Condition=\" '$(Configuration)' == 'Debug' And !Exists('$(SpaRoot)node_modules') \"\u003e\n \u003c!-- Ensure Node.js is installed --\u003e\n \u003cExec Command=\"node --version\" ContinueOnError=\"true\"\u003e\n \u003cOutput TaskParameter=\"ExitCode\" PropertyName=\"ErrorCode\" /\u003e\n \u003c/Exec\u003e\n \u003cError Condition=\"'$(ErrorCode)' != '0'\" Text=\"Node.js is required to build and run this project. To continue, please install Node.js from https://nodejs.org/, and then restart your command prompt or IDE.\" /\u003e\n \u003cMessage Importance=\"high\" Text=\"Restoring dependencies using 'npm'. This may take several minutes...\" /\u003e\n \u003cExec WorkingDirectory=\"$(SpaRoot)\" Command=\"npm install\" /\u003e\n\u003c/Target\u003e\n```\n\nThis chunky block of code runs an `npm install` command before building your dotnet application. It also features a nice check to ensure you got Node.js installed (I guess for the backend people 😁). It does this with the `\u003cExec WorkingDirectory=\"$(SpaRoot)\" Command=\"npm install\" /\u003e` command runner (note SpaRoot is defined a the top as a static property pointing to **ClientApp\\**).\n\nThe second part is the publish target,\n\n```\n\u003cTarget Name=\"PublishRunWebpack\" AfterTargets=\"ComputeFilesToPublish\"\u003e\n \u003c!-- As part of publishing, ensure the JS resources are freshly built in production mode --\u003e\n \u003cExec WorkingDirectory=\"$(SpaRoot)\" Command=\"npm install\" /\u003e\n \u003cExec WorkingDirectory=\"$(SpaRoot)\" Command=\"npm run build\" /\u003e\n\n \u003c!-- Include the newly-built files in the publish output --\u003e\n \u003cItemGroup\u003e\n \u003cDistFiles Include=\"$(SpaRoot)build\\**\" /\u003e\n \u003cResolvedFileToPublish Include=\"@(DistFiles-\u003e'%(FullPath)')\" Exclude=\"@(ResolvedFileToPublish)\"\u003e\n \u003cRelativePath\u003e%(DistFiles.Identity)\u003c/RelativePath\u003e\n \u003cCopyToPublishDirectory\u003ePreserveNewest\u003c/CopyToPublishDirectory\u003e\n \u003cExcludeFromSingleFile\u003etrue\u003c/ExcludeFromSingleFile\u003e\n \u003c/ResolvedFileToPublish\u003e\n \u003c/ItemGroup\u003e\n\u003c/Target\u003e\n```\n\nAgain fairly similar concept running a publish first installs dependencies then builds the project. The build artefacts get created in the **ClientApp\\build** folder. The item group block then ensures the build assets are included in your **bin\\ClientApp\\build** folder.\n\n## Summary\n\nSo to summarise, when running in debug mode\n\n1. We npm install dependencies\n2. Build and run the dotnet app\n3. Run an npm development server\n4. Begin routing all calls to the backend, and where it fails to the default client page.\n\nIn the case of a published application\n\n1. We create a published version of the dotnet application\n2. We npm install dependencies\n3. We create a production build of the spa in the folder **ClientApp\\build**\n4. Static files from the spa are included in the output\n5. Running the application now has a packaged version of the spa its static files are served up upon running the backend. \n\nThis is all well and great so far... but the react app gets pre built.. what if we need to run it as part of a different environment? Currently, it's all running off a single `.env` file!\n\n# Adding environments 🆕\n\nBelow is my solution for getting environments running across the stack, it also conforms to the dev-ops ethos of,\n\n\u003e Build once and deploy many times.\n\n## Install the dependencies\n\nTo being adding environments we first need to ensure our npm app can support it. For this, we will use the well know [env-cmd](https://www.npmjs.com/package/env-cmd). \n\nWe will also be needing something to manipulate the build folders generated by react-scripts. Since all operating systems are equipped with CLI commands to rename/remove files we don't need anything special to do this. However, because these commands differ from one operating system to the next, it's always a good practice to use something like [shx](https://www.npmjs.com/package/shx) to ensure it works cross-platform.\n\nSo let's start with running the install command in the ClientApp folder,\n\n`npm install env-cmd shx --save-dev`\n\n## Add your environment files\n\nNext let's start creating some environment files, the file structure should look something like this, with the .env file containing settings shared across all the environments:\n\n- .env\n- .env.staging\n- .env.production\n\nAny key on these files need to be prefixed with `REACT_APP_` this is a safety feature build in,\n\n\u003e You must create custom environment variables beginning with REACT_APP_. Any other variables except NODE_ENV will be ignored to avoid accidentally exposing a private key on the machine that could have the same name.\n\nFor now, let's add just add an environment variable that tells us which environment we are in. Do this for both production and staging .env files.\n\n```\nREACT_APP_ENV='production'\n```\n\nTo show our environment on the page lets also create a *config.js* file, that accesses the environment variable.\n\n```\nexport const config = {\n ENVIRONMENT: process.env.REACT_APP_ENV \n};\n```\n\nAnd finally output it to the page,\n\n```\nimport React, { Component } from 'react';\nimport { Container } from 'reactstrap';\nimport { NavMenu } from './NavMenu';\nimport { config } from '../config';\n\nexport class Layout extends Component {\n static displayName = Layout.name;\n\n render () {\n return (\n \u003cdiv\u003e\n {config.ENVIRONMENT}\n \u003cNavMenu /\u003e\n \u003cContainer\u003e\n {this.props.children}\n \u003c/Container\u003e\n \u003c/div\u003e\n );\n }\n}\n\n```\n\n## Add your build scripts\n\nBuild scripts are now needed to trigger the environments, we need to make the following amends to the npm scripts section,\n\n```\n \"scripts\": {\n \"build:staging\": \"env-cmd -f .env.staging react-scripts build \u0026\u0026 shx rm -rf staging \u0026\u0026 shx cp -r build staging\",\n \"build:production\": \"env-cmd -f .env.production react-scripts build \u0026\u0026 shx rm -rf production \u0026\u0026 shx cp -r build production\",\n \"start:staging\": \"rimraf ./build \u0026\u0026 env-cmd -f .env.staging react-scripts start\",\n \"start:production\": \"rimraf ./build \u0026\u0026 env-cmd -f .env.production react-scripts start\",\n }\n```\n\nThe scripts prefixed with *build* are using env-cmd with its respective environment file to create a production build of the app. The shx part is then firstly removing the folder staging/production then copying the *build* files react-script creates into an environment specific folder.\n\nSimilarly the scripts prefixed with *start* run the app using a certain environment. Note if your trying to run this from the dotnet app, you will need to change the Startup.cs \u003e UseReactDevelopmentServer function to,\n\n```\nspa.UseReactDevelopmentServer(npmScript: \"start:production\");\n```\n\nNow that this is set up, running the app should show the environment variables.\n\n## Modifying your .csproj\n\nThe next step is to get this working with `dotnet publish`! To do this we need to modify the **PublishRunWebpack** target in the .csproj file to,\n\n```\n\u003cTarget Name=\"PublishRunWebpack\" AfterTargets=\"ComputeFilesToPublish\"\u003e\n \u003cExec WorkingDirectory=\"$(SpaRoot)\" Command=\"npm install\"/\u003e\n\n \u003cMessage Importance=\"high\" Text=\"Started building staging version of the spa ...\" Condition=\" '$(Configuration)' == 'Release' \"/\u003e\n \u003cExec WorkingDirectory=\"$(SpaRoot)\" Command=\"npm run build:staging\" Condition=\" '$(Configuration)' == 'Release' \"/\u003e\n \u003cMessage Importance=\"high\" Text=\"Started building production version of the spa ...\" Condition=\" '$(Configuration)' == 'Release' \"/\u003e\n \u003cExec WorkingDirectory=\"$(SpaRoot)\" Command=\"npm run build:production\" Condition=\" '$(Configuration)' == 'Release' \"/\u003e\n\n \u003cExec WorkingDirectory=\"$(SpaRoot)\" Command=\"npm run build\" Condition=\" '$(Configuration)' == 'Debug' \" /\u003e\n \u003cItemGroup\u003e\n \u003cDistFiles Include=\"$(SpaRoot)build\\**\" Condition=\" '$(Configuration)' == 'Debug' \" /\u003e\n \u003cDistFiles Include=\"$(SpaRoot)staging\\**\" Condition=\" '$(Configuration)' == 'Release' \" /\u003e\n \u003cDistFiles Include=\"$(SpaRoot)production\\**\" Condition=\" '$(Configuration)' == 'Release' \" /\u003e\n \u003cResolvedFileToPublish Include=\"@(DistFiles-\u003e'%(FullPath)')\" Exclude=\"@(ResolvedFileToPublish)\"\u003e\n \u003cRelativePath\u003e%(DistFiles.Identity)\u003c/RelativePath\u003e\n \u003cCopyToPublishDirectory\u003ePreserveNewest\u003c/CopyToPublishDirectory\u003e\n \u003cExcludeFromSingleFile\u003etrue\u003c/ExcludeFromSingleFile\u003e\n \u003c/ResolvedFileToPublish\u003e\n \u003c/ItemGroup\u003e\n\u003c/Target\u003e\n```\n\nTo summarise what's happening here, when building in debug mode we are continuing to use the `npm run build` command to create a production build and the spa files get stored in the build folder `$(SpaRoot)build\\**`. The output looks like this:\n\n- bin\n - Release\n - publish\n - ClientApp\n - build\n -spa files go here! \n\nHowever in release mode we now create two versions of the spa (one for each environment) using out new npm environment builds, `npm run build:staging` and `npm run build:production`. The builds also get moved to their corresponding folders.\n\n- bin\n - Release\n - publish\n - ClientApp\n - staging\n - staging spa files go here!\n - production\n - production spa files go here!\n\nOnce thats setup you can test it out with `dotnet publish --configuration Release`, the build output should look something like this,\n\n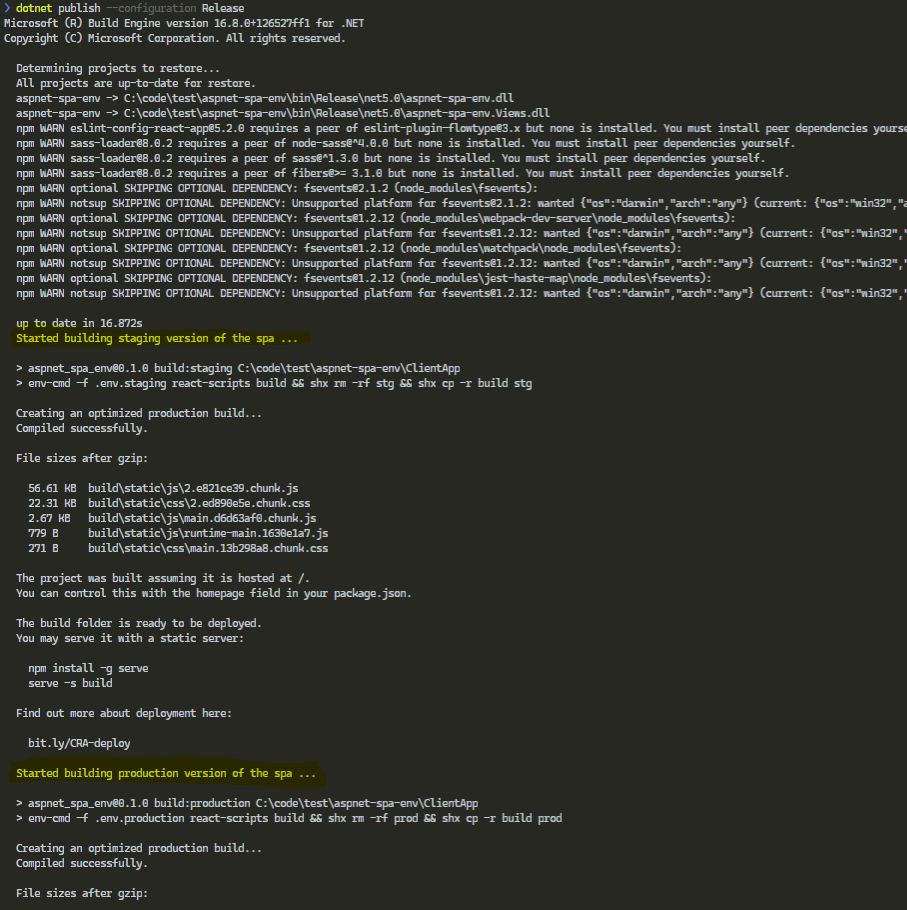\n\n## Modifying your startup.cs\n\nThe final step is to modify your Startup.cs file to switch out which spa to use based on the environment variable,\n\n```\nservices.AddSpaStaticFiles(configuration =\u003e configuration.RootPath = WebHostEnvironment.IsDevelopment()\n ? \"ClientApp/build\"\n : $\"ClientApp/{WebHostEnvironment.EnvironmentName}\");\n```\n\n# How to deploy 🚀\n\nDeployment is now a simple case of running `dotnet publish --configuration Release`, once the published artefacts are deployed the app can now take its environment and run the appropriate spa. Build once and deploy anywhere!\n"])</script><script>self.__next_f.push([1,"1c:T3635,"])</script><script>self.__next_f.push([1,"# Why I started building a CLI\n\nAs a .NET engineer, I work with Azure storage a lot, its versatility, ease of use, as well as cost makes it a common staple amongst developers. Its application is also widespread from leveraging queues on a basic console app to storing uploaded images from a web application.\n\nTypically as an engineer, I have always interfaced with azure storage using [Azure Storage Manager](https://azure.microsoft.com/en-gb/features/storage-explorer/#features), but as a UI tool, its always been two clicks away from the information I need or was just slow to navigate. \n\nSo I ended up taking my destiny into my own hands and built a CLI tool called [Az-Lazy](https://github.com/faesel/az-lazy).\n\n# Packages used when I started\n\nSo as with all projects, I started with a shopping list of packages I wanted to use/needed to make a great CLI experience. \n\n### 1. [CommandLineParser](https://github.com/commandlineparser/commandline)\n\nWhilst there are many command parsers on the market, I found this implementation particular nice to use. The end result allows you to to get a command pattern similar to most of the Microsoft dotnet tools, `azlazy connection --list`.\n\nDefining available commands is as easy as decorating a class with attributes, and the help options for each command is automatically generated for you (azlazy addcontainer --help).\n\n```\n[Verb(\"addcontainer\", HelpText = \"Creates a new storage container\")]\n public class AddContainerOptions : ICommandOptions\n {\n [Option('n', \"name\", Required = true, HelpText = \"Name of the container to create\")]\n public string Name { get; set; }\n\n [Option('p', \"publicAccess\", Required = false, HelpText = \"Options are None, Blob, BlobContainer\")]\n public string PublicAccess { get; set; }\n }\n```\n\n### 2. [Pastel](https://github.com/silkfire/Pastel)\n\nSplash of colour is always a sign of a great CLI experience and seeing red or green are key indicators of successful execution of a command. *Pastel* lets you do exactly that! its got a range of preset vibrant colours to choose from and allows you to easily RGB your console output. \n\nThe extension method style syntax is also great and doesn't distract you away from the code.\n\n```\n\"You successfully deleted all your data\".Pastel(Color.LightGreen);\n```\n\n### 3. [ConsoleTables](https://github.com/khalidabuhakmeh/ConsoleTables)\n\nAs Az-Lazy deals with table storeage, it was only a matter of time till i needed to output a table to the console. After a quick search on Nuget Gallery *ConsoleTables* showed up. With a simple minimilist table implementation it was quick to get setup,\n\n```\nvar table = new ConsoleTable(\"Id\", \"Blob\", \"Size\");\ntable.AddRow(1, \"dinopic1.jpg\", 300)\n .AddRow(2, \"dinopic2.jpb\", 450);\n\ntable.Write();\n```\n\nHowever, I later had to drop this package for something slightly more advanced (Alba.CsConsoleFormat) as I needed to word wrap large cells (particularly when displaying JSON snippets). \n\n### 4. [Alba.CsConsoleFormat](https://github.com/Athari/CsConsoleFormat)\n\nAs mentioned above *Alba.CsConsoleFormat* was a replacement package to render tables. With great options to not only style your table with colours but also specify word wrap options, it was a good choice for rendering large volumes of data.\n\nI did find its syntax a little verbose to work with,\n\n```\nvar headerThickness = new LineThickness(LineWidth.Double, LineWidth.Single);\n\nvar doc = new Document(\n new Span(\"Dinosaurs #\") { Color = Yellow }, Order.Id, \"\\n\",\n new Span(\"Type: \") { Color = Yellow }, Order.Customer.Name,\n new Grid {\n Color = Gray,\n Columns = { GridLength.Auto, GridLength.Star(1), GridLength.Auto },\n Children = {\n new Cell(\"Id\") { Stroke = headerThickness },\n new Cell(\"Name\") { Stroke = headerThickness },\n new Cell(\"Count\") { Stroke = headerThickness },\n Order.OrderItems.Select(item =\u003e new[] {\n new Cell(item.Id),\n new Cell(item.Name),\n new Cell(item.Count) { Align = Align.Right },\n })\n }\n }\n);\n\nConsoleRenderer.RenderDocument(doc);\n```\n\nBuy my oh my does it produce a great console table 👨🎨\n\n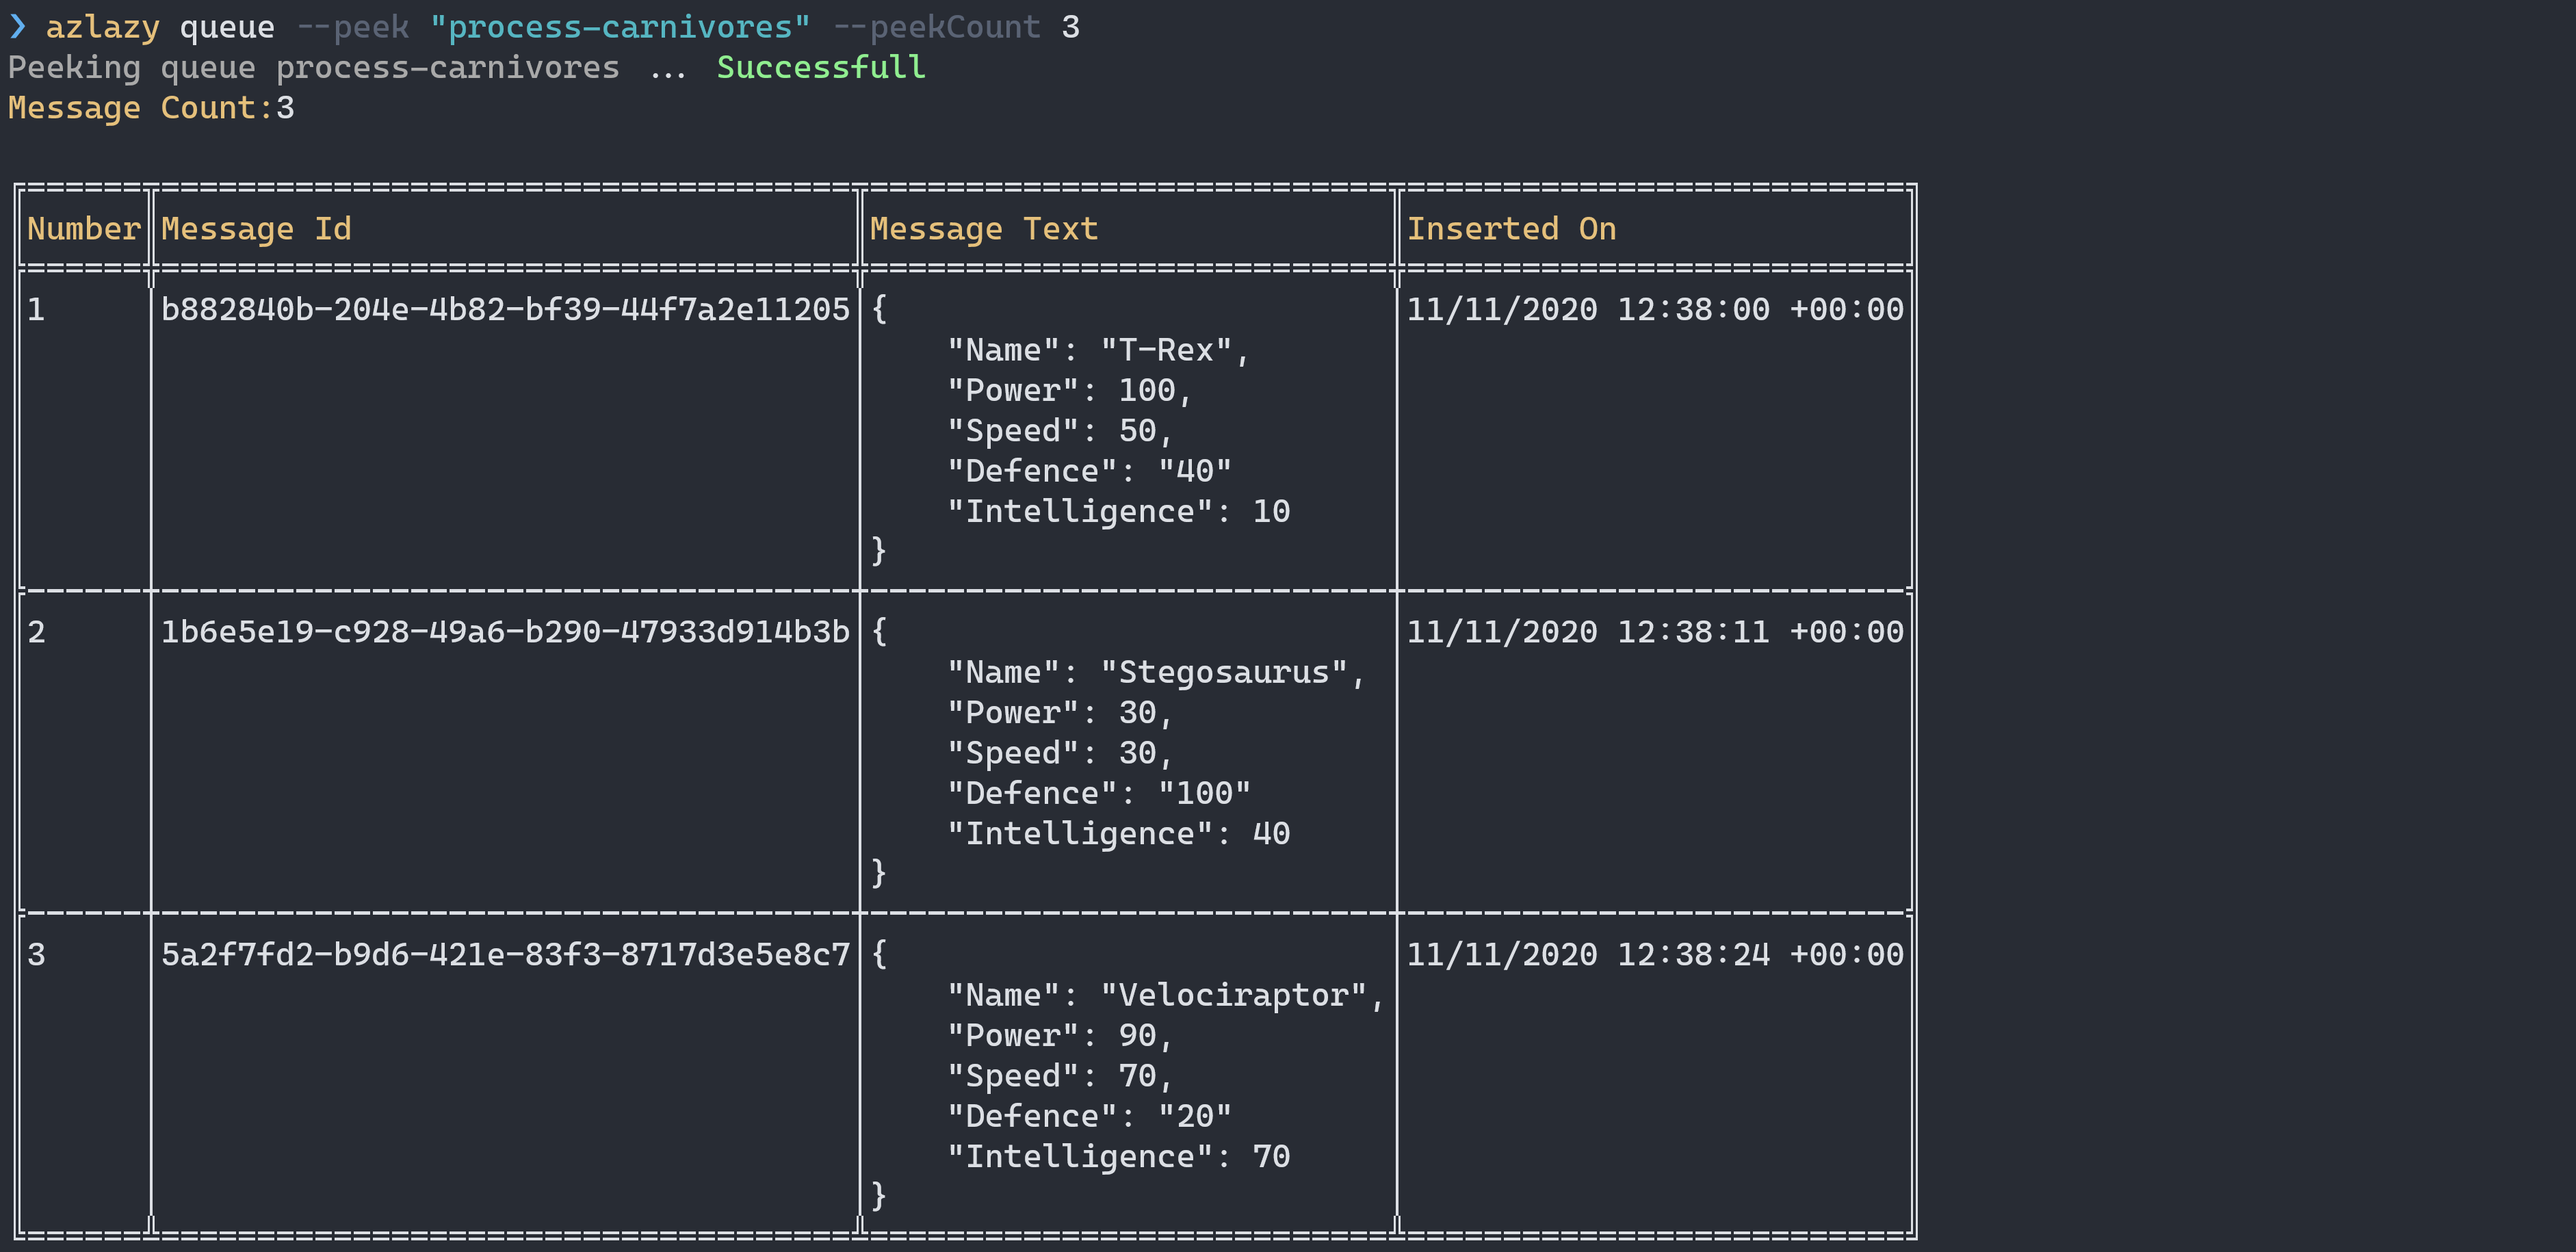\n\n### 5. [LiteDb](https://github.com/mbdavid/LiteDB)\n\nOne of the requirements of Az-Lazy was to store a list of connections to be reused at any time. Since CLI's don't have any state, I needed a lightweight storage mechanism that can easily ship with the tool.\n\nIn comes *LiteDb*! With its entity framework style CRUD syntax, I really felt at home with this framework,\n\n```\n// Create your POCO class\npublic class Dinosaur\n{\n public int Id { get; set; }\n public string Name { get; set; }\n public int Age { get; set; }\n}\n\nusing(var db = new LiteDatabase(@\"DinoDb.db\"))\n{\n var collection = db.GetCollection\u003cDinosaur\u003e(\"dinosaurs\");\n\n var dinosaur = new Dinosaur\n { \n Id = 1\n Name = \"T-Rex\", \n Age = 39\n };\n\n collection.Insert(dinosaur);\n\n var oldDinosaurs = col.Find(x =\u003e x.Age \u003e 50);\n}\n```\n\nSince *LiteDb* stores all its data into one file, from a tool perspective it ensures your not littering your client's computer with files.\n\n# Packages used now\n\n### 1. [CommandLineParser](https://github.com/commandlineparser/commandline)\n\nI've still continued to use *CommandLineParser* however it's starting to hit some limitations, namely nesting of commands. So something like `azlazy connection add --name \"test\" --connection \"connectionString\"` is not allowed.\n\nWhilst this package has been great to get me started, I might start looking at other options as Az-Lazy starts supporting more complex commands.\n\n### 2. [LiteDb](https://github.com/mbdavid/LiteDB)\n\nIt just works, still happy with this package. Really recommend it for CLI tools!\n\n### 2. [Spectre.Console](https://github.com/spectresystems/spectre.console)\n\n*Spectre.Console* was a big find for me, from the writer of [Cake](https://github.com/cake-build/cake) ([Patrik Svensson](https://github.com/patriksvensson)) it's a one-stop-shop for all your CLI needs. Just to name a few of the features,\n\n- Console Colours\n- Progress bars\n- Tables\n- Prompts\n- Spinners\n\nAfter discovering this package I ended up doing a NuGet cull 🪓 which is why this list now stops at 3 (That culls still in progress as I'm removing Pascal for Specters implementation).\n\nI won't go into all the code samples for this, but here are a few, beginning with progress indicators (also note the syntax to colour the output).\n\n```\nawait AnsiConsole.Progress()\n .StartAsync(async ctx =\u003e\n {\n // Define tasks\n var dinoTask = ctx.AddTask(\"[green]Uploading dinosaurs[/]\");\n\n while (!ctx.IsFinished)\n {\n // Simulate some work\n await Task.Delay(250);\n dinoTask.Increment(1.5);\n }\n });\n```\n\nCheck out how it looks in action, it's great for long-running tasks.\n\n\n\nTable's are also strightforward to create,\n\n```\n// Create a table\nvar table = new Table();\n\n// Add some columns\ntable.AddColumn(\"Foo\");\ntable.AddColumn(new TableColumn(\"Bar\").Centered());\n\n// Add some rows\ntable.AddRow(\"Baz\", \"[green]Qux[/]\");\ntable.AddRow(new Markup(\"[blue]Corgi[/]\"), new Panel(\"Waldo\"));\n\n// Render the table to the console\nAnsiConsole.Render(table);\n```\n\n# Other great code snippets\n\nThe only thing lacking for me in *Specter.Console* was display a tree structure which is useful for folder hierarchies, (there is an open issue here if you want to [show your interest](https://github.com/spectresystems/spectre.console/issues/144)) 🙏.\n\nTo fulfil this requirement, I found a great article by Andrew Lock which renders this structure, [Creating an ASCII-art tree in C#](https://andrewlock.net/creating-an-ascii-art-tree-in-csharp/). Here's what it looks like for me,\n\n\n\n# Why I chose .NET\n\nSo initially I was torn between Node JS and C#, there was an especially compelling article by [Twilio](https://www.twilio.com/blog/how-to-build-a-cli-with-node-js) outlining how you can create a great CLI experience that was winning me over. They also went so far as suggesting some interesting packages to make use of, here's a snippet of whats comparable with what I used for az-lazy.\n\n- [inquirer](http://npm.im/inquirer), [enquirer](http://npm.im/enquirer) or [prompts](https://npm.im/prompts) for complex input prompts\n- [chalk](http://npm.im/chalk) or [kleur](https://npm.im/kleur) for colored output\n- [ora](http://npm.im/ora) for beautiful spinners\n- [boxen](http://npm.im/boxen) for drawing boxes around your output\n- [stmux](http://npm.im/stmux) for a tmux like UI\n- [listr](http://npm.im/listr) for progress lists\n- [meow](http://npm.im/meow) or [arg](http://npm.im/arg) for basic argument parsing\n- [commander](http://npm.im/commander) and [yargs](https://www.npmjs.com/package/yargs) for complex argument parsing and subcommand support\n- [oclif](https://oclif.io/) a framework for building extensible CLIs by Heroku ([gluegun](https://infinitered.github.io/gluegun/#/) as an alternative)\n\nWhilst the NuGet ecosystem is not as diverse as npm, after discovering *Spectre.Console*, I found that its a one-stop-shop for most of those npm packages mentioned above.\n\nThe deciding factor for me however was down to the userbase I was targeting. I figured the majority of my userbase would be more familiar with dotnet than npm, and this solidified the decision. However, whatever platform you choose I believe theres enough packages available to make a great CLI experience.\n\n# How to create a .NET CLI tool\n\nThis guide shows you how to create a bare-bones .NET CLI tool.\n\n### 1. Creating a new project\n\nLet's start by creating a new directory and console application.\n\n1. `mkdir barebonescli`\n2. `cd barebonescli`\n3. `dotnet new console`\n4. The console app will already come with a standard-issue `Console.Writeline(\"Hello World\");` 😁\n\n### 2. Package as a tool\n\nWhat distinguishes your console app from a dotnet tool is purly the .csproj file. In particular the package as a tool option `\u003cPackAsTool\u003etrue\u003c/PackAsTool\u003e`, Id which needs to be unique across all the NuGet packages in the gallery `\u003cId\u003eazlazy\u003c/Id\u003e` and tool command name `\u003cToolCommandName\u003eazlazy\u003c/ToolCommandName\u003e`. The full .csproj should look like this,\n\n```\n\u003cProject Sdk=\"Microsoft.NET.Sdk\"\u003e\n \u003cPropertyGroup\u003e\n \u003cOutputType\u003eExe\u003c/OutputType\u003e\n \u003cTargetFramework\u003enetcoreapp3.1\u003c/TargetFramework\u003e\n \u003cRootNamespace\u003ebarebonescli\u003c/RootNamespace\u003e\n \u003cPackAsTool\u003etrue\u003c/PackAsTool\u003e\n \u003cToolCommandName\u003ebarebones\u003c/ToolCommandName\u003e\n \u003cPackageOutputPath\u003e./nupkg\u003c/PackageOutputPath\u003e\n \u003cVersion\u003e1.0.0\u003c/Version\u003e\n \u003cId\u003ebarebonescli\u003c/Id\u003e\n \u003cAuthors\u003eFaesel Saeed\u003c/Authors\u003e\n \u003cOwners\u003eFaesel Saeed\u003c/Owners\u003e\n \u003cTitle\u003eDemo app to show a bare bones CLI\u003c/Title\u003e\n \u003cDescription\u003eThis great CLI can greet the world\u003c/Description\u003e\n \u003cCopyright\u003eCopyright 2020 Faesel Saeed\u003c/Copyright\u003e\n \u003cPackageRequireLicenseAcceptance\u003efalse\u003c/PackageRequireLicenseAcceptance\u003e\n \u003cPackageLicenseFile\u003eLICENSE.txt\u003c/PackageLicenseFile\u003e\n \u003cPackageIconUrl\u003ehttps://raw.githubusercontent.com/faesel/barebonescli/main/barebones/icon.png\u003c/PackageIconUrl\u003e\n \u003cPackageTags\u003ebarebones greeting cli\u003c/PackageTags\u003e\n \u003cRepositoryUrl\u003ehttps://github.com/faesel/barebonescli.git\u003c/RepositoryUrl\u003e\n \u003cRepositoryType\u003egit\u003c/RepositoryType\u003e\n \u003cRepositoryBranch\u003emain\u003c/RepositoryBranch\u003e\n \u003cPackageProjectUrl\u003ehttps://github.com/faesel/barebonescli\u003c/PackageProjectUrl\u003e\n \u003cPackageIcon\u003eicon.png\u003c/PackageIcon\u003e\n \u003c/PropertyGroup\u003e\n \u003cItemGroup\u003e\n \u003cPackageReference Include=\"Microsoft.Extensions.DependencyInjection\" Version=\"3.1.9\" /\u003e\n ...\n \u003cNone Include=\"LICENSE.txt\" Pack=\"true\" PackagePath=\"$(PackageLicenseFile)\" /\u003e\n \u003cNone Include=\"icon.png\" Pack=\"true\" PackagePath=\"\\\" /\u003e\n \u003c/ItemGroup\u003e\n\u003c/Project\u003e\n```\n\n*The Github links are fictional, you can replace them with your project.*\n\nTo make your package more credible in the NuGet gallery there are other fields you can fill in. For the licence and package icon, you will need to place the files in the same project, the folder structure will look something like this, \n\nbarebonescli\n- barebonescli.csproj\n- Program.cs\n- icon.png\n- LICENCE.txt\n\n### 3. Package your CLI\n\nThe next step is to create a NuGet package, if you specified a `PackageOutputPath` in your .csproj you will see the NuGet package in that folder. \n\n1. Run `dotnet pack` on the project\n\nOnce executed you should have a `barebonescli.1.0.0.nupkg` file.\n\n### 4. Upload your package to the [Nuget gallery](https://www.nuget.org/)\n\n1. Click on your profile\n2. Select upload package and upload the nupkg file\n\n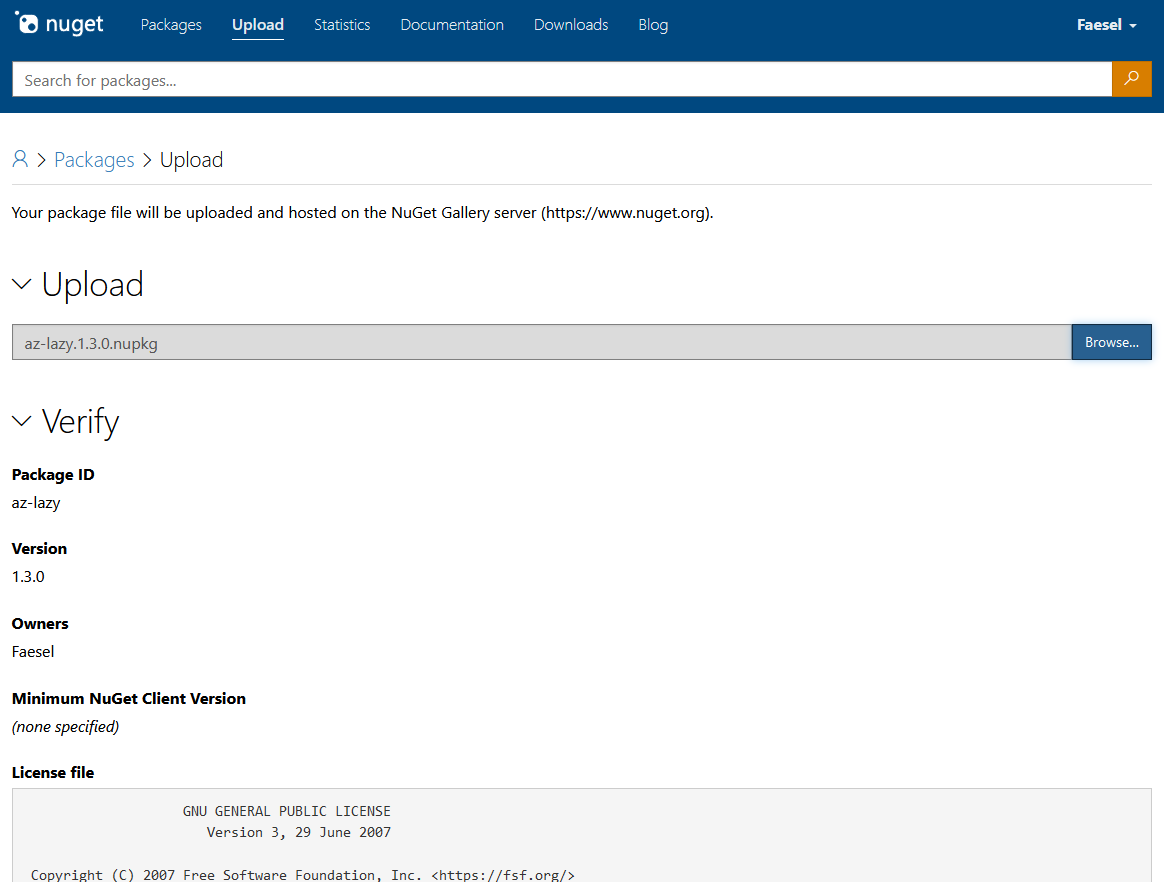\n\nYou could also alternatively use the CLI to push with `nuget push barebonescli.1.0.0.nupkg`\n\nOnce uploaded it will be ready to install as soon as its indexed, `dotnet tool install --global barebonescli --version 1.0.0` 😎\n\nFrom here the packages mentioned in this article can help you create a professional-looking CLI.\n\n# More about Az-Lazy\n\nIf you're interested in checking out Az-Lazy, you can install in with the command,\n\n`dotnet tool install --global az-lazy`\n\n# Usefull links\n\nDo checkout *Nuget Must Haves* command-line tagged package list, there's some great options in there that are not mentioned in this article.\n\n[Nuet Must Haves - CommandLine Packages](https://nugetmusthaves.com/Tag/Commandline?page=1)\n"])</script><script>self.__next_f.push([1,"1d:T3d71,"])</script><script>self.__next_f.push([1,"As an engineer, I have always had a heavy reliance on REST'ful API's for passing information between applications. With the introduction of [open API specification](https://swagger.io/specification/) now in version 3.0.3, integration has never been easier. The push to break monoliths into microservices has further boosted its usage, however I always found one size never fits all.\n\n## Where REST falls down 👎\n\nRESTful services have many shortfalls built in, if you're in my boat and most of the time your creating services and working on client applications. Having to tailor a client library to call those services has always been a tiresome task. 3rd party tooling like [Nswag](https://github.com/RicoSuter/NSwag) made some attempt to fix this problem however I still find breaking changes between versions that make huge changesets across all your endpoints. If your working across multiple languages like C# and Javascript your work doubles up. \n\nThere are also encumbrances experienced when mixing batch/bulk operations, overnight jobs with REST'ful APIs. Leading to complex solutions that auto scale or spread load over time. Having to go through each request-response cycle on bulk is just in-efficient.\n\nIn most cases, responses are also in the form of JSON which is designed to cater for human readability at the expense of being inefficient. If you talking machine to machine readability is not a concern? \n\nLets also not mention those endless subjective PR threads trying to decide whats RESTful and whats not 😇.\n\n## Can GRPC fill the gaps 🤷♂️\n\nIf you experienced the REST'ful pains above, GRPC's got your back. To get a quick demonstration of its capabilities, I recommend [Shawn Wildermuth's gRPC Talk at netPonto User Group (2020)](http://wildermuth.com/2020/07/09/gRPC-Talk-at-netPonto) he explains it in a easy to understand way.\n\nhttps://www.youtube.com/watch?v=3wUtQb6C7to\n\nTo sum up its capabilities it has two key differences to REST (if your already familiar with this, skip to section **Things to look into**).\n\n### 1. Proto files\n\nProto files contain the definition of your API in a structured spec compliant way. The code below shows a simple *GreetingsService* with a basic request and response.\n\n```\nsyntax = \"proto3\";\n\noption csharp_namespace = \"HelloService\";\n\nservice GreetingsService {\n rpc GetHello (HelloRequest) returns (HelloResponse);\n}\n\nmessage HelloRequest {\n int32 HelloCount = 1;\n}\n\nmessage HelloResponse {\n string HelloDescription = 1;\n}\n```\n\nProto files can then be used to transpile code [into many languages](https://grpc.io/docs/languages/). When transpiling we have the option to either create code for a **server** or **client**. Code generation creates a base class **GreetingsServiceBase** for us (it's generated in the bin folder on build time). Eventually, you end up with a service that looks like this:\n\n```\nusing Grpc.Core;\nusing HelloServer;\nusing System.Threading.Tasks;\n\nnamespace TaxServer.Services\n{\n public class HelloGrpcService : GreetingsService.GreetingsServiceBase\n {\n public override async Task\u003cHelloResponse\u003e GetHello(HelloRequest request, ServerCallContext context)\n {\n return new HelloResponse { HelloDescription = $\"{request.HelloCount} Hellos to you!\" };\n }\n }\n}\n```\n\nThe act of sharing and distributing proto files means that consuming clients can easily create their own client code and be completely agnostic of language.\n\n### 2. Defining request/response lifecycle\n\nGRPC allows you to change its request/response lifecycle, it has 4 options described below,\n\n- **Unary RPC's**: Unary RPCs where the client sends a single request to the server and gets a single response back.\n- **Server Streaming RPC's**: Server streaming RPCs where the client sends a request to the server and gets a stream to read a sequence of messages back.\n- **Client Streaming RPC's**: Client streaming RPCs where the client writes a sequence of messages and sends them to the server, again using a provided stream.\n- **Bi-Directional Streaming RPC's**: Bidirectional streaming RPCs where both sides send a sequence of messages using a read-write stream.\n\n[*Taken from GRPC.io*](https://grpc.io/docs/what-is-grpc/core-concepts/)\n\nThese additional modes are more suited for batch processing over your traditional request/response lifecycle.\n\n## Things to look into ✅\n\nSo far so great, getting to this point is relatively easy and straightforward. Problem is all the tutorials seem to end at this point 😟. To have a live API several additional concerns need to be addressed. My list was as follows:\n\n1. Check how we can consume/distribute .proto files\n2. How to create a health checking probe for a GRPC service\n3. How to version endpoints\n4. Can a .NET Framework client app consume a .NET Core GRPC server?\n5. How to debug with tools, call an endpoint\n6. Authentication and authorization\n7. Can you call the service from a browser?\n\n### 1. Check how we can consume/distribute .proto files\n\nThere are two different approaches to achieve this, mainly dependent on whether your service is internal or external public facing.\n\n#### Option 1 - With nuget packages\n\nOption one is to distribute your proto files using Nuget packages. This solution is recommended in the situation where you are using GRPC for internal services. Your solution structure would look something like this:\n\n- HelloService.Protos\n - Hello.protos\n- HelloService.Server\n - Server code ... \n\nIn this case we would use a Nuspec file to package the .protos and output it into the following structure in the client app. Considering you could be consuming more than one GRPC service it might make sense to create subfolders to know where the proto file comes from.\n\n- HelloClient\n /Protos/**service name goes gere**/Hello.protos\n\nFrom here the client application can generate its client service code using the protofile. If you want to go one step further there is a dotnet command you can use to integrate the proto file into the **.csproj** file using a [dotnet command](https://docs.microsoft.com/en-us/aspnet/core/grpc/dotnet-grpc?view=aspnetcore-3.1) which can be triggered after the installation of the package.\n\n```\ndotnet grpc add-file Hello.proto\n```\n\n#### Option 2 - With a discovery endpoint\n\nThis approach is recommended if your GRPC service is a service meant for external consumers. The idea behind this approach is to expose which services/endpoints are available. The method is dependent on the [**Grpc.Reflection**](https://www.nuget.org/packages/Grpc.Reflection/) Nuget package.\n\nThe general approach is outlined [here](https://github.com/grpc/grpc/blob/master/doc/csharp/server_reflection.md). \n\nOnce implemented it allows you to use an endpoint from the server code to generate your client code. Dotnet has a [GRPC CLI tool](https://www.nuget.org/packages/dotnet-grpc-cli/), that can read from a server reflection endpoint and produce a proto file out of it. The command looks like this,\n\n```\ndotnet grpc-cli dump https://localhost:5001 Reflection.HelloService\n```\n\nYou can also write the proto file to disk using this command\n\n```\ndotnet grpc-cli dump http://localhost:10042 Reflection.HelloService -o ./prot\n```\n\n### 2. How to create a health checking probe for a GRPC service\n\nHealth checking probe endpoints are useful for monitoring uptime as well as managing containers when services are unresponsive. GRPC specification has a defined structure for creating your health checking endpoint called the [**GRPC Health Checking Protocol**](https://github.com/grpc/grpc/blob/master/doc/health-checking.md). \n\nHowever, since we are using asp.net core we can get away from this and rely on middleware to do this for us with little code.\n\n```\npublic void ConfigureServices(IServiceCollection services)\n{\n services.AddGrpc();\n services.AddHealthChecks();\n ...\n}\n\npublic void Configure(IApplicationBuilder app)\n{\n app.UseEndpoints(endpoints =\u003e\n {\n endpoints.MapHealthChecks(\"/healthz\");\n ...\n });\n}\n```\n\nNow when running locally **https://localhost:5001/healthz** we can get a 200 response. Here is what the output logs look like:\n\n```\n Request starting HTTP/2 GET https://localhost:5001/healthz\ninfo: Microsoft.AspNetCore.Routing.EndpointMiddleware[0]\n Executing endpoint 'Health checks'\ninfo: Microsoft.AspNetCore.Routing.EndpointMiddleware[1]\n Executed endpoint 'Health checks'\ninfo: Microsoft.AspNetCore.Hosting.Diagnostics[2]\n Request finished in 19.056ms 200 text/plain\n```\n\n### 3. How to version endpoints\n\nThe problem of versioning is easily solved using namespaces, it's just a case of incorporating your version number into the namespace like so,\n\n```\noption csharp_namespace = \"HelloService.v1\";\n```\n\nFor each version, you would have different proto files and different service implementations. When inheriting from the base we can be specific on the version we need.\n\n**Server Code**\n\n```\npublic class HelloGrpcService : HelloService.v1.GreetingsService.GreetingsServiceBase\n{\n}\n```\n\n**Client Code**\n\nThe namespaces segregate the types so it just works out.\n\n```\n//Version 1\nusing var channel = GrpcChannel.ForAddress(\"https://localhost:5001\");\nvar client = new HelloService.v1.GreetingsService.GreetingsServiceClient(channel);\nvar response = await client.GetHello(new HelloService.v1.HelloRequest() { \n HelloCount = 1\n});\n\n//Version 2\nusing var channel2 = GrpcChannel.ForAddress(\"https://localhost:5001\");\nvar client2 = new HelloService.v2.GreetingsService.GreetingsServiceClient(channel);\nvar response2 = await client2.GetHello(new HelloService.v2.HelloRequest() {\n HelloCount = 2\n});\n```\n\n### 4. Can a .NET Framework client app consume a .NET Core GRPC server?\n\nTurns out it can yes, however ... as GRPC is built upon HTTP/2 which is not supported in .net framework, making secure connections to your API is not possible. The client code for .net framework is very similar, we just pass a **ChannelCredentials.Insecure** option in when building the client.\n\n```\nvar channel = new Channel(\"127.0.0.1\", 5000, ChannelCredentials.Insecure);\nvar client = new GreetingsService.GreetingsServiceClient(channel);\n```\n\n### 5. How to debug with tools, call an endpoint\n\nIf you're like me and you've come from a REST background your most likely used to polished tools like Postman or Insomnia to test out your endpoints. Sadly these tools don't support GRPC 😢... yet anyway...\n\nThe [GRPC Tooling Community](https://github.com/grpc-ecosystem/awesome-grpc#lang-cs) is still in its infancy. There are however some new players that are emerging that get the job done, most notably for me BloomRPC. \n\n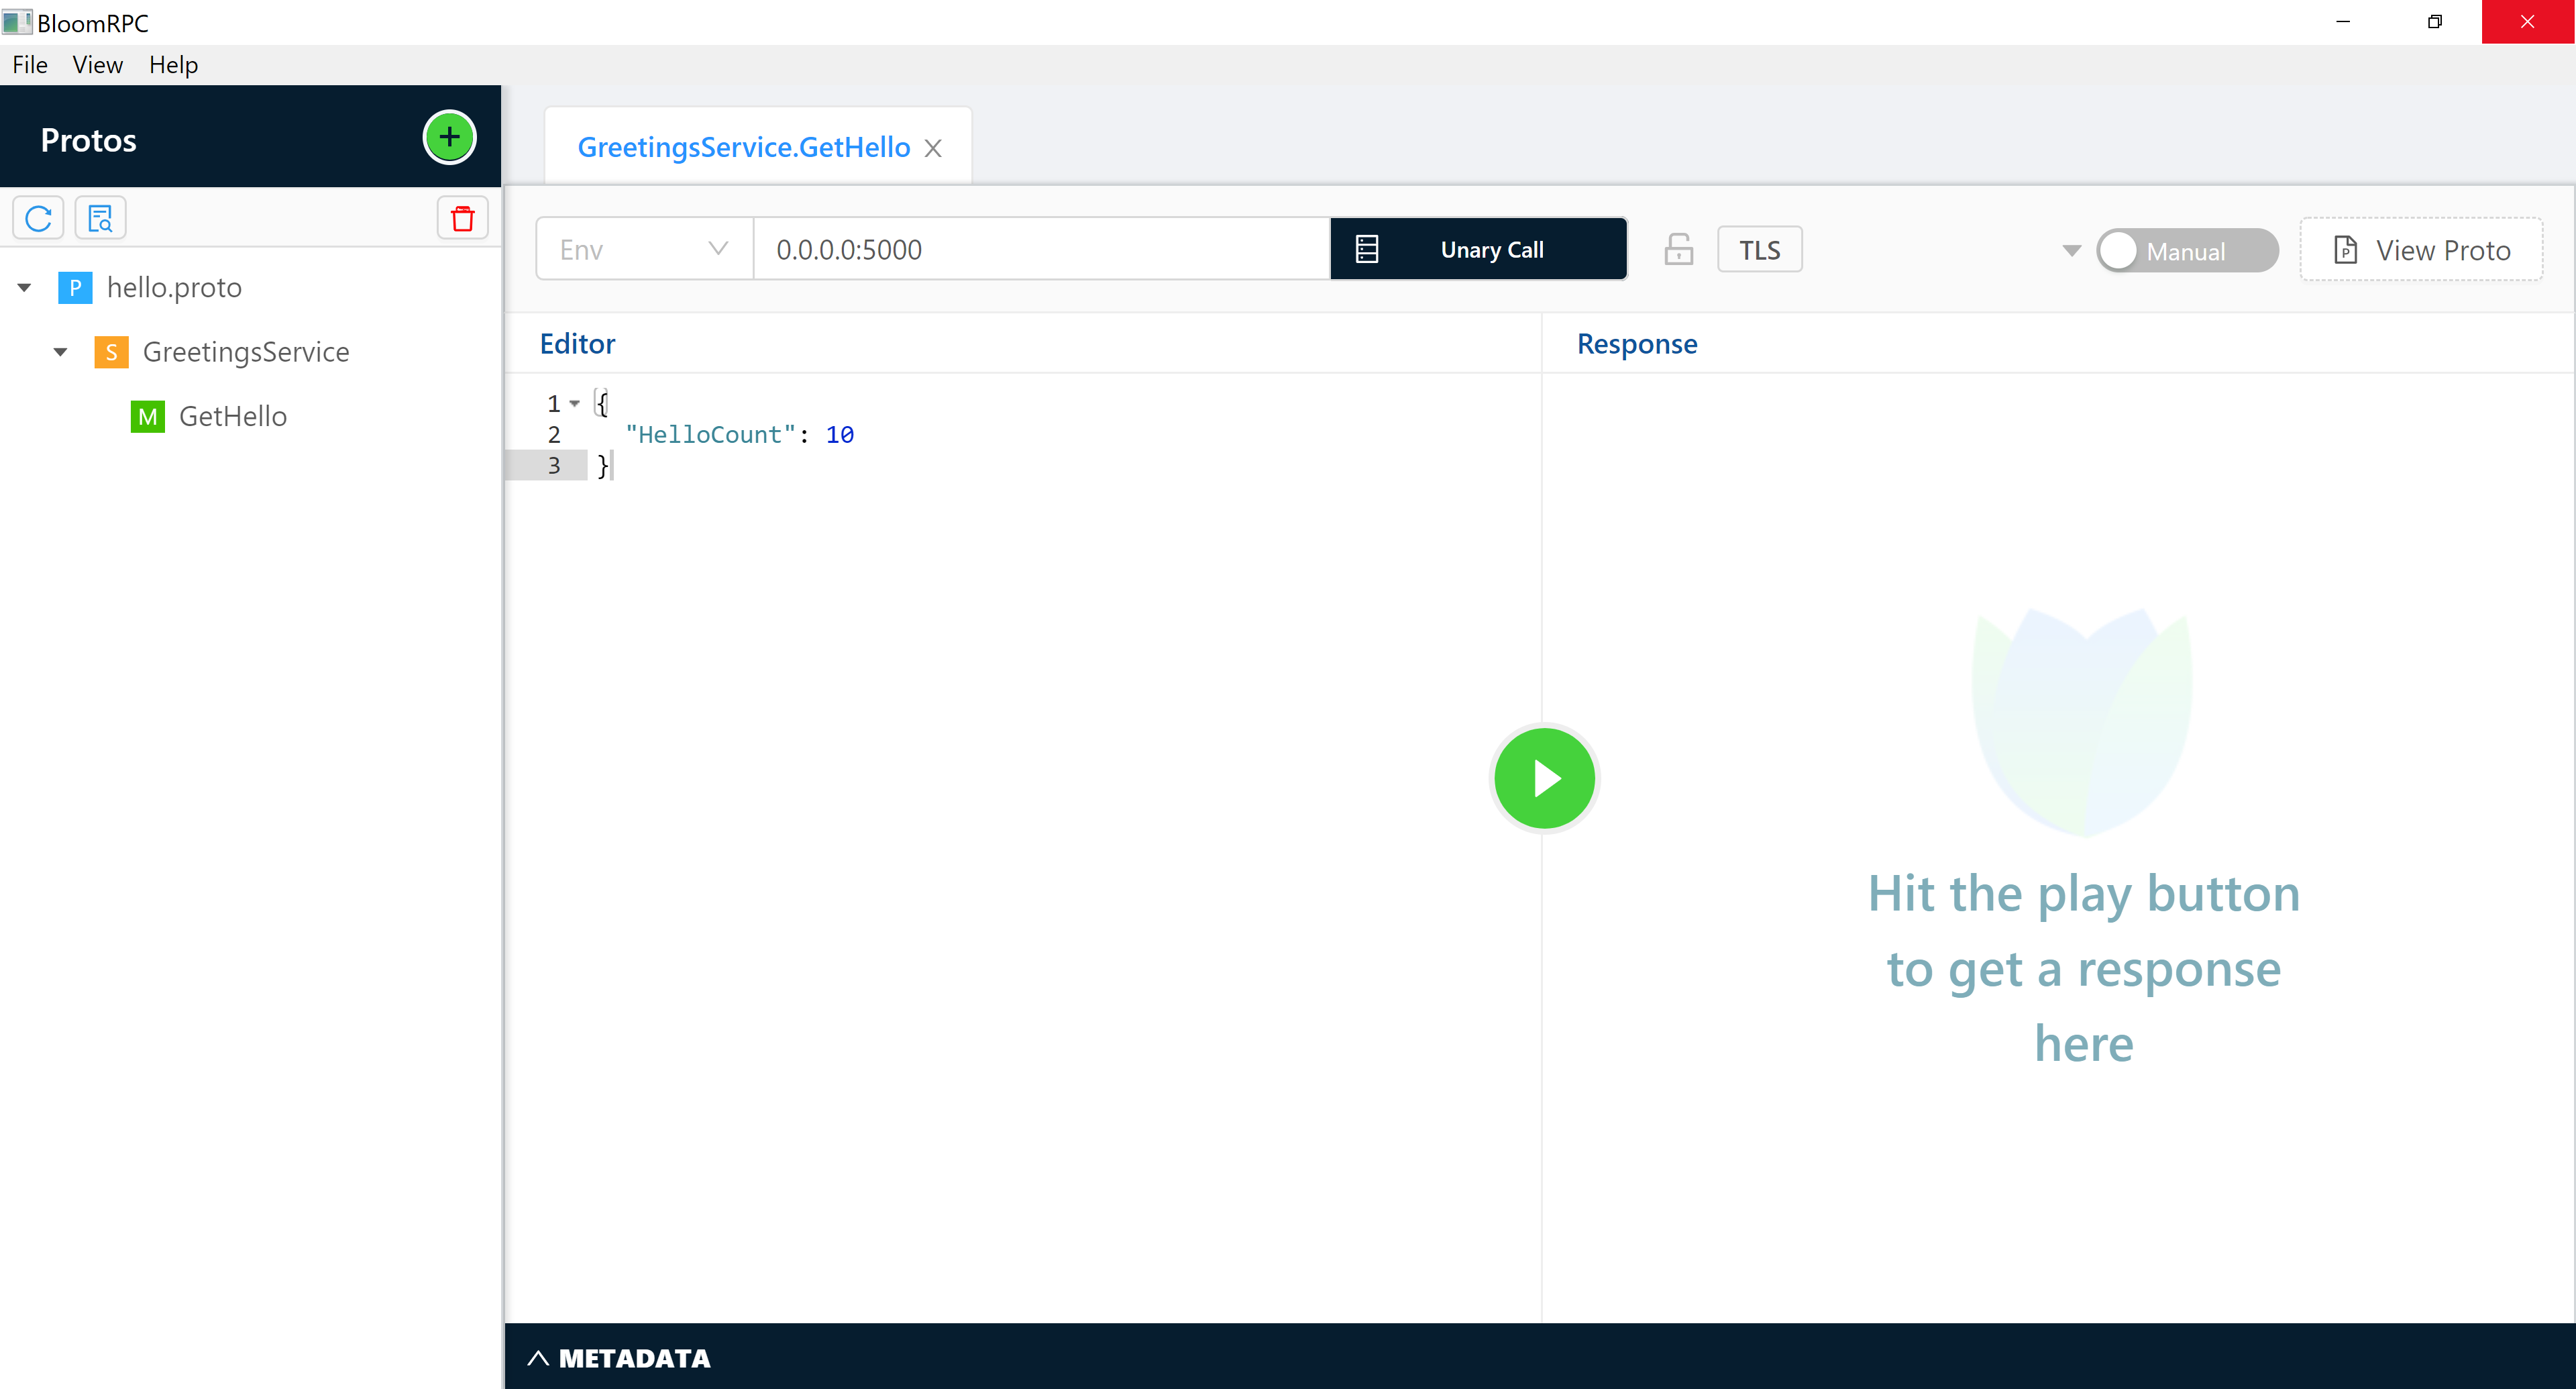\n\nAfter importing in your proto files you get a great swagger-esk UI that automatically build up your request body from your proto file.\n\n### 6. Authentication and authorization\n\nBecause we are working under the guise of asp.net core we can take advantage of its authentication middleware. The following authentication methods are supported.\n\n- Azure Active Directory\n- Client Certificate\n- IdentityServer\n- JWT Token\n- OAuth 2.0\n- OpenID Connect\n- WS-Federation\n\nBelow is a simple code example of authenticating a JWT token with an identity service. As you can see its no different from a REST service.\n\n```\npublic void ConfigureServices(IServiceCollection services)\n{\n var authority = \"https://myidentityserver.com\";\n\n services\n .AddAuthentication(\"Bearer\")\n .AddJwtBearer(\"Bearer\", options =\u003e\n {\n options.Authority = authority;\n options.RequireHttpsMetadata = false;\n options.TokenValidationParameters = new TokenValidationParameters\n {\n ValidateAudience = false,\n };\n options.ConfigurationManager = new ConfigurationManager\u003cOpenIdConnectConfiguration\u003e\n (\n metadataAddress: authority + \"/.well-known/openid-configuration\",\n configRetriever: new OpenIdConnectConfigurationRetriever(),\n docRetriever: new HttpDocumentRetriever { RequireHttps = false }\n );\n options.Events = new JwtBearerEvents\n {\n OnTokenValidated = context =\u003e\n {\n var ci = (ClaimsIdentity)context.Principal.Identity;\n var authHeader = context.Request.Headers[\"Authorization\"];\n var token = authHeader.FirstOrDefault()?.Substring(7);\n if (token != null)\n {\n ci.AddClaim(new Claim(\"token\", token));\n }\n\n return Task.CompletedTask;\n }\n };\n });\n\n services.AddAuthorization();\n ...\n}\n\npublic void Configure(IApplicationBuilder app)\n{\n app.UseAuthentication();\n app.UseAuthorization();\n ...\n}\n```\n\nBelow is output from an authenticated request:\n\n```\n Request starting HTTP/2 POST https://localhost:5001/HelloGrpcService.GreetingsService/GetHello application/grpc\ninfo: Microsoft.AspNetCore.Authentication.JwtBearer.JwtBearerHandler[2]\n Successfully validated the token.\ninfo: Microsoft.AspNetCore.Authorization.DefaultAuthorizationService[1]\n Authorization was successful.\ninfo: Microsoft.AspNetCore.Routing.EndpointMiddleware[0]\n Executing endpoint 'gRPC - /HelloGrpcService.GreetingsService/GetHello'\nRequest parameter 1\nRequest came from test-client-id\ninfo: Microsoft.AspNetCore.Routing.EndpointMiddleware[1]\n Executed endpoint 'gRPC - /HelloGrpcService.GreetingsService/GetHello'\ninfo: Microsoft.AspNetCore.Hosting.Diagnostics[2]\n Request finished in 5865.2411ms 200 application/grpc\n```\n\n### 7. Can you call the service from a browser?\n\nCurrently, as it stands the answer is no, browsers don't offer fine-grained control over API requests to support GRPC. However, there is some light at the end of the tunnel.\n\nBack in 2016 Google started working on a specification for \"GRPC for the browser\". You can read more about it [here](https://grpc.io/blog/state-of-grpc-web/) but in essence,\n\n\u003eThe basic idea is to have the browser send normal HTTP requests (with Fetch or XHR) and have a small proxy in front of the gRPC server to translate the requests and responses to something the browser can use - grpc.io\n\nIn the C# world, Microsoft has an implementation of this specification in their docs, [Use gRPC in browser apps](https://docs.microsoft.com/en-gb/aspnet/core/grpc/browser?view=aspnetcore-3.1).\n\nThere are some disclaimers to this, as gRPC supports streaming and bidirectional requests this addition is only recommended for unary requests. Due to this limiting factor helpers are present to turn it on and off for services when setting up GRPC services in the startup,\n\n```\nendpoints.MapGrpcService\u003cHelloGrpcService\u003e().EnableGrpcWeb().RequireCors(\"AllowAll\");\n```\n\nWhat I find particularly interesting is that the problem grpc-web solves is similar to the problems we have with .net framework (https/2 is not supported). Could this perhaps be an answer to getting secure requests working? ... sadly not yet! at the moment its not possible as grpc-web was was built on .net standard 2.1 so .net framework is not supported. Perhaps there might be movement on this in time to come.\n\n## Things I missed out\n\n1. Integration Testing, im a big fan of using in memory testing with Test Server it would be interesting to see if this works with a GRPC service.\n\n## Useful Links\n\n1. [C# Examples](https://github.com/grpc/grpc/tree/master/src/csharp)\n2. [More c# examples](https://github.com/grpc/grpc-dotnet/tree/master/examples)\n"])</script><script>self.__next_f.push([1,"1e:T1e32,"])</script><script>self.__next_f.push([1,"As a windows user the terminal experience has always been lacking, up till the new [windows terminal](https://www.microsoft.com/en-gb/p/windows-terminal/9n0dx20hk701?rtc=1\u0026activetab=pivot:overviewtab) was released. Incorporating [WSL (Windows Subsystem for Lynx)](https://docs.microsoft.com/en-us/windows/wsl/install-win10) really helped bridge that gap as it opens up console experience that makes use of **apt-get** use the plethora of packages available. \n\nHaving tried using this for react apps I found the experience really slow when building apps. Running the same app in Powershell would start up in a fraction of the time. This got me thinking..\n\n\u003e Can I evolve my Powershell console experience in the same way I can with WSL?\n\nLooking at [Powershells Gallery](https://www.powershellgallery.com/), they have a total of **7,091** unique packages. There must be some things here we can use.\n\nThis article is about my journey from reading this blog post [\"How to make a pretty prompt in Windows Terminal with Powerline, Nerd Fonts, Cascadia Code, WSL, and oh-my-posh\"](https://www.hanselman.com/blog/HowToMakeAPrettyPromptInWindowsTerminalWithPowerlineNerdFontsCascadiaCodeWSLAndOhmyposh.aspx) by Scott Hanselman, to taking the experience one step further to evolve my terminal. Video on it here:\n\nhttps://www.youtube.com/watch?v=lu__oGZVT98\n\n## Prerequisites\n\nThis article assumes you have already read Hanselman's article and kitted your terminal out with the following (if not do so):\n\n- Added Cascadia Ligature Font, for more compact and expressive text.\n- Added oh-my-posh, for better git branch information.\n\n## Making use of your Powershell profile\n\nBefore your Powershell window starts, any code in your Powershell profile is executed first. You can find your profile directory location by typing the following in your console,\n\n```\n$PROFILE\n```\n\nIt's from this file we can begin importing in scripts and adding custom functions. If you followed the prerequisites, your profile file will be mostly empty except perhaps a command to set the theme in oh-my-posh.\n\n```\nSet-Theme Paradox\n```\n\n## Incorporating packages\n\nBefore we start importing packages we need to get **PowerShellGet** setup, installation steps can be found here [Installing PowerShellGet](https://docs.microsoft.com/en-gb/powershell/scripting/gallery/installing-psget?view=powershell-7). Once complete you can start installing scripts like so,\n\n```\nInstall-Module -Name WifiTools \n```\n\nThat's it, you can actually start checking your wifi signal with `Show-WifiState` 📶! Aside from wifi tools here are some choice selections, some of these are recommended as it helps create building blocks for your own custom scripts:\n\n### [1. Terminal Icons](https://www.powershellgallery.com/packages/Terminal-Icons/0.1.1)\n\n[Terminal-Icons](https://www.powershellgallery.com/packages/Terminal-Icons/0.1.1) really helps improve visibility when navigating. It also allows you to format your directory list wide so that you can see all the files and folders without scrolling down.\n\nYou can activate it in your Powershell profile by adding the following import\n\n```\nImport-Module -Name Terminal-Icons\n```\n\nAnd that's it! witness the beauty:\n\n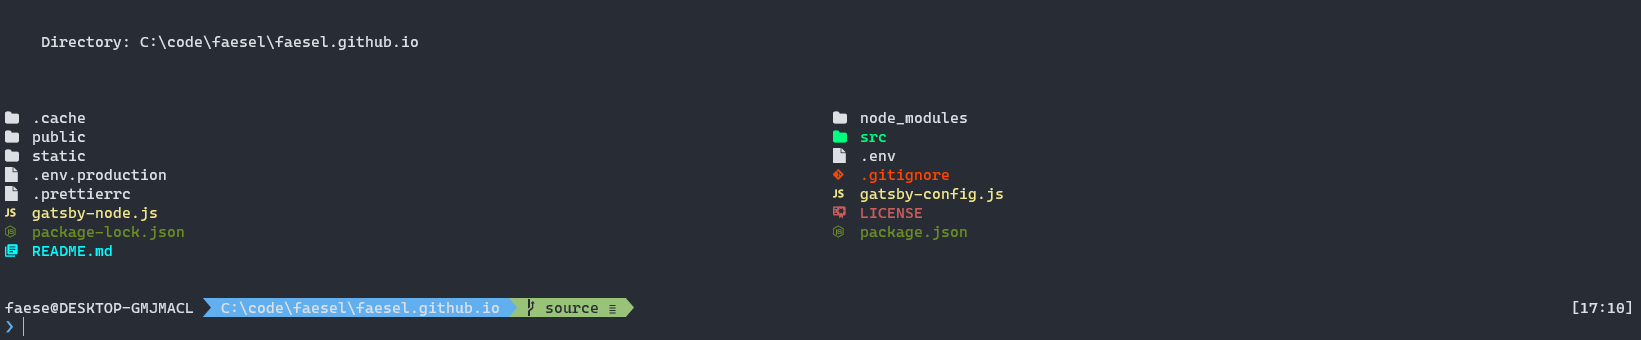\n\n### [2. Tree](https://www.powershellgallery.com/packages/Tree/1.0.1)\n\n[Tree](https://www.powershellgallery.com/packages/Tree/1.0.1) helps with directory discover and searching by printing in (as the name suggests) a tree structure. I alias this package and mainly use it for listing and searching, below is what you need in your Powershell profile,\n\n```\nInstall-Module -Name Tree \n```\n```\n# Shows a tree structure of the current directory (excluding folders you want to ignore)\nfunction treels {\n Get-ChildItemTree . -I 'node_modules|bin|obj|.git|.vs'\n}\n\n# Searches the current directory for a pattern (wildcards * are accepted) and returns the tree view with matching files\nfunction treef ([string] $pattern) {\n Get-ChildItemTree . -P $pattern -I 'node_modules|bin|obj|.git|.vs'\n}\n```\n\nExample showing a directory:\n\n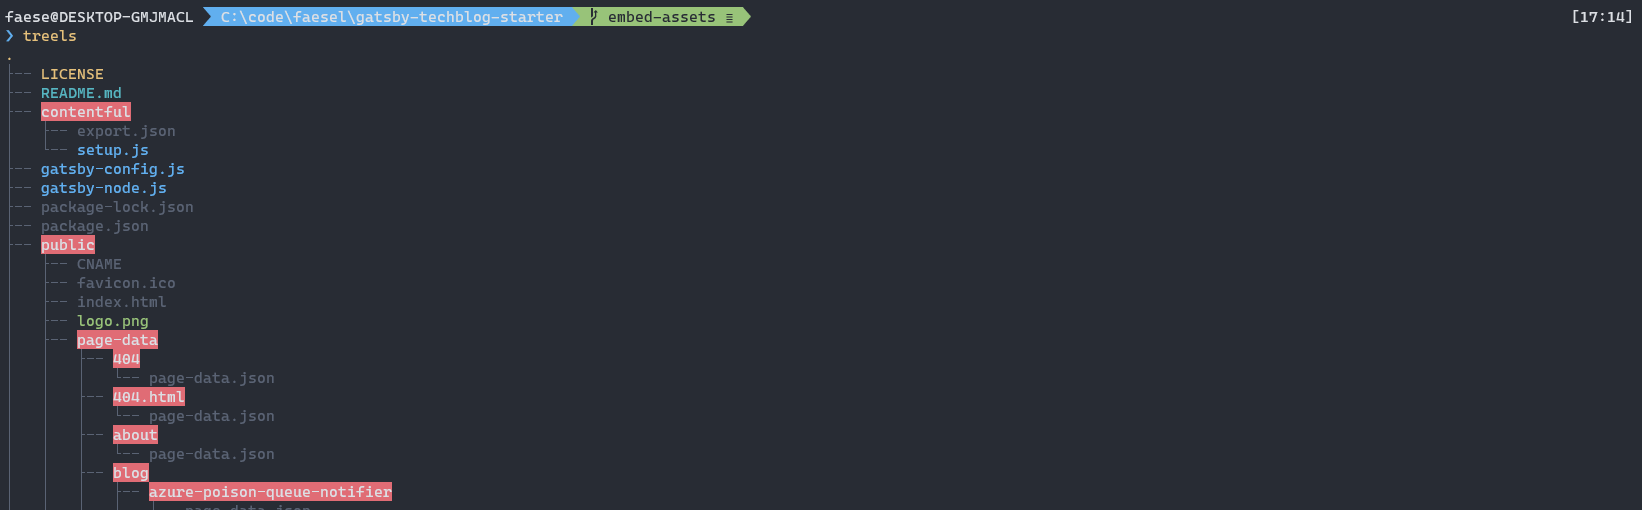\n\nExample search for a file:\n\n\n\n### [3. Burnt Toast](https://www.powershellgallery.com/packages/BurntToast/0.7.1) \n\n[BurntToast](https://www.powershellgallery.com/packages/BurntToast/0.7.1) great package to notify yourself of any long running tasks. It hooks into the native windows toast notification system and has a plethora of options. One ideal use for this is cloning a repo (I'm talking about that repo dating back to the dinosaurs 🐉) since it lets you kick it off and automatically get a notification when done. \n\n```\nInstall-Module -Name BurntToast\n```\n```\n# clones a repo and notify with a toast\nfunction clonem([string] $url) {\n git clone $url\n New-BurntToastNotification -AppLogo 'C:\\Icons\\completed.png' -Text \"Finished!\", 'Finished cloning repo'\n}\n```\n\nI also find it great for scheduling in reminders, this one is dependent on a function which I import at the top of the profile [code example found here](https://github.com/Windos/BurntToast/blob/master/Examples/Example05/New-ToastReminder.ps1).\n\n```\n# IMPORT CUSTOM FILES\n. \"C:\\Users\\faese\\Documents\\WindowsPowerShell\\Custom\\BurntToast.ps1\"\n\n# trigger a remind after x minuites with some custom text\nfunction reminder([int]$minuites, [string]$text) {\n New-ToastReminder -AppLogo 'C:\\Icons\\reminder.png' -Minutes $minuites -ReminderTitle 'Reminder Reminder!' -ReminderText $text\n}\n```\n\nExample to ensure you never eggless,\n\n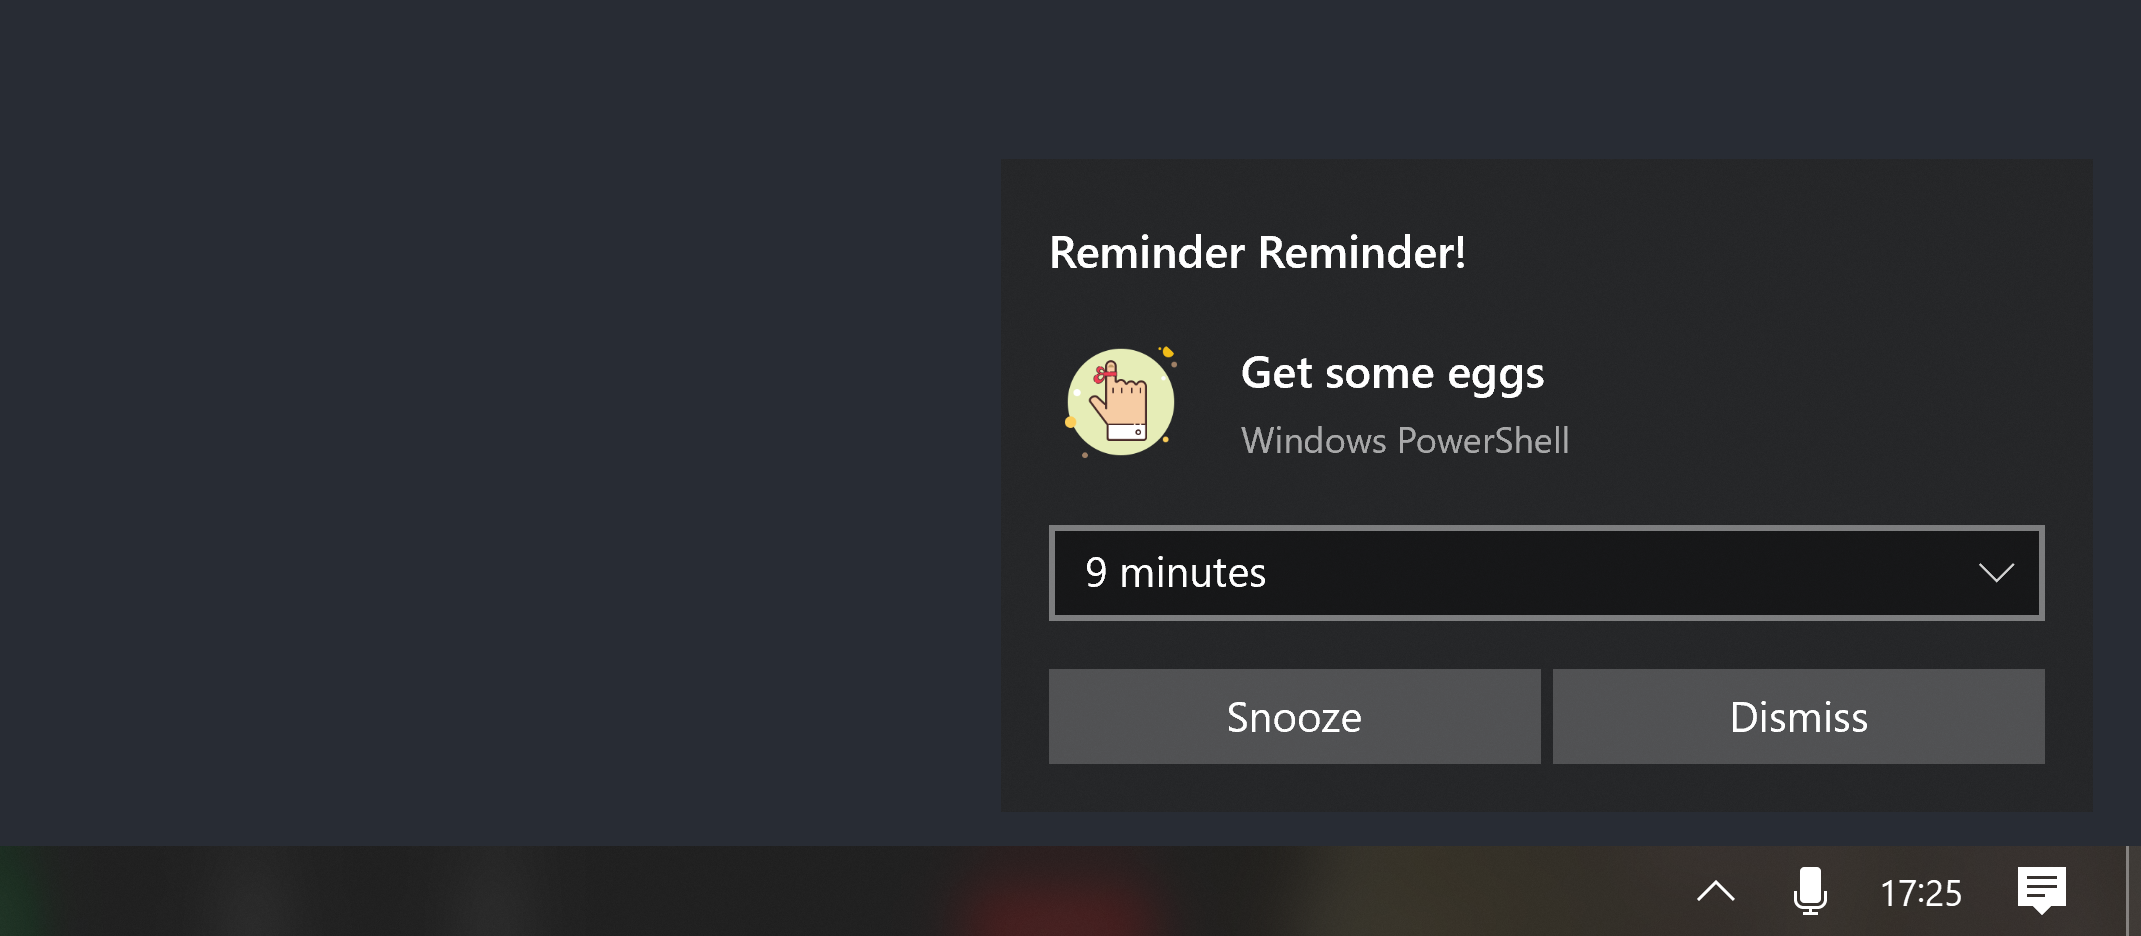\n\n### [4. ColoredText](https://www.powershellgallery.com/packages/ColoredText/1.0.6)\n\nThis library essentially allows you to print in different colours pure and simple. I mainly use this as a confirmation line when chaining together several commands so your eye just looks for coloured text to look for completion.\n\n```\nInstall-Module -Name ColoredText\n```\n```\n# create a new branch\nfunction newb([string]$branchName){\n git branch $branchName\n git checkout $branchName --track\n\n $message = \"Finished creating branch: \" + $branchName\n\n cprint black $message on rainbow print\n}\n\n# publish branch\nfunction publish {\n $branchName = git rev-parse --abbrev-ref HEAD\n git push --set-upstream origin $branchName\n\n $message = \"Finished publishing branch: \" + $branchName\n\n cprint black $message on rainbow print\n}\n```\n\n\n\n### Some other honourable mentions\n\nBelow are some other honourable mentions that I needed more time to investigate,\n\n- [PS Menu](https://www.powershellgallery.com/packages/ps-menu/1.0.6), allows you to create a multi-select menu of options.\n- [WTToolBox](https://www.powershellgallery.com/packages/WTToolBox/1.6.0), helps manage your windows terminal, I was mainly going to use this to get a list of shortcuts.\n\n## Download my profile code here\n\nYou can download my complete profile code [here](https://github.com/faesel/terminal-profile)\n\n## Summary\n\nI'm still on a path of discovery with Powershell, I've seen some great packages that can help make my terminal experience fast and efficient. However, I do feel I'm at the very beginning of this journey and with the continued improvements to WSL, I may flip flop to the Linux side."])</script><script>self.__next_f.push([1,"1f:T36b9,"])</script><script>self.__next_f.push([1,"I recently recreated my blog in GatsbyJs, you can download a template of it here [gatsby-techblog-starter](https://github.com/faesel/gatsby-techblog-starter). In the joy of sharing its simplicity to the world, I tweet about my [intro article](https://www.faesel.com/blog/gatsby-tech-blog-starter) with a link to my website. To my dismay, I noticed the tweet was lacking a lot of formatting and information on the link... would you even see that link 👀?\n\n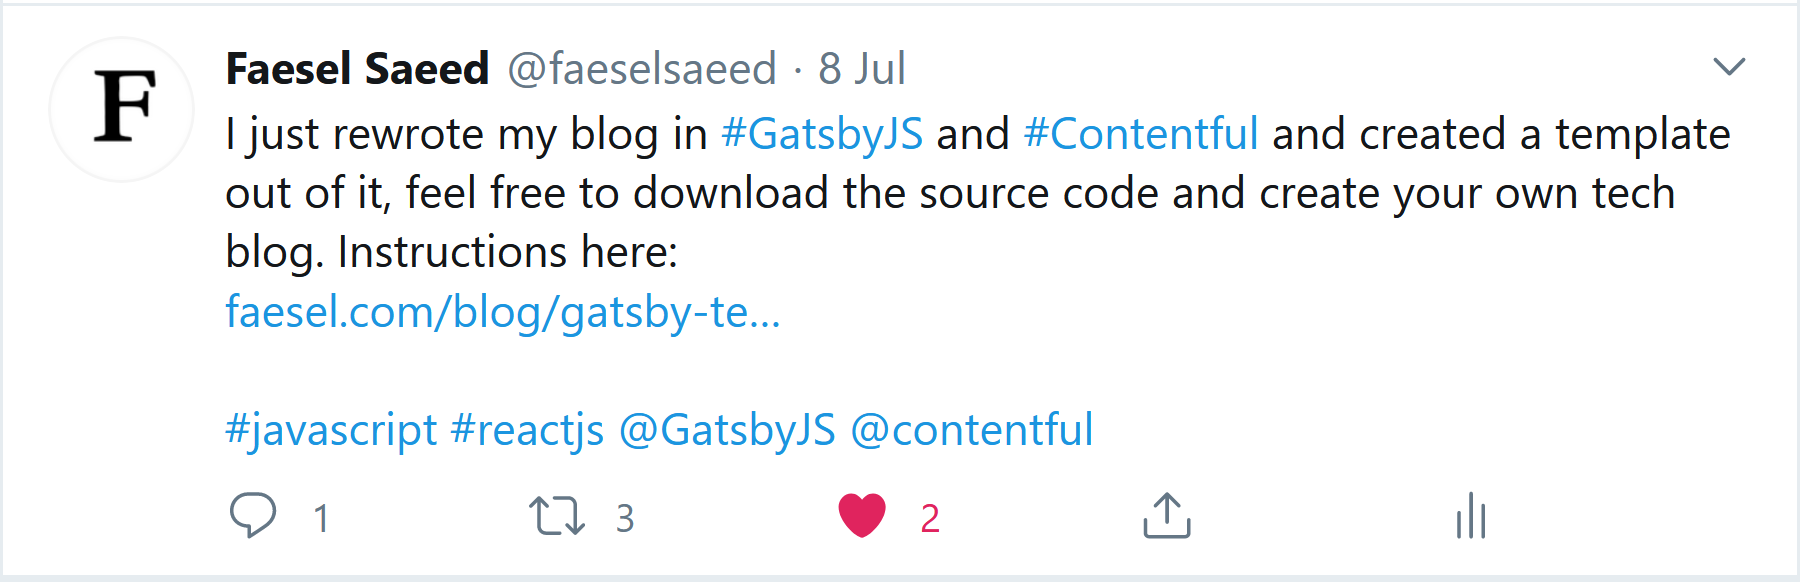\n\nI realised the secret sauce I was missing was called **Open Graph Protocol**. From the [specifications website](https://ogp.me/) itself, \n\n\u003e The Open Graph protocol enables any web page to become a rich object in a social graph. For instance, this is used on Facebook to allow any web page to have the same functionality as any other object on Facebook.\n\nIn essence its the mata tags you see below, that sites like Twitter, Linked In, Facebook use to correctly render an enriched link of the page on their website,\n\n```javascript\n\u003cmeta data-react-helmet=\"true\" name=\"twitter:card\" content=\"summary_large_image\"\u003e\n\u003cmeta data-react-helmet=\"true\" name=\"twitter:site\" contact=\"@faeselsaeed\"\u003e\n\u003cmeta name=\"twitter:creator\" content=\"\" data-react-helmet=\"true\"\u003e\n\u003cmeta name=\"twitter:title\" content=\"Creating my dream tech blog with GatsbyJS\" data-react-helmet=\"true\"\u003e\n\u003cmeta name=\"twitter:description\" content=\"I'm someone who's always had my own tech blog, I…\" data-react-helmet=\"true\"\u003e\n\u003cmeta name=\"twitter:image\" content=\"//images.ctfassets.net/wjg1udsw901v/6hjsGXkoyitmyiEuBdeTP2/c77e74af9235ac775f18836e2de07cac/gatsby-logo.jpg\" data-react-helmet=\"true\"\u003e\n\n\u003cmeta property=\"og:site_name\" content=\"\" data-react-helmet=\"true\"\u003e\n\u003cmeta property=\"og:title\" content=\"Creating my dream tech blog with GatsbyJS\" data-react-helmet=\"true\"\u003e\n\u003cmeta property=\"og:url\" content=\"https://www.faesel.com/blog/gatsby-tech-blog-starter\" data-react-helmet=\"true\"\u003e\n\u003cmeta property=\"og:description\" content=\"I'm someone who's always had my own tech blog, I…\" data-react-helmet=\"true\"\u003e\n\u003cmeta property=\"og:image\" content=\"//images.ctfassets.net/wjg1udsw901v/6hjsGXkoyitmyiEuBdeTP2/c77e74af9235ac775f18836e2de07cac/gatsby-logo.jpg\" data-react-helmet=\"true\"\u003e\n\u003cmeta property=\"og:image:alt\" content=\"Gatsby JS\" data-react-helmet=\"true\"\u003e\n\u003cmeta property=\"og:type\" content=\"article\" data-react-helmet=\"true\"\u003e\n```\n\nThis article is about how I used [Helmet JS](https://helmetjs.github.io/) to improve my sites shareability and improving its SEO capabilities.\n\n## Step 1 - Install those dependencies\n\nThe dependencies we are interested in are as follows:\n\n```\nnpm intall gatsby-plugin-react-helmet react-helmet\n```\n\nYou can read more about the gatsby plugin [here](https://www.gatsbyjs.org/packages/gatsby-plugin-react-helmet/) along with more detailed information on Helmet js and all its supported tabs [here](https://github.com/nfl/react-helmet)\n\n## Step 2 - Store your constant's in your gatsby config\n\nWhen creating a Gatsby website we always have a config file in the root of the project called **gatsby-config.js**, from here we can add various plugins like so,\n\n```javascript\nmodule.exports = {\n plugins: [\n 'gatsby-plugin-react-helmet'\n ]\n}\n```\n\nThis config file is also the place to store all you common reusable information in Gatsby's predefined **siteMetadata** tag (this tag makes it accessible through GraphQl). We will be using this later on to populate our head with various information.\n\n```json\nmodule.exports = {\n siteMetadata: {\n title: 'FAESEL.COM',\n author: 'Faesel Saeed',\n description: 'Personal blog of Faesel Saeed',\n siteUrl: 'https://www.faesel.com',\n social: {\n linkedin: 'https://www.linkedin.com/in/faesel-saeed-a97b1614',\n twitter: 'https://twitter.com/@faeselsaeed',\n twitterUsername: '@faeselsaeed',\n github: 'https://github.com/faesel',\n flickr: 'https://www.flickr.com/photos/faesel/',\n email: 'faesel@outlook.com'\n },\n rssFeedUrl: '/rss.xml'\n },\n ...\n}\n```\n\n## Step 3 - Create your head component\n\nNow that we have all our static information in the config we can query this out using GraphQl through the objects \u003e **site** \u003e **siteMetadata**. We can also import in **Helmet** and start building up our Head meta data. My Head component looks like this,\n\n```javascript\nimport React from 'react'\nimport { Helmet } from 'react-helmet'\nimport { useStaticQuery, graphql } from 'gatsby'\n\nimport favicon from '../../static/favicon.ico'\n\nconst Head = ({ pageTitle, title, url, description, imageUrl, imageAlt, type datePublished }) =\u003e {\n const data = useStaticQuery(graphql`\n query {\n site {\n siteMetadata {\n siteUrl,\n title,\n author,\n social {\n twitterUsername\n }\n }\n }\n }\n `)\n\n return (\n \u003c\u003e\n \u003cHelmet title={`${pageTitle} | ${data.site.siteMetadata.title}`} /\u003e\n \u003cHelmet\u003e\n \u003clink rel=\"icon\" href={favicon} /\u003e\n\n \u003cmeta name=\"twitter:card\" content=\"summary_large_image\"\u003e\u003c/meta\u003e\n \u003cmeta name=\"twitter:site\" contact={data.site.siteMetadata.social.twitterUsername}\u003e\u003c/meta\u003e\n \u003cmeta name=\"twitter:creator\" content={data.site.siteMetadata.twitterUsername}\u003e\u003c/meta\u003e\n \u003cmeta name=\"twitter:title\" content={title}\u003e\u003c/meta\u003e\n \u003cmeta name=\"twitter:description\" content={description}\u003e\u003c/meta\u003e\n \u003cmeta name=\"twitter:image\" content={imageUrl}\u003e\u003c/meta\u003e\n\n \u003cmeta property=\"og:locale\" content=\"en_GB\" /\u003e\n \u003cmeta property=\"og:site_name\" content={data.site.siteMetadata.title} /\u003e\n \u003cmeta property=\"og:title\" content={title}\u003e\u003c/meta\u003e\n \u003cmeta property=\"og:url\" content={url}\u003e\u003c/meta\u003e\n \u003cmeta property=\"og:description\" content={description}\u003e\u003c/meta\u003e\n \u003cmeta property=\"og:image\" content={imageUrl}\u003e\u003c/meta\u003e\n \u003cmeta property=\"og:image:alt\" content={imageAlt}\u003e\u003c/meta\u003e\n \u003cmeta property=\"og:type\" content={type} /\u003e\n \u003c/Helmet\u003e\n \u003c/\u003e\n )\n}\n\nexport default Head\n```\n(Note some of the properties get fleshed out later on in the article)\n\nThe Helmet component injects in HTML tags into the head of the HTML document. To understand what the tags represent within the Helmet component, and to see a full range of what's available use the following two links.\n\n1. [Tags from Open Graph](https://ogp.me/)\n2. [Tags from Twitter](https://developer.twitter.com/en/docs/tweets/optimize-with-cards/overview/markup)\n\n## Step 3 - Using your head component\n\nUsing your head component is quite straight forward, its more a case of working out where to source all your properties. Here's what my page looks like,\n\n```javascript\nimport React from \"react\"\nimport { graphql } from \"gatsby\"\nimport Layout from \"../components/layout\"\nimport Head from \"../components/head\"\n\n// Add some code here to get all your data from markdown, cms etc.\n\nconst Blog = props =\u003e {\n return (\n \u003cLayout\u003e\n \u003cHead \n pageTitle={props.data.title}\n title={props.data.title}\n description={props.data.bodym.childMarkdownRemark.excerpt}\n url={`${props.data.site.siteMetadata.siteUrl}/blog/${props.data.slug}`}\n imageUrl={props.data.hero.file.url}\n imageAlt={props.data.hero.title} \n type='article' \n datePublished={props.data.contentfulBlog.iso8601DatePublished}/\u003e\n\n \u003ch1\u003eMy Great Blog Post\u003c/h1\u003e\n ...\n \u003c/Layout\u003e\n )\n}\n\nexport default Blog\n\n```\n\n## Step 4 - Go further with JSON-LD and Linked data\n\nSo far so great, we have enough here for most social media sites to understand the structure of our data and to use this to correctly format the information on a consuming website. But what do search engines use?\n\nThe answer is [Json-ld and linked data](https://json-ld.org/), best explained by the specs website itself,\n\n\u003e JSON-LD is a lightweight Linked Data format. It is easy for humans to read and write. It is based on the already successful JSON format and provides a way to help JSON data interoperate at Web-scale. JSON-LD is an ideal data format for programming environments, REST Web services, and unstructured databases such as Apache CouchDB and MongoDB.\n\nand,\n\n\u003e Linked Data empowers people that publish and use information on the Web. It is a way to create a network of standards-based, machine-readable data across Web sites. It allows an application to start at one piece of Linked Data, and follow embedded links to other pieces of Linked Data that are hosted on different sites across the Web. \n\nTo sum it up in one sentence *we are using JSON data to create structured information so that websites can deep link with each other*. With this in mind our head component looks like this:\n\n```javascript\nimport React from 'react'\nimport { Helmet } from 'react-helmet'\nimport { useStaticQuery, graphql } from 'gatsby'\n\nconst Head = ({ pageTitle, title, url, description, imageUrl, imageAlt, type, datePublished }) =\u003e {\n const data = useStaticQuery(graphql`\n query {\n site {\n siteMetadata {\n siteUrl,\n title,\n author,\n social {\n twitterUsername\n }\n }\n }\n }\n `)\n\n const ldJsonBreadcrumb = {\n '@context': 'https://schema.org',\n '@type': 'BreadcrumbList',\n 'itemListElement': [{\n '@type': 'ListItem',\n 'position': 1,\n 'name': 'Home',\n 'item': `${data.site.siteMetadata.siteUrl}/home`\n },{\n '@type': 'ListItem',\n 'position': 2,\n 'name': 'Blog',\n 'item': `${data.site.siteMetadata.siteUrl}/blog`\n },{\n '@type': 'ListItem',\n 'position': 3,\n 'name': 'Projects',\n 'item': `${data.site.siteMetadata.siteUrl}/projects`\n },{\n '@type': 'ListItem',\n 'position': 4,\n 'name': 'Contact',\n 'item': `${data.site.siteMetadata.siteUrl}/contact`\n }]\n };\n\n const jsonldArticle = {\n '@context': 'http://schema.org',\n '@type': `${type}`,\n 'description': `${description}`,\n 'image': {\n '@type': 'ImageObject',\n 'url': `${imageUrl}`\n },\n 'mainEntityOfPage': {\n '@type': 'WebPage',\n '@id': `${data.site.siteMetadata.siteUrl}`\n },\n 'inLanguage': 'en',\n 'name': `${title}`,\n 'headline': `${title}`,\n 'url': `${url}`,\n 'datePublished': `${datePublished}`,\n 'dateModified': `${datePublished}`,\n 'author': {\n '@type': 'Person',\n 'name': `${data.site.siteMetadata.author}`\n },\n 'publisher' : {\n '@type': 'Organization',\n 'name': `${data.site.siteMetadata.author}`,\n 'logo': {\n '@type': 'ImageObject',\n 'url': `https://images.ctfassets.net/wjg1udsw901v/4RI5COhSqeYFCbvzYFeFZW/af52277ab41da56c1be5f72f316befe9/logo.png`\n }\n }\n };\n\n return (\n \u003c\u003e\n \u003cHelmet\u003e\n {/* other head elements go here */}\n \n \u003cscript type=\"application/ld+json\"\u003e\n {JSON.stringify(ldJsonBreadcrumb)}\n \u003c/script\u003e\n \n {type === 'article' \u0026\u0026 (\n \u003cscript type=\"application/ld+json\"\u003e\n {JSON.stringify(jsonldArticle)}\n \u003c/script\u003e\n )}\n \n {/* Meta properties go here */}\n \n \u003c/Helmet\u003e\n \u003c/\u003e\n )\n}\n\nexport default Head\n```\n\nFor more information on the structure you can read up on the [W3C Json-LD specification document](https://www.w3.org/2018/jsonld-cg-reports/json-ld/#introduction)\n\nTo get an idea of the full range of tags available take a look at these two links (in the case of my website I only use **BreadcrumbList** and **Article** types depending on what content you have you may show something else).\n\n1. [BreadcrumbList](https://schema.org/BreadcrumbList)\n2. [Article](https://schema.org/Article)\n\nDo note for the property **datePublished** you need to format your dates in [ISO-8601](https://en.wikipedia.org/wiki/ISO_8601) format. To save you a trip in google this up you can use the GraphQl query snippet below. The format definition comes from [Moment JS](https://momentjs.com/) which Gatsby is using under the hood.\n\n```\niso8601DatePublished: datePublished(formatString: \"YYYY-MM-DD[T]HH:mm:ss.SSS[Z]\")\n```\n\n## Step 5 - Validating your tags\n\nThere are actually various websites we can use to validate your tags and data. When building my website I used the following sources.\n\n- [Twitters Card testing tool](https://cards-dev.twitter.com/validator)\n- [Googles link for testing json-ld](https://search.google.com/structured-data/testing-tool/u/0/), testing and validating tool for JSON-LD. It goes as far as telling you if there are any missing tags.\n- [Matatags.io](https://metatags.io/), great for previewing how you website links will render on all the social media websites\n\nTIP 😎! If your implementing this retrospectively twitter will update all your previous tweets with with extra formatting, but it does take about a week. If you want to refresh it quicker, you can use the **Twitters Card testing tool** mentioned above to clear out the cache for an individual post.\n\nAfter that you can begin to tweet with confidence 😁\n\n"])</script><script>self.__next_f.push([1,"20:T2804,"])</script><script>self.__next_f.push([1,"I'm someone who's always had my own tech blog, I've gone through two revisions already with the last revision updating out of a 1997 style book. How much I contribute to the blog has always depended on how much friction and effort it takes to write content, manage and upload photos and paste in code. \n\nMy previous revisions at its core have always been dependent on using opensource wysiwyg editors. Which for me have been deficient in several ways.\n\n1. Behind the scenes, they produce HTML which always contains ghost 👻 spaces.\n2. You always have to build in your own system to upload and manage photos.\n3. Pasting in code and getting it to format correctly has always been difficult.\nThe content I write belongs to the actual website, so every time I change or rebuild my website I have to migrate all my content across.\n\nWith all this in mind, I wanted a solution that leverages a content management system that supports markdown. Is free and open source, and easily extendable using a modern JavaScript framework. The combination I chose contains the following,\n\n- **Gatsby** Framework built on React that creates a really fast experience and is easily extendable.\n- **Contentful** One of the leading content management systems that support markdown.\n- **Disqus** One of the most popular commenting systems mainly chose this as a continuation from my previous website.\n- **Github Pages** Free hosting by the GitHub guys.\n\nDue to everything being either free or opensource, you can download the source code [here](https://github.com/faesel/gatsby-techblog-starter), follow the steps in the readme or below in this article and get started with your own tech blog.\n\n## Why use Contentful? \n\nIf your someone like me and you don't want to be restricted to the world of WordPress websites, Contentful is the next best thing. As the name describes its a repository for your content and nothing else. Where Contentful really shines is in how easy it is to get your content out. Everything is API accessible and in a JSON format, so if I ever decide to build v4 its just a case of hooking up the CMS.\n\nContentful also supports writing in markdown format which is absolutely crucial if you're going to be pasting in code (as markdown supports syntax highlighting you will get the most accurate code colours when rendering).\n\n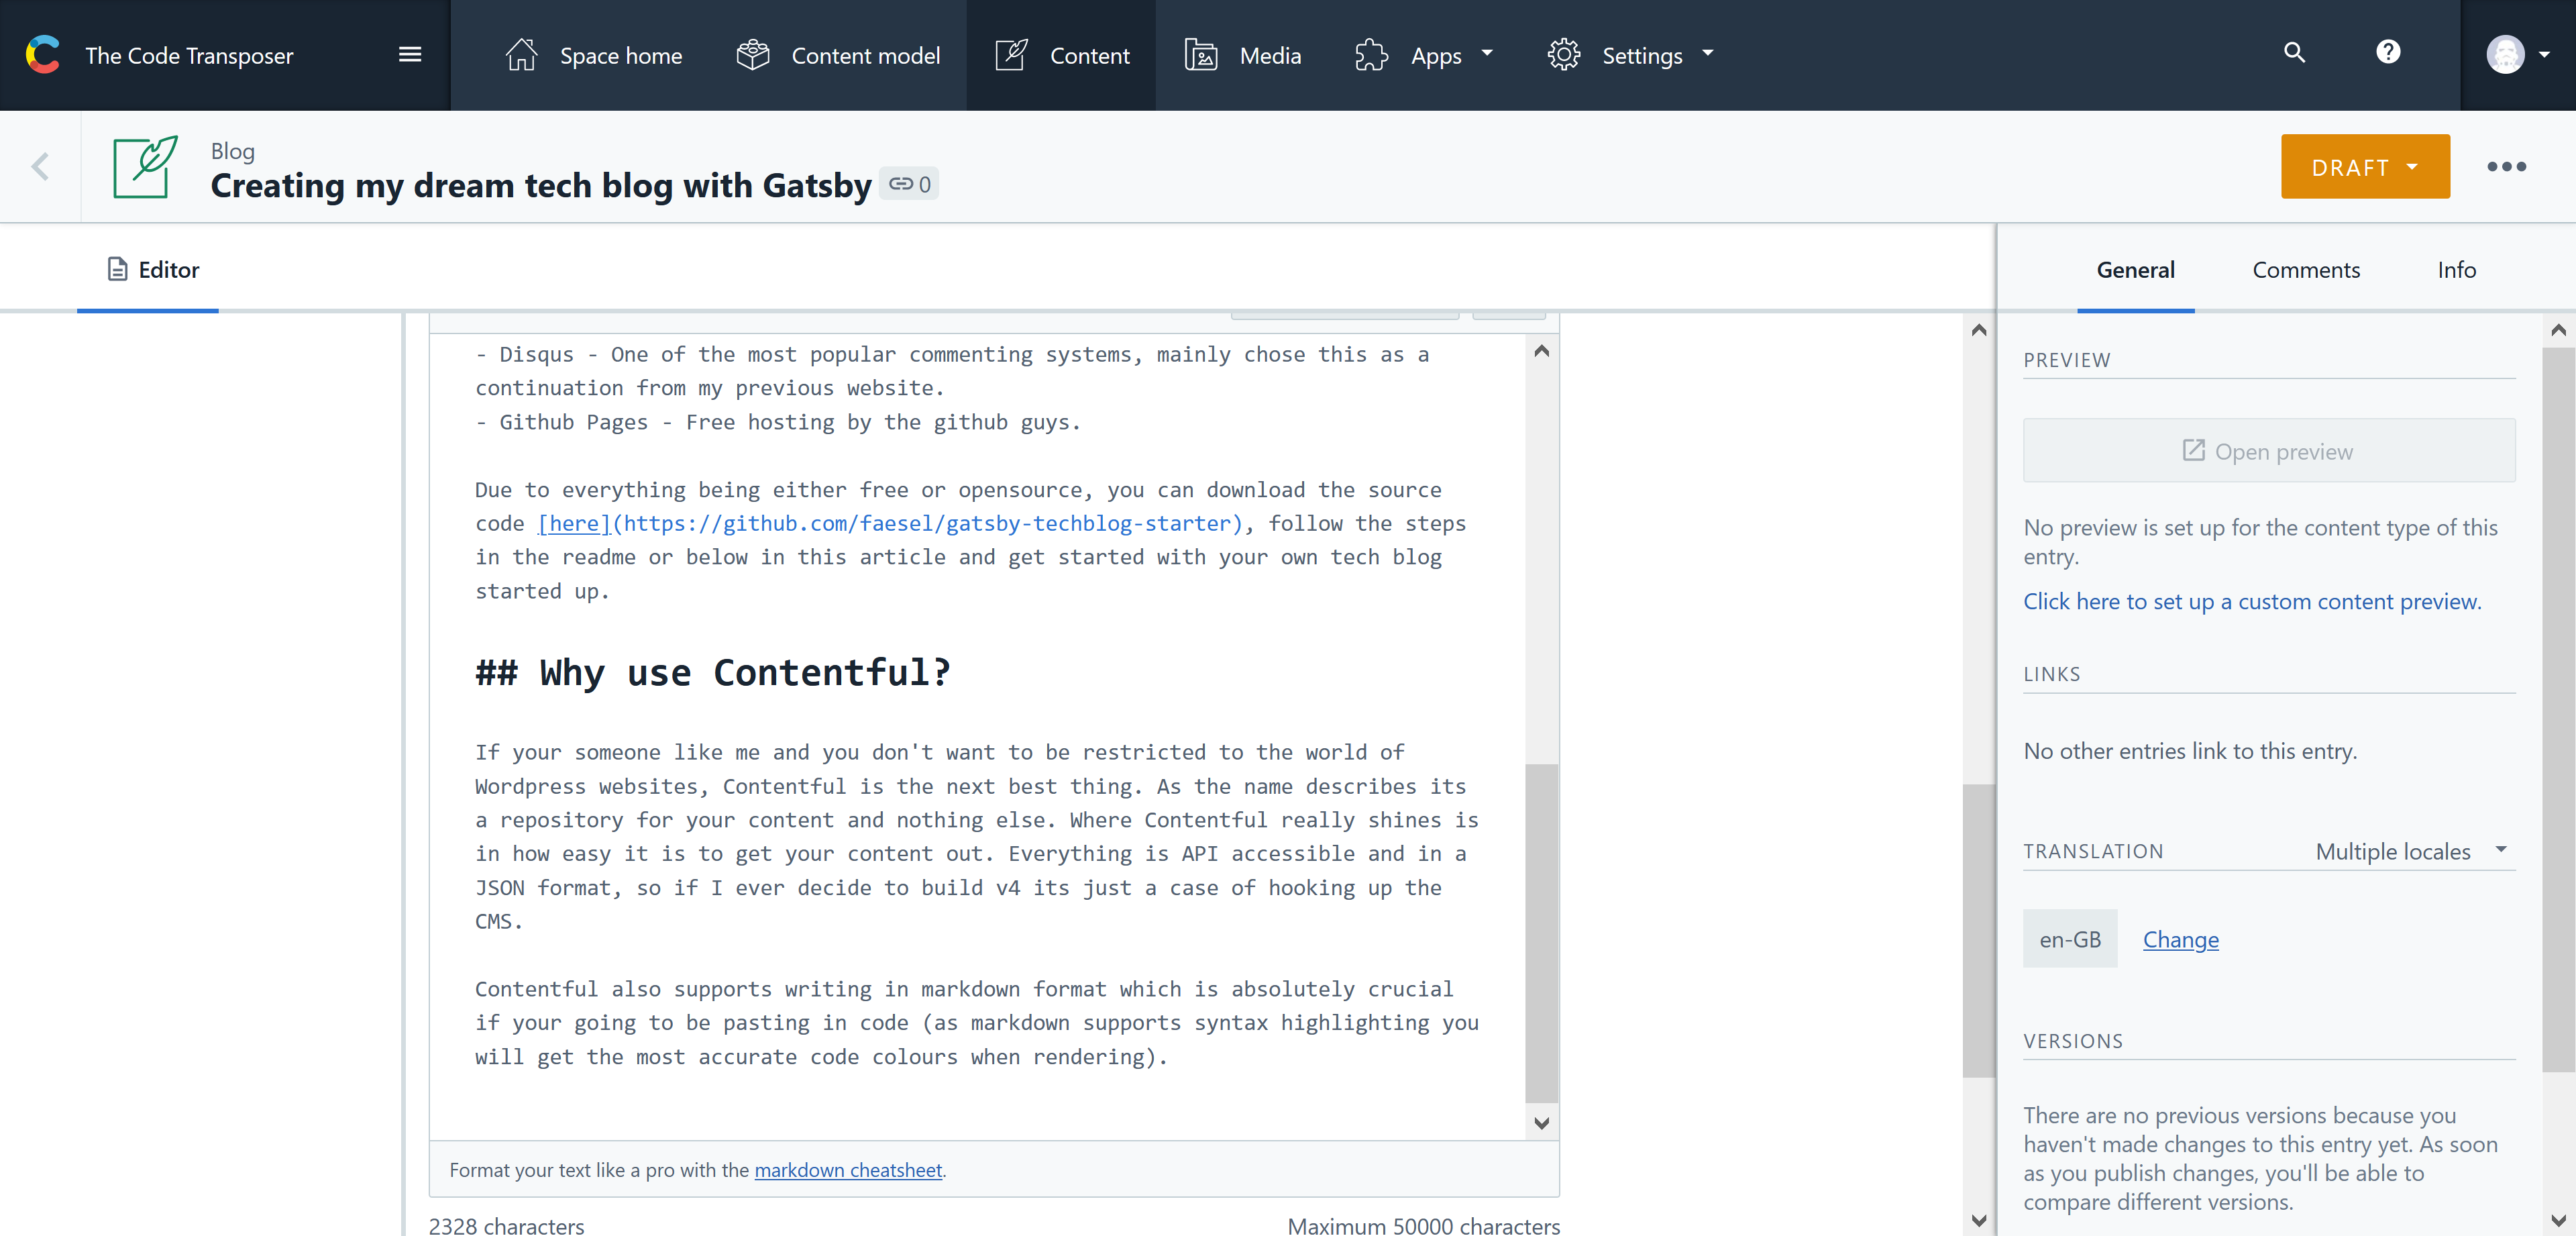\n\n## Why use Disqus?\n\nAs mentioned Disqus was mainly a continuation from the previous version of my website, there are however some plus points to using Disqus. Namely the popularity (See image below), Disqus is by far the most popular commenting system out there, its also incredibly easy to get set up.\n\n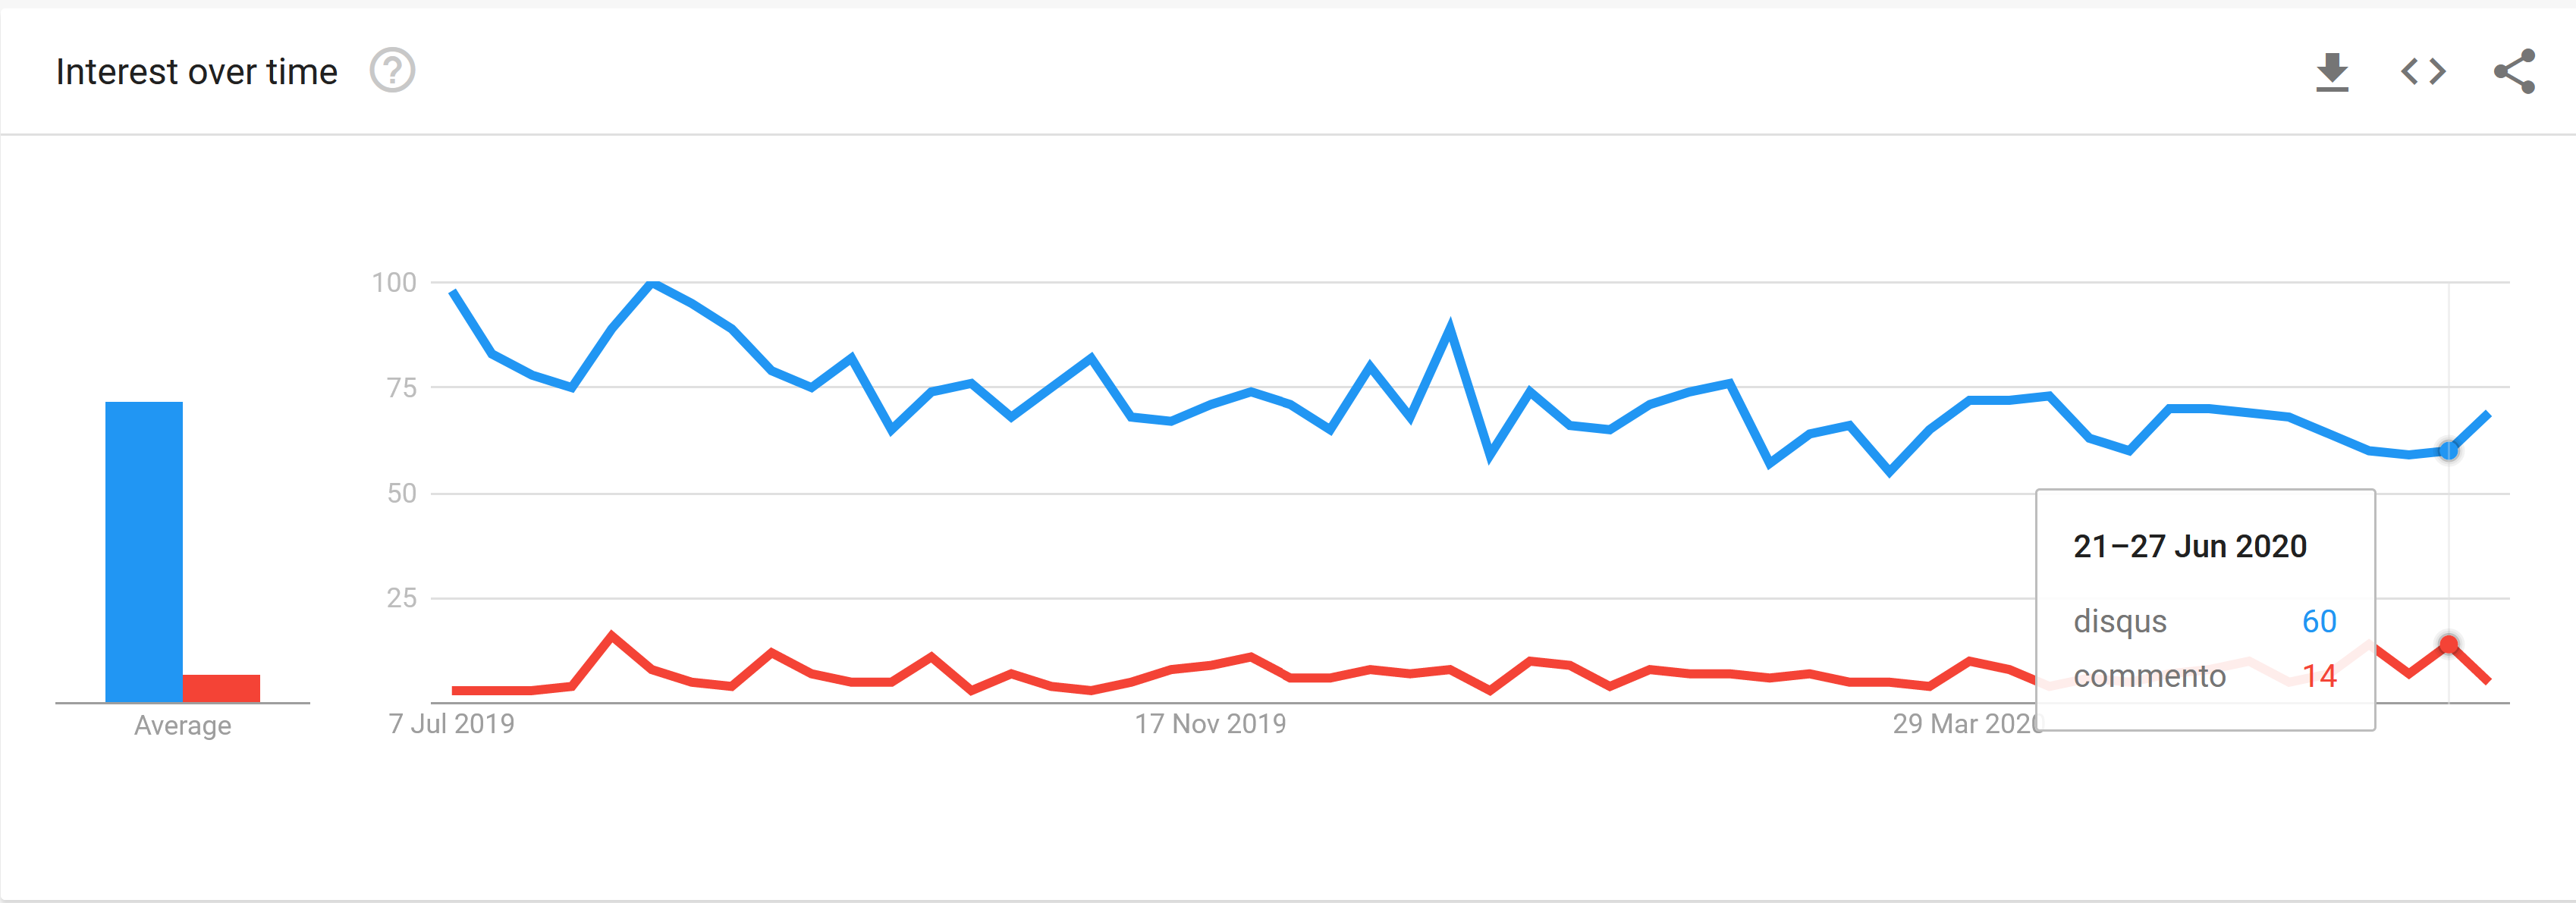\n\nThere are some annoyances however, namely the lack of markdown support, which could be an issue if a commenter wants to post a code snippet.\n\nPerhaps at some point I will migrate to using [Commento](https://commento.io/), theres a great article comparing the two [here](https://victorzhou.com/blog/replacing-disqus/).\n\n## Why GitHub pages?\n\nFirstly it's free hosting! What more do you want...\n\nI have always relied on using Azure to host my pages but unless you got a Biztalk account there's a cost in doing so. Github allows you to host content on their website for absolutely free, its got two forms of public pages. \n\n1. Personal pages\n\nThis sits under your personal repository path, so in my case my username is faesel (https://github.com/faesel/), when creating a repository called 'faesel' and enabling pages. GitHub gives you the domain https://faesel.github.io. What's amazing is (provided your DNS is setup correctly) they also handle SSL certificates for your behalf.\n\n2. Project pages\n\nGithub also supports project pages which sit under a subdomain of your repository, for example a repository with the link https://github.com/faesel/faesel-blog would resolve into public page URL for https://faesel.github.io/faesel-blog.\n\nFor my blog option 1 was chosen. There is one caveat to personal pages, your published output needs to reside in master and your actual source code needs to be in another branch. The Gatsby template I have created, uses master and source as the two main branches as you can see [here](https://github.com/faesel/faesel.github.io/branches).\n\n## Why use Gatsby?\n\nGatsby lightning fast when it comes to rendering pages, behind the scenes it builds up static pages which you deploy to your website. As it's designed to be a progressive web app, pre-fetching is built it, so when your cycles through different pages on your website the load times are instant.\n\nGatsby supports a wide range of plugins, **2162** at the time of writing this article. Admittedly some of them are duplicates, but overall they have enough coverage to integrate the vast majority of 3rd party platforms. Below are some plugins I used for my blog:\n\n- **gatsby-plugin-feed** Used for generating an RSS feed\n- **gatsby-plugin-sitemap** Used for generating a sitemap xml file\n- **gatsby-plugin-gtag** Used for integrating google analytics into your blog\n- **gatsby-plugin-react-helmet** SEO plugin used for setting titles and metadata\n- **gatsby-plugin-sass** Integrating sass\n- **gatsby-remark-highlight-code** Used for highlighting code syntax\n- **gatsby-source-contentful** Used for getting data from Contentful\n- **gatsby-transformer-remark** Used for transforming markdown into HTML\n\nA full list of their plugins can be found [here](https://www.gatsbyjs.org/plugins/)\n\nAs Gatsby is built on top of React which means extending your website's functionality is easy. In addition to this data access is all powered through GraphQL which really helps tailor the requests for data in accordance with your UI. All this is setup for you right out the box.\n\n## How to use the blog template to create my own tech blog?\n\nAs mentioned I have created a Gatsby blog template that you can clone yourself, setup and host all at no cost at all. The code can be found [here](https://github.com/faesel/gatsby-techblog-starter).\n\nThere are some pre-requisites we need to get through before we can begin, mainly creating accounts in the following 3rd partys.\n\n- [Contentful](https://www.contentful.com/sign-up/)\n- [Google Analytics](https://analytics.google.com/analytics/web/)\n- [Disqus](https://disqus.com/)\n\n### Step 1 - Configuring Contentful\n\nThe first step is to configure Contentful by creating a content model. A content model represents all the building blocks required to represent a single blog post. Below is a screenshot of the content model needed:\n\n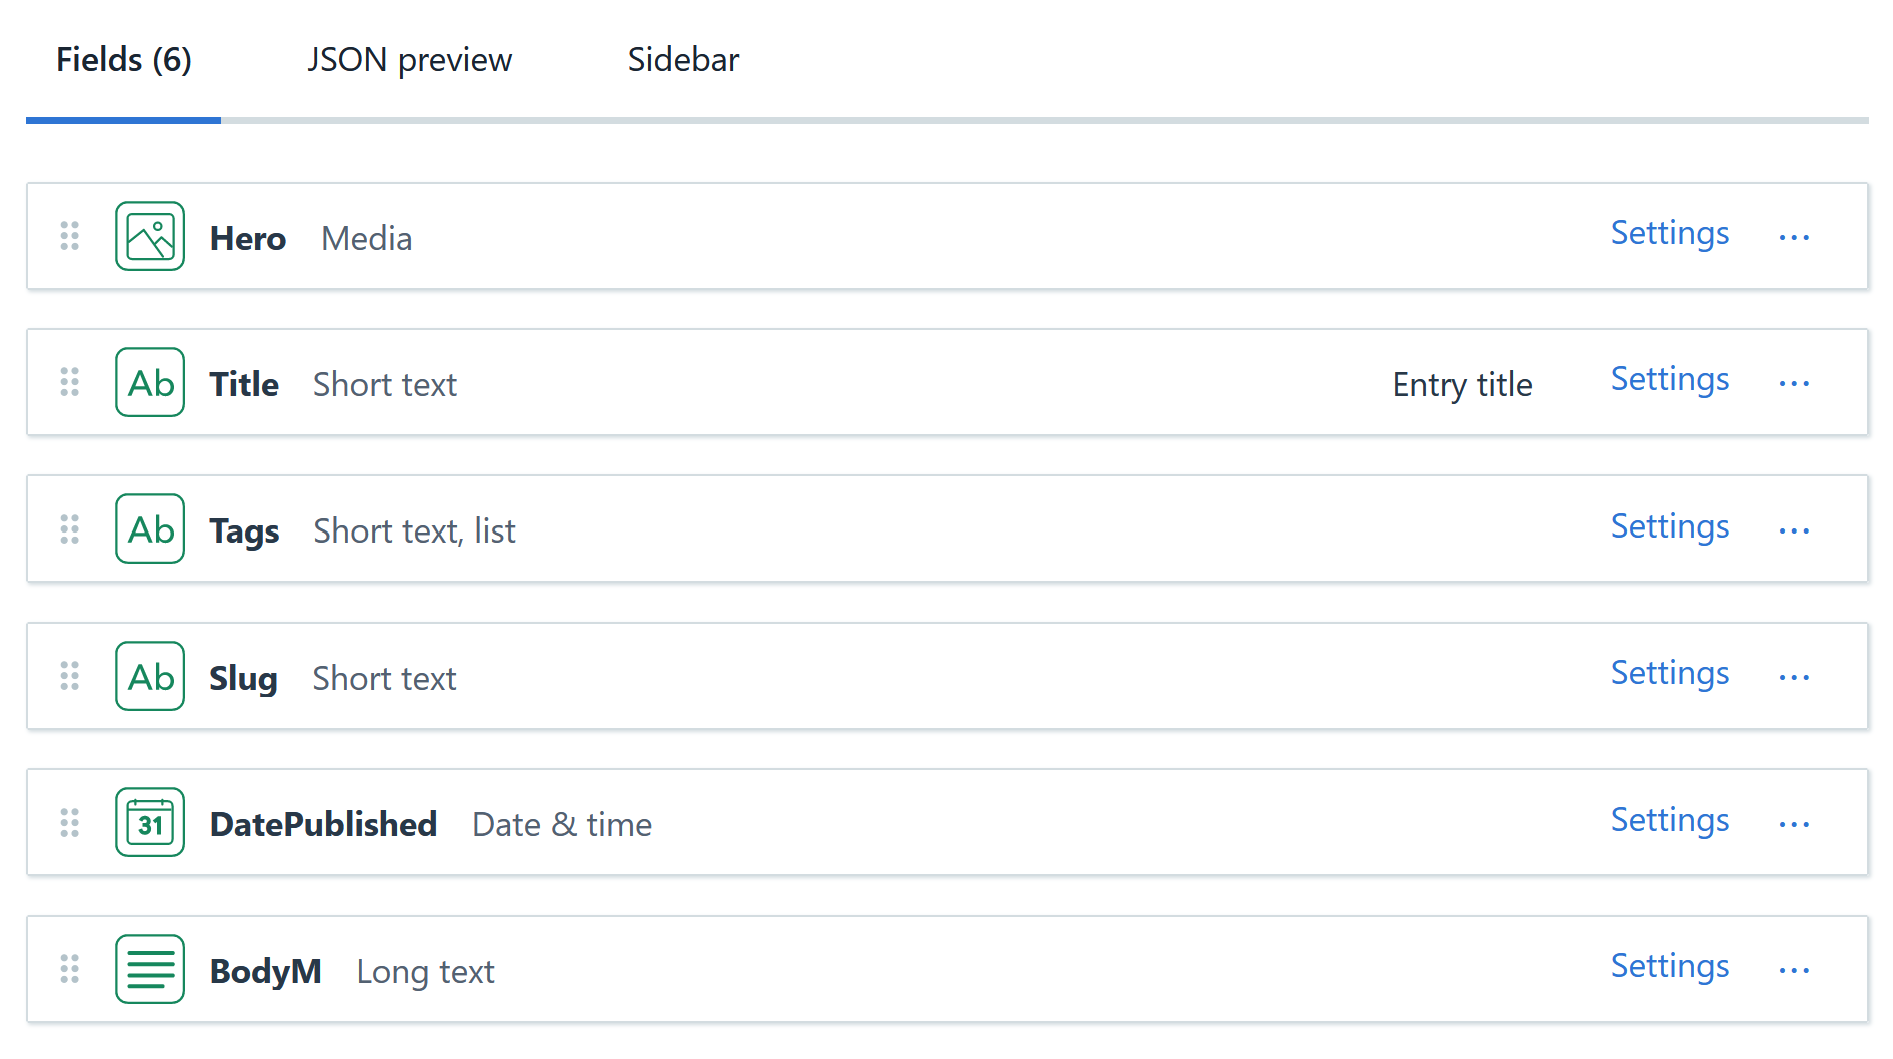\n\nIf your creating it manually do remember to set the field 'BodyM' as a markdown field. Once this model is in place, you can begin writing up your first markdown post. To create this model programatically you can run the following command:\n\n```\nnpm run setup SPACE_ID CONTENTFUL_MANAGEMENT_TOKEN\n```\n\nThe management token can be sourced from **Settings** \u003e **API Keys** \u003e **Content management tokens**\n\nThere are two settings we need to take a note of that are needed for **Step 2**\n\n- Space Id\n- Space Access Token\n\nBoth of these can be sourced from **Settings** \u003e **API Keys** \u003e **Content delivery / preview tokens**, \n\n### Step 2 - Configuring Environment Variables\n\nThe next step is to populate your environment variables, the two Contentful keys can be accessed by following Step 1. Setting up google and Discus is optional.\n\n```\nCONTENTFUL_SPACE_ID=\nCONTENTFUL_ACCESS_TOKEN=\nGOOGLE_TRACKING_ID=\nGATSBY_DISQUS_NAME=\n```\n\n### Step 3 - Configuring your gatsby config\n\nThe gatsby config file is at the root of this project, it contains all the plugins installed into this project.\n\n```\nmodule.exports = {\n siteMetadata: {\n title: 'FAESEL.COM',\n author: 'Faesel Saeed',\n description: 'Welcome to my great blog',\n siteUrl: 'https://www.faesel.com', //Use the fully qualified url\n social: {\n twitter: 'https://twitter.com/@faeselsaeed', //Use the fully qualified url\n linkedin: 'https://www.linkedin.com/....',\n github: 'https://github.com/....',\n flickr: 'https://www.flickr.com/....', //Feel free to remove this :)\n email: 'someone@gmail.com'\n },\n },\n}\n```\n\nOnce This is filled in your all set to run the project!\n\n### Step 4 - Running the project\n\nBegin by installing dependencies: \n\n**npm install**\n\nFollowed by running the website:\n\n**npm run develop**\n\n## Step 5 - Deployment\n\nTo deploy the project begin by creating a repository containing your GitHub username \"faesel.github.io\".\n\nCopy all your code into a branch called **source**\n\nRun the following command\n\n**npm run publish**\n\nThe command will publish all the static files Gatsby generates into the **master** branch.\n\nTo enable github pages navigate to the **Repository** \u003e **Settings** \u003e Scroll down to github pages and select the source branch as **master**. Also at this step if you can enter in your custom domain. Once setup it should look something like this:\n\n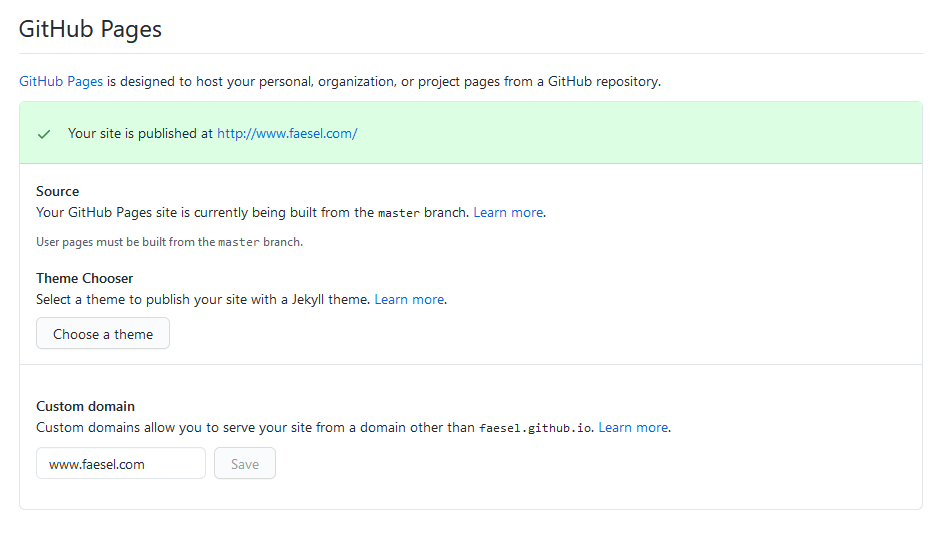\n\n## Summary\n\nIts as easy as that, you know have a blog whos content is powered by Contentful! ... time to blog.\n\n\n\nAs with all things in tech, there are some improvements that got taken off the bucket list.\n\n- Automate deployments by making use of webhooks triggered when publishing content.\n- Add a plugin to allow embeding content like tweets, youtube posts ect.\n- Add a searching mechanism\n- Add pagination\n\n## The Honourable mention\n\nThis article and the project was inspired by Andrew Mead's [**'The Great Gatsby Bootcamp'**](https://www.youtube.com/watch?v=kzWIUX3CpuI) course which I highly recommend in learning the basics.\n\nhttps://www.youtube.com/watch?v=kzWIUX3CpuI"])</script><script>self.__next_f.push([1,"21:T2606,"])</script><script>self.__next_f.push([1,"I'm currently working at a place were we are using queue triggered Webjobs to handle the sending of messages like email and SMS (using Send Grid and Twilio). Using a queue based system for this is great because it allows us to replay any queue messages, should one of the 3rd party's (or our code) fail to send the message. \n\nSince we are connecting into 3rd party's you can almost guarantee there's going to be some form of failure. So its always good practice to leverage on this type of architecture to handle the unknown. We have the following setup:\n\n- Website \u003e Storage Queue \u003e Web Job \u003e Send Grid\n- Website \u003e Storage Queue \u003e Web Job \u003e Twillio\n\nWhen a failure occurs, queue messages are automatically moved from the \nmessage queue into a poison queue, these queues are always suffixed with \"poison\" (MS really wanted to highlight how toxic your problems are) like so:\n\n- email - For normal operation\n- email-poison - Messages moved here when a failure occurs\n- sms\n- sms-poison\n\nGaining visibility of what's in a poison queue is really important in knowing \nthe health of your system. So I embarked upon a task in seeking out an \nalert setting buried deep somewhere in the Azure portal to help surface \nany messages going into the poison queue. I knew this would be a metric \nalert of some kind either in the 'Storage Account', 'Alerts' or perhaps \neven 'Application Insights' blade. \n\nAfter having spent a while searching for it as well as posting this Stack Overflow question (it wasn't a popular one..), I started doubting whether it even existed!\n\nI even tried the search box at the top of the azure dashboard as a last ditch effort, hoping it will provide answers. You think this would \nexists somewhere (if it does and my eyes have deceived me please do get \nin touch) or at the very least be visible and easily findable? Alas this was not the case..\n\nSo I decided to do something about it, \n\n\u003e why not have an Azure function that takes a storage account and looks through all the queues to check if any poison queue messages exist. \n\nWhilst were at it we could also check if messages are stacking up in the non-poison queues (just in-case a Webjob has been turned off or cant process a certain message), and even provide the content of a problematic queue message. Since our team uses slack for communication I decided to send the notification to Slack. Below are the steps I took:\n\n#Step 1 - Setting up slack\n\nSetting up slack is quick and easy, just create a 'poison-queue' channel, and create a new integration in the custom integrations section (Note your gonna have to get admin access to do this (I have provided a link at the bottom of this article as its nested deep in their UI). An integration is essentially a web hook endpoint for us to post JSON data to (I have added a link for Slacks JSON format below too, as well as a message builder to help customise the look and feel).\n\nThe picture below show where you can get your web hook URL from.\n\n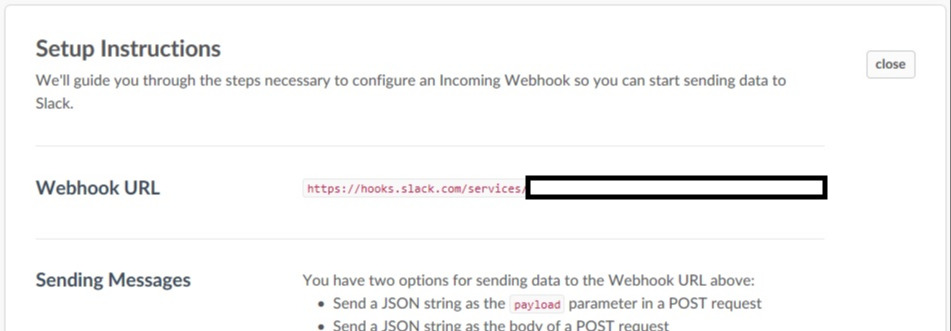\n\n#Step 2 - Create your Azure Function\n\nSince this is not a tutorial on Azure Functions, I'm going to skip going into detail here. Microsoft however have provided some great documentation on this (with pictures!) to help you out. Links are at the end until MS break them. By the way your gonna need a cron expression to define the timeframe for this function to work in, if you hate cron as much as I do worry not! Use my cron expression for a daily sobering alert at 9:00 - 0 0 9 * * *\n\n#Step 3 - Create your slack message structure\n\nNext we can create the basic structure needed for our Slack message, expressed as a C# class. My class is actually quite simple and missing quite a few properties, to get a sense of all the customisations Slack offers have a look at the links below.\n\n```csharp\n#r \"Newtonsoft.Json\"\n\n#load \"Attachments.csx\"\n\nusing Newtonsoft.Json;\nusing System.Collections.Generic;\n\npublic sealed class SlackMessage\n{\n public SlackMessage()\n {\n Attachments = new List\u003cAttachments\u003e();\n }\n\n [JsonProperty(\"channel\")]\n public string Channel { get; set; }\n\n [JsonProperty(\"username\")]\n public string UserName { get; set; }\n\n [JsonProperty(\"text\")]\n public string Text { get; set; }\n\n [JsonProperty(\"attachments\")]\n public List\u003cAttachments\u003e Attachments { get; set; }\n\n [JsonProperty(\"icon_emoji\")]\n public string Icon\n {\n get { return \":computer:\"; }\n }\n}\n\n#r \"Newtonsoft.Json\"\n\nusing Newtonsoft.Json;\n\npublic class Attachments\n{\n [JsonProperty(\"color\")]\n public string Colour { get; set; }\n\n [JsonProperty(\"title\")]\n public string Title { get; set; }\n\n [JsonProperty(\"text\")]\n public string Text { get; set; }\n}\n```\nRemember to create these classes as .csx files for the Azure function to understand them.\n\n#Step 4 - Create a slack client to post the message\n\nNow that we have our message structure we can create a class to serialize and post the JSON to Slack using the Webhook created in **Step 1**, below is the code to do this,\n\n```csharp\n#r \"Newtonsoft.Json\"\n#r \"System.Web.Extensions\"\n#r \"System.Web\"\n\n#load \"SlackMessage.csx\"\n#load \"Attachments.csx\"\n\nusing System.Net;\nusing Newtonsoft.Json;\nusing System.Collections.Specialized;\n\npublic class SlackClient\n{\n public static readonly string WebHook = @\"https://hooks.slack.com/services/XXXXXXXX/XXXXXXXXXXXXXXXXXXXXXXXXXXX\";\n\n public void SendMessage(SlackMessage message)\n {\n string payloadJson = JsonConvert.SerializeObject(message);\n \n using (WebClient client = new WebClient())\n {\n NameValueCollection data = new NameValueCollection();\n data[\"payload\"] = payloadJson;\n client.UploadValues(WebHook, \"POST\", data);\n }\n }\n}\n```\nIts good practice to move the Webhook URL into the settings file, for simplicity I have included it into this class.\n\n#Step 5 - Queue Checker\n\nNext we need to add code to loop through any connections string we pass it, check all the queues and send messages if we think there's something wrong.\n\n```csharp\n#r \"Microsoft.WindowsAzure.Storage\"\n\n#load \"SlackClient.csx\"\n#load \"SlackMessage.csx\"\n#load \"Attachments.csx\"\n\nusing System.Collections.Generic;\nusing System.Linq;\nusing Microsoft.WindowsAzure.Storage;\nusing Microsoft.WindowsAzure.Storage.Auth;\n\npublic class PoisonQueueChecker\n{\n public void CheckPoisonQueues(Dictionary\u003cstring, string\u003e storageConnectionStrings)\n {\n var slackClient = new SlackClient();\n var slackMessage = new SlackMessage { Text = \"Poison Queue Alerts\", Channel = \"poison-queue\" };\n\n foreach (var storageConnectionString in storageConnectionStrings)\n {\n var storageCredentials = new StorageCredentials(storageConnectionString.Key, storageConnectionString.Value);\n var storageAccount = new CloudStorageAccount(storageCredentials, true);\n var queueClient = storageAccount.CreateCloudQueueClient();\n\n var queues = queueClient.ListQueues();\n foreach (var queue in queues)\n {\n queue.FetchAttributes();\n //Gets the total messages in the queue\n var queueCount = queue.ApproximateMessageCount;\n\n if (queueCount \u003e 0)\n {\n var isPoisonQueue = queue.Name.EndsWith(\"poison\");\n var attachment = new Attachments();\n attachment.Title = $\"Queue: {queue.Name}, Message Count: {queueCount}\";\n attachment.Colour = isPoisonQueue ? \"danger\" : \"warning\";\n\n //Note the peek function will not dequeue the message\n var message = queue.PeekMessage();\n attachment.Text = $@\"Insertion Time: {message.InsertionTime}, Sample Contents:\\n\" +\n $\" {message.AsString}\"; \n\n slackMessage.Attachments.Add(attachment);\n }\n }\n\n //Add a message showing all is well\n if (!slackMessage.Attachments.Any())\n {\n slackMessage.Attachments.Add(new Attachments { Title = \"All queues are operational and empty\", Colour = \"good\" });\n }\n }\n\n slackClient.SendMessage(slackMessage);\n }\n}\n```\n\n#Step 6 - Being it all together\n\nFinal step is to hook up the functions run method like so:\n\n```csharp\n#load \"PoisonQueueChecker.csx\"\n\nusing System;\nusing System.Collections.Generic;\n\npublic static void Run(TimerInfo myTimer, TraceWriter log)\n{\n log.Info($\"C# Timer trigger function executed at: {DateTime.Now}\");\n\n var storageConnectionStrings = new Dictionary();\n storageConnectionStrings.Add(\"storagename\", \"storagekey\");\n\n var poisonQueueChecker = new PoisonQueueChecker();\n poisonQueueChecker.CheckPoisonQueues(storageConnectionStrings);\n}\n```\n\nAnd that's it, 9 O'clock tomorrow you can finally start gaining visibility of those poison queues and start worrying about those dodgy lines of code causing your messages to be poisoned.\n\n#Helpful Links\n\nCustom Integrations\n\nhttps://\u003c\u003cyourslackgroupname\u003e\u003e.slack.com/apps/manage/custom-integrations\n\nCustomising your slack message\n\nhttps://api.slack.com/docs/messages/builder\n\nHow to send a slack message to your web hook:\n\nhttps://api.slack.com/custom-integrations/incoming-webhooks\n\nHow to create a azure function:\n\nhttps://docs.microsoft.com/en-us/azure/azure-functions/functions-create-first-azure-function\n\nHow to code up a azure function:\n\nhttps://docs.microsoft.com/en-us/azure/azure-functions/functions-reference-csharp\n"])</script><script>self.__next_f.push([1,"22:T1f26,"])</script><script>self.__next_f.push([1,"Having looked at a number of projects in my lifetime, I always come across classes named something like \"CustomerService\" with similar variations (usually in the same project calling each other) ranging from \"CustomerProvider / Helper /Manager / Store / etc...\".\n\n\u003e There are two hard things in computer science: cache invalidation, naming things, and off-by-one errors - PhilKarlton\n\nAs a new developer working on a project it becomes really hard to figure out what the structure is, and in the case of adding code what to name classes. Naming and structure always seem to be a developers achilles heel(almost akin to superman and kryptonite).\n\nSo, I wanted to come up with a solution to the problem, something more structured that helps facilitate better naming and structuring and the way I decided to do this is through dependency injection. \n\nBy now we are all familiar with Inversion of control, and comfortable using it to decouple dependencies within our applications. Most of us have dabbled with the usual suspects CastleWindsor, AutoFaq, Ninject to name a few. \n\nOne thing people don’t realise is we can also utilise these frameworks to enforce good structure as well as unit test the structure itself to ensure new developers don’t stray from the named path. For the examples below I'm going to use Castle Windsor.\n\n#Step 1 – Define the structure and start naming the onion layers\n\nThe codebases of yester-year were usually architected using a n-tier structure typically following the pattern: \n\nPresentation Layer (Controller) \u003e Business Layer (Service) \u003e Data Layer (Repository)\n\nAs time progressed new patterns emerged the structure became more complex however we still try to adopt some form of onion layering within the application. Whether it’s one onion or many within a single solution we should always strive to define what the layers are in the application.\n\nSo, to start we should define:\n\n1. What the onion layer is named (forming groups of similar classes).\n2. What the responsibility of each layer is.\n\n#Step 2 – Create your conventions\n\nNow that we have some understanding of the layers, we can start defining them in code. I use an empty interface to do this. Note Castle distinguishes these layers as 'Conventions'.\n\n```csharp\n/// A class that contains business logic, it also does not directly access any data source.\npublic interface IService\n{\n}\n```\n\nNote the interface has no bearing on logic, and does not alter how the app behaves. It’s simply used as a marker to distinguish the layers of the application. A small description is also provided to define what the responsibility of the layer is. These conventions are also a way to document the structure of the application.\n\n#Step 3 – Install all dependency’s using the convention.\n\nNow that we have a convention we can blanket install all classes subscribing to that convention, if your using castle Windsor there is a slight difference in how this is done depending on whether you apply the convention directly on the class itself or if you apply it to another interface.\n\n**Applying it to an interface**\n\n```csharp\n/// A class that contains business logic, it also does not directly access any data source.\npublic interface IService\n{\n}\n\n/// Blanket install all IServies\ncontainer.Register(Classes.FromAssembly(Assembly.Load(\"Assembly name goes here\"))\n .BasedOn(IService)\n .WithService.AllInterfaces()\n .LifestyleSingleton());\n\n/// Example usage\npublic interface ICustomerService : IService\npublic class CustomerService : ICustomerService\n```\n\n**Applying it to a class**\n\nWhen applying it to class the installation has a slight difference.\n\n```csharp\n/// A class that contains a business rule, it validates whether the rule has been met\npublic interface IRule\n{\n string ApplyRule();\n}\n\ncontainer.Register(Classes.FromAssembly(Assembly.Load(\"Assembly name goes here\"))\n .BasedOn(IRule)\n .WithService.Base()\n .LifestyleSingleton());\n\npublic class CustomerRule : IRule\n```\n\nWhen creating a new class that fits within a pre-defined convention installation becomes a walk in the park, just apply the convention interface and you’re done.\n\n#Step 4 – Unit testing structure\n\nNow that we have our convention setup and we are installing all classes with that convention we can apply a unit tests that will check against the structure. We are testing on two things here:\n\n1. Only Services should have a‘Service’ Suffix\n2. Only Services should exist in a ‘Service’ namespace\n\n```csharp\n[TestFixture]\npublic class TestSolutionConventionTests\n{\n [SetUp]\n public void Setup()\n {\n // Register all dependencys in the project using castle\n RegisterDependencies(); \n }\n\n [Test]\n public void OnlyServices_HaveServiceSuffix()\n {\n // Get access to IWindsorContainer\n var container = DependencyResolver.Container; \n // Get all classes in the application where the name ends with Service (using reflection).\n var allServices = GetPublicClassesFromApplicationAssembly(c =\u003e c.Name.EndsWith(\"Service\"), \"Assembly name where service exists goes here\");\n // Get all services installed within castles container that use the interface IService\n var registeredServices = GetImplementationTypesFor(typeof(IService), container);\n\n // Assert the names all match and are equal\n allServices.ToList().Should().Equal(registeredManagers, (ac, rc) =\u003e ac.Name == rc.Name);\n }\n\n [Test]\n public void OnlyServices_LiveInServicesNamespace()\n {\n var container = DependencyResolver.Container; \n // Get all classes in the application where the namespace contains Service\n var allServices = GetPublicClassesFromApplicationAssembly(c =\u003e c.Namespace.Contains(\"Service\"), \"Assembly name where service exists goes here\");\n var registeredServices = GetImplementationTypesFor(typeof(IService), container);\n\n allServices.ToList().Should().Equal(registeredManager, (ac, rc) =\u003e ac.Name == rc.Name);\n }\n\n private Type[] GetPublicClassesFromApplicationAssembly(Predicate where, string assemblyName)\n {\n return Assembly.Load(assemblyName).GetExportedTypes()\n .Where(t =\u003e t.IsClass)\n .Where(t =\u003e t.IsAbstract == false)\n .Where(where.Invoke)\n .OrderBy(t =\u003e t.Name)\n .ToArray();\n }\n\n private Type[] GetImplementationTypesFor(Type type, IWindsorContainer container)\n {\n return container.Kernel.GetAssignableHandlers(type)\n .Select(h =\u003e h.ComponentModel.Implementation)\n .OrderBy(t =\u003e t.Name)\n .ToArray();\n }\n}\n```\n\nPicture below describes what these unit tests protect against:\n\n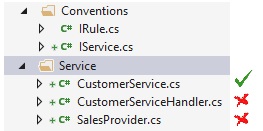\n\n#Step 5 – Introducing new conventions\n\nAs your solution evolves you’re going to come across certain scenarios where the responsibilities of a class don’t fit into the conventions defined (as we have a list of conventions with descriptions it’s easy to distinguish if a new convention is needed). These scenarios will mainly occur at the beginning phase of a new application (as its rapidly evolving) and as conventions get defined you will find that having to define a new one will become an increasingly rare activity.\n\nThis process should mitigate the scenario of having a customer/service/manager/provider…\n\n#Step 6 – Sharing conventions across projects unified code base\n\nOnce we’ve established some conventions for a project we can easily extract these out into a separate project and package it as a NuGet package. This allows us to apply the conventions to other solutions giving us a unified structure that looks the same from one solution to another.\n\nNew developers will surely appreciate this, and as a co-worker sitting next to them the wtf count will be below uncomfortable thresholds!"])</script><script>self.__next_f.push([1,"23:Tb11,"])</script><script>self.__next_f.push([1,"This is a quick guide on how to split unit tests into different categories to decrease the time it takes for your CI build to run. The categories can be used to distinguish different areas of your tests to break down the CI Builds (typically used to run different categories in parallel) or to separate slow running tests into a separate build, all in the aim of speeding up the feedback cycle for developers. So to create a category you simple add a category attribute to either a test or a test fixture like so:\n\n```csharp\n[Category(\"CategoryOne\")] \n[TestFixture] \npublic void FunkyMethod() \n{ \n string pointless = \"this is code\"; \n} \n\n[Category(\"CategoryFour\")] \n[TestFixture] \npublic class UpgradeControllerTests \n{ \n ...\n```\n\nWhen segregating tests sometimes you will find a tests intersects multiple categories, in this case you can add multiple attributes. Later on we will see the different types of expressions you are able to enter when running the tests through TeamCity. Below is an example of using multiple categories\n\n```csharp\n[Category(\"CategoryOne\")] \n[Category(\"CategoryTwo\")] \n[Test] \npublic void FunkyMethod() \n{ \n string pointless = \"this is code\"; \n}\n```\n\nSo far creating categories like this is fine however having magic strings all over your code is not great. So to fix this we can create a custom attribute which does exactly the same thing as shown below. The custom attribute inherits from CategoryAttribute.\n\n```csharp\n//Used for a test fixture \n[AttributeUsage(AttributeTargets.Class, AllowMultiple = false)] \npublic sealed class CategoryFiveAttribute : CategoryAttribute { } \n//Used for a test \n[AttributeUsage(AttributeTargets.Method, AllowMultiple = false)] \npublic sealed class CategoryThreeAttribute : CategoryAttribute { }\n```\n\nNow that we have the attributes ready we can use them like so.\n\n```csharp\n[TestFixture, CategoryFiveAttribute] \npublic class SignOutControllerTests \n{ \n ...\n```\n\nTo configure team city to run certain categories is fairly straightforward. Start by creating a Build step with the runner type set to “NUnit”. Under Run tests from select your test project dll file. And then under Nunit categories include list the categories you want to test out by writing\n\n/Include: CategoryOne\n\nNote that you can also do the inverse and exclude certain tests by adding the following in the section named Nunit categories exclude\n\n/Exclude: CategoryOne\n\nNUnit also supports quite complex expressions, to see a full list click here (section “Specifying test categories to include or exclude”). \n\nA screenshot is included for a full list of settings.\n\n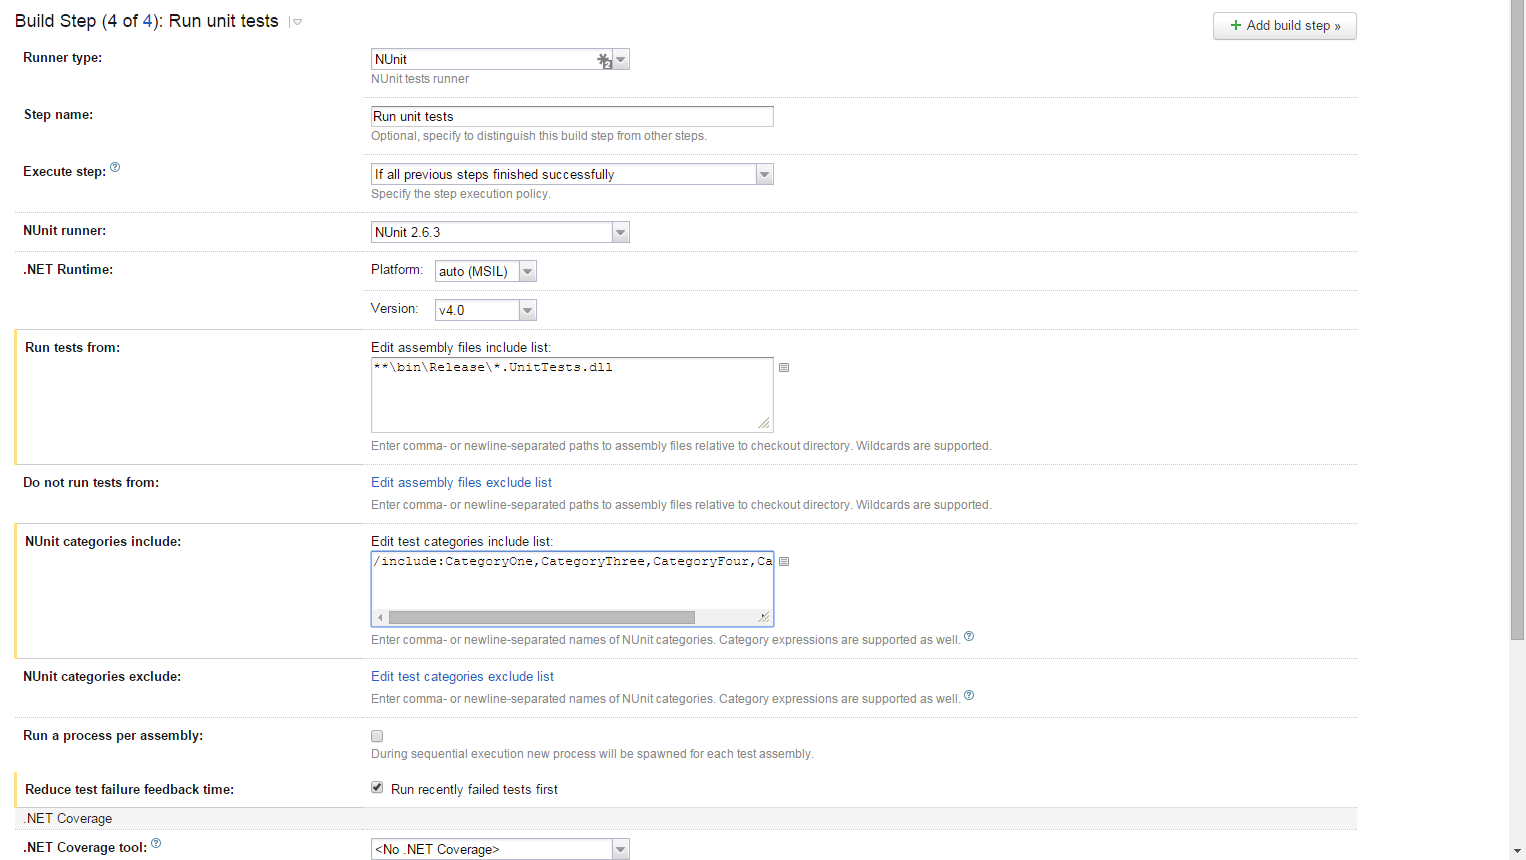\n\nOnce you have this in place your unit tests will run with lightening speed."])</script><script>self.__next_f.push([1,"7:[[\"$\",\"script\",null,{\"type\":\"application/ld+json\",\"dangerouslySetInnerHTML\":{\"__html\":\"{\\\"@context\\\":\\\"https://schema.org\\\",\\\"@type\\\":\\\"BreadcrumbList\\\",\\\"itemListElement\\\":[{\\\"@type\\\":\\\"ListItem\\\",\\\"position\\\":1,\\\"name\\\":\\\"Home\\\",\\\"item\\\":\\\"https://www.faesel.com\\\"},{\\\"@type\\\":\\\"ListItem\\\",\\\"position\\\":2,\\\"name\\\":\\\"Blog\\\",\\\"item\\\":\\\"https://www.faesel.com/blog\\\"}]}\"}}],[\"$\",\"script\",null,{\"type\":\"application/ld+json\",\"dangerouslySetInnerHTML\":{\"__html\":\"{\\\"@context\\\":\\\"https://schema.org\\\",\\\"@type\\\":\\\"CollectionPage\\\",\\\"name\\\":\\\"Blog\\\",\\\"description\\\":\\\"Articles about technology, coding, and digital innovation\\\",\\\"url\\\":\\\"https://www.faesel.com/blog\\\"}\"}}],[\"$\",\"$L12\",null,{\"posts\":[{\"metadata\":{\"tags\":[],\"concepts\":[]},\"sys\":{\"space\":{\"sys\":{\"type\":\"Link\",\"linkType\":\"Space\",\"id\":\"wjg1udsw901v\"}},\"id\":\"2rVaNCr3bLzorSAqRW013p\",\"type\":\"Entry\",\"createdAt\":\"2026-06-07T11:14:40.254Z\",\"updatedAt\":\"2026-06-07T14:12:30.539Z\",\"environment\":{\"sys\":{\"id\":\"master\",\"type\":\"Link\",\"linkType\":\"Environment\"}},\"publishedVersion\":115,\"revision\":9,\"contentType\":{\"sys\":{\"type\":\"Link\",\"linkType\":\"ContentType\",\"id\":\"theCodeTransposerBlogPosts\"}},\"locale\":\"en-GB\"},\"fields\":{\"hero\":{\"metadata\":{\"tags\":[],\"concepts\":[]},\"sys\":{\"space\":{\"sys\":{\"type\":\"Link\",\"linkType\":\"Space\",\"id\":\"wjg1udsw901v\"}},\"id\":\"2cwSDrr8iE5me2vayzL0xK\",\"type\":\"Asset\",\"createdAt\":\"2026-06-07T09:07:57.065Z\",\"updatedAt\":\"2026-06-07T10:48:48.697Z\",\"environment\":{\"sys\":{\"id\":\"master\",\"type\":\"Link\",\"linkType\":\"Environment\"}},\"publishedVersion\":14,\"revision\":3,\"locale\":\"en-GB\"},\"fields\":{\"title\":\"Gridwatch Token Utilisation\",\"description\":\"\",\"file\":{\"url\":\"//images.ctfassets.net/wjg1udsw901v/2cwSDrr8iE5me2vayzL0xK/80d2a2e60c4c3178d610c58a8db273c4/token-hero.svg\",\"details\":{\"size\":29646,\"image\":{\"width\":1200,\"height\":630}},\"fileName\":\"token-hero.svg\",\"contentType\":\"image/svg+xml\"}}},\"title\":\"Stop Burning Tokens with GridWatch\",\"tags\":[\"gridwatch\",\"copilot\",\"tokens\",\"ai\"],\"slug\":\"stop-burning-tokens-with-gridwatch\",\"datePublished\":\"2026-06-10T00:00+01:00\",\"bodym\":\"$13\"}},{\"metadata\":{\"tags\":[],\"concepts\":[]},\"sys\":{\"space\":{\"sys\":{\"type\":\"Link\",\"linkType\":\"Space\",\"id\":\"wjg1udsw901v\"}},\"id\":\"5KaXgE1gIW54LwOFsLRQje\",\"type\":\"Entry\",\"createdAt\":\"2026-04-12T10:40:26.977Z\",\"updatedAt\":\"2026-04-12T10:53:46.288Z\",\"environment\":{\"sys\":{\"id\":\"master\",\"type\":\"Link\",\"linkType\":\"Environment\"}},\"publishedVersion\":60,\"revision\":3,\"contentType\":{\"sys\":{\"type\":\"Link\",\"linkType\":\"ContentType\",\"id\":\"theCodeTransposerBlogPosts\"}},\"locale\":\"en-GB\"},\"fields\":{\"hero\":{\"metadata\":{\"tags\":[],\"concepts\":[]},\"sys\":{\"space\":{\"sys\":{\"type\":\"Link\",\"linkType\":\"Space\",\"id\":\"wjg1udsw901v\"}},\"id\":\"25D8ZUmMWM3oAgIcNw56Yp\",\"type\":\"Asset\",\"createdAt\":\"2026-04-12T10:40:17.597Z\",\"updatedAt\":\"2026-04-12T10:40:17.597Z\",\"environment\":{\"sys\":{\"id\":\"master\",\"type\":\"Link\",\"linkType\":\"Environment\"}},\"publishedVersion\":5,\"revision\":1,\"locale\":\"en-GB\"},\"fields\":{\"title\":\"gridwatch-0.28.0-hero\",\"description\":\"\",\"file\":{\"url\":\"//images.ctfassets.net/wjg1udsw901v/25D8ZUmMWM3oAgIcNw56Yp/27dd5fecd3c8afa58af2daa437fa4dad/gridwatch-v028-hero.png\",\"details\":{\"size\":41780,\"image\":{\"width\":1200,\"height\":630}},\"fileName\":\"gridwatch-v028-hero.png\",\"contentType\":\"image/png\"}}},\"title\":\"GridWatch v0.28.0 — From Side Project to Daily Driver\",\"tags\":[\"gridwatch\",\"copilot\",\"cli\"],\"slug\":\"gridwatch-v028-from-side-project-to-daily-driver\",\"datePublished\":\"2026-04-12T00:00+01:00\",\"bodym\":\"$14\"}},{\"metadata\":{\"tags\":[],\"concepts\":[]},\"sys\":{\"space\":{\"sys\":{\"type\":\"Link\",\"linkType\":\"Space\",\"id\":\"wjg1udsw901v\"}},\"id\":\"53u7RPegch7IFV6MvXdT42\",\"type\":\"Entry\",\"createdAt\":\"2026-02-28T14:05:24.537Z\",\"updatedAt\":\"2026-02-28T14:49:07.788Z\",\"environment\":{\"sys\":{\"id\":\"master\",\"type\":\"Link\",\"linkType\":\"Environment\"}},\"publishedVersion\":71,\"revision\":6,\"contentType\":{\"sys\":{\"type\":\"Link\",\"linkType\":\"ContentType\",\"id\":\"theCodeTransposerBlogPosts\"}},\"locale\":\"en-GB\"},\"fields\":{\"hero\":{\"metadata\":{\"tags\":[],\"concepts\":[]},\"sys\":{\"space\":{\"sys\":{\"type\":\"Link\",\"linkType\":\"Space\",\"id\":\"wjg1udsw901v\"}},\"id\":\"23Pz8ZHNR3LA4dru1fR9ki\",\"type\":\"Asset\",\"createdAt\":\"2026-02-28T13:33:09.723Z\",\"updatedAt\":\"2026-02-28T13:33:09.723Z\",\"environment\":{\"sys\":{\"id\":\"master\",\"type\":\"Link\",\"linkType\":\"Environment\"}},\"publishedVersion\":5,\"revision\":1,\"locale\":\"en-GB\"},\"fields\":{\"title\":\"Gridwatch\",\"description\":\" A Tron-themed Electron desktop app that visualises your GitHub Copilot CLI sessions — browse history, track token usage, and explore activity across all your coding sessions. \",\"file\":{\"url\":\"//images.ctfassets.net/wjg1udsw901v/23Pz8ZHNR3LA4dru1fR9ki/fd356cebbc39758d158d9318c23c44fb/screenshot-sessions.png\",\"details\":{\"size\":695515,\"image\":{\"width\":3312,\"height\":2168}},\"fileName\":\"screenshot-sessions.png\",\"contentType\":\"image/png\"}}},\"title\":\"Building GridWatch — A Dashboard for GitHub Copilot CLI Sessions\",\"tags\":[\"copilot\",\"gridwatch\",\"cli\"],\"slug\":\"gridwatch-copilot-session-manager\",\"datePublished\":\"2026-02-28T00:00+00:00\",\"bodym\":\"$15\"}},{\"metadata\":{\"tags\":[],\"concepts\":[]},\"sys\":{\"space\":{\"sys\":{\"type\":\"Link\",\"linkType\":\"Space\",\"id\":\"wjg1udsw901v\"}},\"id\":\"75itZoN0s7ztUCbFQZaxRn\",\"type\":\"Entry\",\"createdAt\":\"2026-02-24T12:55:03.856Z\",\"updatedAt\":\"2026-02-24T13:05:19.036Z\",\"environment\":{\"sys\":{\"id\":\"master\",\"type\":\"Link\",\"linkType\":\"Environment\"}},\"publishedVersion\":488,\"revision\":3,\"contentType\":{\"sys\":{\"type\":\"Link\",\"linkType\":\"ContentType\",\"id\":\"theCodeTransposerBlogPosts\"}},\"locale\":\"en-GB\"},\"fields\":{\"hero\":{\"metadata\":{\"tags\":[],\"concepts\":[]},\"sys\":{\"space\":{\"sys\":{\"type\":\"Link\",\"linkType\":\"Space\",\"id\":\"wjg1udsw901v\"}},\"id\":\"4PwE6fYKXRgmDdn4A7ok44\",\"type\":\"Asset\",\"createdAt\":\"2026-02-11T17:02:05.200Z\",\"updatedAt\":\"2026-02-11T17:03:03.798Z\",\"environment\":{\"sys\":{\"id\":\"master\",\"type\":\"Link\",\"linkType\":\"Environment\"}},\"publishedVersion\":8,\"revision\":2,\"locale\":\"en-GB\"},\"fields\":{\"title\":\"frontend-working-backend\",\"description\":\"\",\"file\":{\"url\":\"//images.ctfassets.net/wjg1udsw901v/4PwE6fYKXRgmDdn4A7ok44/f8252594cc8221cce16af558aec0f929/image.png\",\"details\":{\"size\":1492321,\"image\":{\"width\":1479,\"height\":824}},\"fileName\":\"image.png\",\"contentType\":\"image/png\"}}},\"title\":\"Going fullstack with Nx monorepo using C# and React\",\"tags\":[\"dotnet\",\"react\",\"Nx\",\"monorepo\"],\"slug\":\"fullstack-nx-using-react-csharp\",\"datePublished\":\"2026-02-24T00:00+00:00\",\"bodym\":\"$16\"}},{\"metadata\":{\"tags\":[],\"concepts\":[]},\"sys\":{\"space\":{\"sys\":{\"type\":\"Link\",\"linkType\":\"Space\",\"id\":\"wjg1udsw901v\"}},\"id\":\"5Y4yxKp7A7MgcystqRbOpl\",\"type\":\"Entry\",\"createdAt\":\"2023-03-17T14:03:54.327Z\",\"updatedAt\":\"2023-03-17T16:06:56.451Z\",\"environment\":{\"sys\":{\"id\":\"master\",\"type\":\"Link\",\"linkType\":\"Environment\"}},\"publishedVersion\":22,\"revision\":2,\"contentType\":{\"sys\":{\"type\":\"Link\",\"linkType\":\"ContentType\",\"id\":\"theCodeTransposerBlogPosts\"}},\"locale\":\"en-GB\"},\"fields\":{\"hero\":{\"metadata\":{\"tags\":[],\"concepts\":[]},\"sys\":{\"space\":{\"sys\":{\"type\":\"Link\",\"linkType\":\"Space\",\"id\":\"wjg1udsw901v\"}},\"id\":\"4N5m97m5WfdJi5u7D8I4tX\",\"type\":\"Asset\",\"createdAt\":\"2023-03-17T11:24:11.827Z\",\"updatedAt\":\"2023-03-17T11:24:11.827Z\",\"environment\":{\"sys\":{\"id\":\"master\",\"type\":\"Link\",\"linkType\":\"Environment\"}},\"publishedVersion\":5,\"revision\":1,\"locale\":\"en-GB\"},\"fields\":{\"title\":\"electron-newrelic-opentelemetry\",\"description\":\"\",\"file\":{\"url\":\"//images.ctfassets.net/wjg1udsw901v/4N5m97m5WfdJi5u7D8I4tX/00d1a21ab7ce8db54af5fa6f84f89e9d/article-banner.jpg\",\"details\":{\"size\":25119,\"image\":{\"width\":1000,\"height\":500}},\"fileName\":\"article-banner.jpg\",\"contentType\":\"image/jpeg\"}}},\"title\":\"Electron \u0026 New Relic Integration Using Open Telemetry\",\"tags\":[\"electron\",\"new-relic\",\"open-telemetry\",\"tracing\",\"logging\",\"jaeger\",\"otlp\",\"ipc-channel\"],\"slug\":\"electron-newrelic-integration-using-open-telemetry\",\"datePublished\":\"2023-03-17T00:00+00:00\",\"bodym\":\"$17\"}},{\"metadata\":{\"tags\":[],\"concepts\":[]},\"sys\":{\"space\":{\"sys\":{\"type\":\"Link\",\"linkType\":\"Space\",\"id\":\"wjg1udsw901v\"}},\"id\":\"5QTs3PIFwWHFqQzpcCUwHl\",\"type\":\"Entry\",\"createdAt\":\"2021-05-21T14:22:32.520Z\",\"updatedAt\":\"2026-06-07T11:24:17.464Z\",\"environment\":{\"sys\":{\"id\":\"master\",\"type\":\"Link\",\"linkType\":\"Environment\"}},\"publishedVersion\":53,\"revision\":5,\"contentType\":{\"sys\":{\"type\":\"Link\",\"linkType\":\"ContentType\",\"id\":\"theCodeTransposerBlogPosts\"}},\"locale\":\"en-GB\"},\"fields\":{\"hero\":{\"metadata\":{\"tags\":[],\"concepts\":[]},\"sys\":{\"space\":{\"sys\":{\"type\":\"Link\",\"linkType\":\"Space\",\"id\":\"wjg1udsw901v\"}},\"id\":\"78Ws2s56LgCLoxkx3Xdcsl\",\"type\":\"Asset\",\"createdAt\":\"2021-05-21T14:22:25.484Z\",\"updatedAt\":\"2021-05-21T14:22:25.484Z\",\"environment\":{\"sys\":{\"id\":\"master\",\"type\":\"Link\",\"linkType\":\"Environment\"}},\"publishedVersion\":4,\"revision\":1,\"locale\":\"en-GB\"},\"fields\":{\"title\":\"Obsidian Logo\",\"file\":{\"url\":\"//images.ctfassets.net/wjg1udsw901v/78Ws2s56LgCLoxkx3Xdcsl/083d00cd84eeec428087bbab65ae3580/obsidian-logo.png\",\"details\":{\"size\":31000,\"image\":{\"width\":1998,\"height\":666}},\"fileName\":\"obsidian-logo.png\",\"contentType\":\"image/png\"}}},\"title\":\"Why every developer needs to use Obsidian\",\"tags\":[\"obsidian\",\"research\",\"notes\",\"markdown\",\"ownership\",\"mermaid\",\"git\",\"knowledge-graph\",\"ide\",\"plantuml\",\"open-graph\"],\"slug\":\"why-every-developer-needs-to-use-obsidian\",\"datePublished\":\"2021-05-24T00:00+01:00\",\"bodym\":\"$18\"}},{\"metadata\":{\"tags\":[],\"concepts\":[]},\"sys\":{\"space\":{\"sys\":{\"type\":\"Link\",\"linkType\":\"Space\",\"id\":\"wjg1udsw901v\"}},\"id\":\"6mCFlKsDIry12uLc8ZDYNO\",\"type\":\"Entry\",\"createdAt\":\"2021-04-09T15:16:41.488Z\",\"updatedAt\":\"2021-04-09T15:37:21.069Z\",\"environment\":{\"sys\":{\"id\":\"master\",\"type\":\"Link\",\"linkType\":\"Environment\"}},\"publishedVersion\":182,\"revision\":9,\"contentType\":{\"sys\":{\"type\":\"Link\",\"linkType\":\"ContentType\",\"id\":\"theCodeTransposerBlogPosts\"}},\"locale\":\"en-GB\"},\"fields\":{\"hero\":{\"metadata\":{\"tags\":[],\"concepts\":[]},\"sys\":{\"space\":{\"sys\":{\"type\":\"Link\",\"linkType\":\"Space\",\"id\":\"wjg1udsw901v\"}},\"id\":\"4l5ONHEazPnD41lO0henyW\",\"type\":\"Asset\",\"createdAt\":\"2021-04-09T15:12:23.261Z\",\"updatedAt\":\"2021-04-09T15:12:23.261Z\",\"environment\":{\"sys\":{\"id\":\"master\",\"type\":\"Link\",\"linkType\":\"Environment\"}},\"publishedVersion\":5,\"revision\":1,\"locale\":\"en-GB\"},\"fields\":{\"title\":\"Deconstruct\",\"file\":{\"url\":\"//images.ctfassets.net/wjg1udsw901v/4l5ONHEazPnD41lO0henyW/d4cbb6edf21c40cdb3e340faf620a270/deconstruction.jpg\",\"details\":{\"size\":80197,\"image\":{\"width\":1362,\"height\":686}},\"fileName\":\"deconstruction.jpg\",\"contentType\":\"image/jpeg\"}}},\"title\":\"How to Deconstruct objects in C# like we do in Javascript\",\"tags\":[\"c#\",\"javascript\",\"deconstruction\",\"syntax\",\".net\"],\"slug\":\"deconstruct-objects-in-csharp-like-in-javascript\",\"datePublished\":\"2021-04-09T00:00+01:00\",\"bodym\":\"$19\"}},{\"metadata\":{\"tags\":[],\"concepts\":[]},\"sys\":{\"space\":{\"sys\":{\"type\":\"Link\",\"linkType\":\"Space\",\"id\":\"wjg1udsw901v\"}},\"id\":\"5pcAHCggLxz88Q0vkgjH2a\",\"type\":\"Entry\",\"createdAt\":\"2021-04-05T13:54:14.869Z\",\"updatedAt\":\"2021-04-05T15:03:08.237Z\",\"environment\":{\"sys\":{\"id\":\"master\",\"type\":\"Link\",\"linkType\":\"Environment\"}},\"publishedVersion\":1184,\"revision\":5,\"contentType\":{\"sys\":{\"type\":\"Link\",\"linkType\":\"ContentType\",\"id\":\"theCodeTransposerBlogPosts\"}},\"locale\":\"en-GB\"},\"fields\":{\"hero\":{\"metadata\":{\"tags\":[],\"concepts\":[]},\"sys\":{\"space\":{\"sys\":{\"type\":\"Link\",\"linkType\":\"Space\",\"id\":\"wjg1udsw901v\"}},\"id\":\"74JrRnpexhOnSAsBwNOPV7\",\"type\":\"Asset\",\"createdAt\":\"2021-04-05T13:33:18.027Z\",\"updatedAt\":\"2021-04-05T13:33:18.027Z\",\"environment\":{\"sys\":{\"id\":\"master\",\"type\":\"Link\",\"linkType\":\"Environment\"}},\"publishedVersion\":5,\"revision\":1,\"locale\":\"en-GB\"},\"fields\":{\"title\":\"GraphQL With Hot Chocolate\",\"file\":{\"url\":\"//images.ctfassets.net/wjg1udsw901v/74JrRnpexhOnSAsBwNOPV7/635bc389cea0de36f3158df45483ae85/graphql.jpg\",\"details\":{\"size\":42436,\"image\":{\"width\":1120,\"height\":630}},\"fileName\":\"graphql.jpg\",\"contentType\":\"image/jpeg\"}}},\"title\":\"ASP.NET GraphQL server with Hot Chocolate\",\"tags\":[\"graphql\",\"hotchocolate\",\"graphql-voyager\",\"asp.net\",\"authentication\",\"authorization\",\"versioning\",\"rest\",\"chilli-cream\",\"logging\",\"open-telemetry\",\"banana-cake-pop\"],\"slug\":\"aspnet-graphql-server-with-hot-chocolate\",\"datePublished\":\"2021-04-05T00:00+01:00\",\"bodym\":\"$1a\"}},{\"metadata\":{\"tags\":[],\"concepts\":[]},\"sys\":{\"space\":{\"sys\":{\"type\":\"Link\",\"linkType\":\"Space\",\"id\":\"wjg1udsw901v\"}},\"id\":\"5dxjjWwRr6271r9804OQuh\",\"type\":\"Entry\",\"createdAt\":\"2021-01-19T08:52:14.211Z\",\"updatedAt\":\"2021-01-25T10:46:49.931Z\",\"environment\":{\"sys\":{\"id\":\"master\",\"type\":\"Link\",\"linkType\":\"Environment\"}},\"publishedVersion\":912,\"revision\":5,\"contentType\":{\"sys\":{\"type\":\"Link\",\"linkType\":\"ContentType\",\"id\":\"theCodeTransposerBlogPosts\"}},\"locale\":\"en-GB\"},\"fields\":{\"hero\":{\"metadata\":{\"tags\":[],\"concepts\":[]},\"sys\":{\"space\":{\"sys\":{\"type\":\"Link\",\"linkType\":\"Space\",\"id\":\"wjg1udsw901v\"}},\"id\":\"1IeybLQIjDnbaXTl4sbqTn\",\"type\":\"Asset\",\"createdAt\":\"2021-01-18T17:25:12.985Z\",\"updatedAt\":\"2021-01-18T17:25:12.985Z\",\"environment\":{\"sys\":{\"id\":\"master\",\"type\":\"Link\",\"linkType\":\"Environment\"}},\"publishedVersion\":5,\"revision\":1,\"locale\":\"en-GB\"},\"fields\":{\"title\":\".env + dotnet core\",\"file\":{\"url\":\"//images.ctfassets.net/wjg1udsw901v/1IeybLQIjDnbaXTl4sbqTn/294b0ef4ad9095ee3633f6c38a0e35aa/hero.png\",\"details\":{\"size\":55286,\"image\":{\"width\":1280,\"height\":720}},\"fileName\":\"hero.png\",\"contentType\":\"image/png\"}}},\"title\":\"Adding environments to ASP.NET Core with React.js SPA\",\"tags\":[\"react\",\"spa\",\"asp.net\",\"dotnet core\",\"environments\",\"env-cmd\",\"shx\",\"template\",\"msbuild\",\".env\"],\"slug\":\"aspnet-core-react-spa-adding-environments\",\"datePublished\":\"2021-01-19T00:00+00:00\",\"bodym\":\"$1b\"}},{\"metadata\":{\"tags\":[],\"concepts\":[]},\"sys\":{\"space\":{\"sys\":{\"type\":\"Link\",\"linkType\":\"Space\",\"id\":\"wjg1udsw901v\"}},\"id\":\"6Tifdl2jmnr4p5XGBzYzt2\",\"type\":\"Entry\",\"createdAt\":\"2020-12-18T17:20:58.567Z\",\"updatedAt\":\"2021-01-25T11:02:41.835Z\",\"environment\":{\"sys\":{\"id\":\"master\",\"type\":\"Link\",\"linkType\":\"Environment\"}},\"publishedVersion\":972,\"revision\":3,\"contentType\":{\"sys\":{\"type\":\"Link\",\"linkType\":\"ContentType\",\"id\":\"theCodeTransposerBlogPosts\"}},\"locale\":\"en-GB\"},\"fields\":{\"hero\":{\"metadata\":{\"tags\":[],\"concepts\":[]},\"sys\":{\"space\":{\"sys\":{\"type\":\"Link\",\"linkType\":\"Space\",\"id\":\"wjg1udsw901v\"}},\"id\":\"5nkhsfNMJDJ5NGcAfvQ2Lt\",\"type\":\"Asset\",\"createdAt\":\"2020-12-18T17:17:28.507Z\",\"updatedAt\":\"2020-12-18T17:17:28.507Z\",\"environment\":{\"sys\":{\"id\":\"master\",\"type\":\"Link\",\"linkType\":\"Environment\"}},\"publishedVersion\":5,\"revision\":1,\"locale\":\"en-GB\"},\"fields\":{\"title\":\"Az Lazy\",\"file\":{\"url\":\"//images.ctfassets.net/wjg1udsw901v/5nkhsfNMJDJ5NGcAfvQ2Lt/a2ac18006da7a4865044b77365b55987/AzLazy.png\",\"details\":{\"size\":103712,\"image\":{\"width\":2304,\"height\":1296}},\"fileName\":\"AzLazy.png\",\"contentType\":\"image/png\"}}},\"title\":\"My journey of creating a .NET CLI tool\",\"tags\":[\"cli\",\"azure\",\"queues\",\"table-storage\",\"containers\",\"blob\",\"azure-storage\",\"dotnet-tools\",\"az-lazy\",\"console\",\"commandline\",\"dotnet-tools\"],\"slug\":\"my-journey-of-creating-a-dotnet-cli-tool\",\"datePublished\":\"2020-12-18T00:00+00:00\",\"bodym\":\"$1c\"}},{\"metadata\":{\"tags\":[],\"concepts\":[]},\"sys\":{\"space\":{\"sys\":{\"type\":\"Link\",\"linkType\":\"Space\",\"id\":\"wjg1udsw901v\"}},\"id\":\"3llNnDbl34NvCQHa51SjWT\",\"type\":\"Entry\",\"createdAt\":\"2020-09-08T12:51:10.019Z\",\"updatedAt\":\"2020-09-09T11:28:40.087Z\",\"environment\":{\"sys\":{\"id\":\"master\",\"type\":\"Link\",\"linkType\":\"Environment\"}},\"publishedVersion\":1110,\"revision\":14,\"contentType\":{\"sys\":{\"type\":\"Link\",\"linkType\":\"ContentType\",\"id\":\"theCodeTransposerBlogPosts\"}},\"locale\":\"en-GB\"},\"fields\":{\"hero\":{\"metadata\":{\"tags\":[],\"concepts\":[]},\"sys\":{\"space\":{\"sys\":{\"type\":\"Link\",\"linkType\":\"Space\",\"id\":\"wjg1udsw901v\"}},\"id\":\"5m1MwxccFfmDxkLKcq3dBt\",\"type\":\"Asset\",\"createdAt\":\"2020-09-08T12:50:44.778Z\",\"updatedAt\":\"2020-09-08T12:50:44.778Z\",\"environment\":{\"sys\":{\"id\":\"master\",\"type\":\"Link\",\"linkType\":\"Environment\"}},\"publishedVersion\":6,\"revision\":1,\"locale\":\"en-GB\"},\"fields\":{\"title\":\"GRPC Logo\",\"file\":{\"url\":\"//images.ctfassets.net/wjg1udsw901v/5m1MwxccFfmDxkLKcq3dBt/b54fc31b09d0a266a3d8cd5082839976/grpc-logojpg.jpg\",\"details\":{\"size\":80653,\"image\":{\"width\":1600,\"height\":768}},\"fileName\":\"grpc-logojpg.jpg\",\"contentType\":\"image/jpeg\"}}},\"title\":\".NET \u0026 GRPC What they forgot to tell you\",\"tags\":[\"grpc\",\".net\",\"c#\",\"asp.net\",\"grpc-web\",\"rest\",\"nswag\",\"proto-files\",\"nuget\",\"grpc-reflection\",\"bloomrpc\"],\"slug\":\"dotnet-grpc-forgot-to-tell-you\",\"datePublished\":\"2020-09-08T00:00+01:00\",\"bodym\":\"$1d\"}},{\"metadata\":{\"tags\":[],\"concepts\":[]},\"sys\":{\"space\":{\"sys\":{\"type\":\"Link\",\"linkType\":\"Space\",\"id\":\"wjg1udsw901v\"}},\"id\":\"3Wyw7CR6bTwM5Bl8B5mqL8\",\"type\":\"Entry\",\"createdAt\":\"2020-07-19T11:07:03.892Z\",\"updatedAt\":\"2020-07-25T14:11:42.345Z\",\"environment\":{\"sys\":{\"id\":\"master\",\"type\":\"Link\",\"linkType\":\"Environment\"}},\"publishedVersion\":633,\"revision\":8,\"contentType\":{\"sys\":{\"type\":\"Link\",\"linkType\":\"ContentType\",\"id\":\"theCodeTransposerBlogPosts\"}},\"locale\":\"en-GB\"},\"fields\":{\"hero\":{\"metadata\":{\"tags\":[],\"concepts\":[]},\"sys\":{\"space\":{\"sys\":{\"type\":\"Link\",\"linkType\":\"Space\",\"id\":\"wjg1udsw901v\"}},\"id\":\"5WxA9oRmhEgKswEWyFjdbM\",\"type\":\"Asset\",\"createdAt\":\"2020-07-24T17:37:02.272Z\",\"updatedAt\":\"2020-07-25T09:49:11.408Z\",\"environment\":{\"sys\":{\"id\":\"master\",\"type\":\"Link\",\"linkType\":\"Environment\"}},\"publishedVersion\":9,\"revision\":2,\"locale\":\"en-GB\"},\"fields\":{\"title\":\"Windows Terminal Icon\",\"file\":{\"url\":\"//images.ctfassets.net/wjg1udsw901v/5WxA9oRmhEgKswEWyFjdbM/e0efe86ff8b93567fac16c1cfb7d951f/windowsterminalicon.jpg\",\"details\":{\"size\":42772,\"image\":{\"width\":1365,\"height\":768}},\"fileName\":\"windowsterminalicon.jpg\",\"contentType\":\"image/jpeg\"}}},\"title\":\"Evolving your Windows Terminal using Powershell libraries\",\"tags\":[\"powershell\",\"wsl\",\"windows-terminal\",\"powershell-gallery\"],\"slug\":\"evolving-windows-terminal\",\"datePublished\":\"2020-07-25T00:00+01:00\",\"bodym\":\"$1e\"}},{\"metadata\":{\"tags\":[],\"concepts\":[]},\"sys\":{\"space\":{\"sys\":{\"type\":\"Link\",\"linkType\":\"Space\",\"id\":\"wjg1udsw901v\"}},\"id\":\"6QEFdX8pPUEjsy1FkjARIe\",\"type\":\"Entry\",\"createdAt\":\"2020-07-12T11:28:51.943Z\",\"updatedAt\":\"2020-07-12T13:15:52.717Z\",\"environment\":{\"sys\":{\"id\":\"master\",\"type\":\"Link\",\"linkType\":\"Environment\"}},\"publishedVersion\":633,\"revision\":4,\"contentType\":{\"sys\":{\"type\":\"Link\",\"linkType\":\"ContentType\",\"id\":\"theCodeTransposerBlogPosts\"}},\"locale\":\"en-GB\"},\"fields\":{\"hero\":{\"metadata\":{\"tags\":[],\"concepts\":[]},\"sys\":{\"space\":{\"sys\":{\"type\":\"Link\",\"linkType\":\"Space\",\"id\":\"wjg1udsw901v\"}},\"id\":\"6BwwZovIUzXkE7j7ZeVxM6\",\"type\":\"Asset\",\"createdAt\":\"2020-07-12T11:27:18.016Z\",\"updatedAt\":\"2020-07-12T11:27:18.016Z\",\"environment\":{\"sys\":{\"id\":\"master\",\"type\":\"Link\",\"linkType\":\"Environment\"}},\"publishedVersion\":4,\"revision\":1,\"locale\":\"en-GB\"},\"fields\":{\"title\":\"Helmet\",\"file\":{\"url\":\"//images.ctfassets.net/wjg1udsw901v/6BwwZovIUzXkE7j7ZeVxM6/f7eed6871e869df95a84ef57d8df7ed6/gladiator-1931077_1280.jpg\",\"details\":{\"size\":208632,\"image\":{\"width\":1280,\"height\":853}},\"fileName\":\"gladiator-1931077_1280.jpg\",\"contentType\":\"image/jpeg\"}}},\"title\":\"GatsbyJS SEO and Open Graph with Helmet\",\"tags\":[\"helmet\",\"twitter\",\"seo\",\"linked-data\",\"gatsbyjs\",\"json-ld\",\"open-graph\"],\"slug\":\"gatsby-seo-opengraph-helmet\",\"datePublished\":\"2020-07-12T00:00+01:00\",\"bodym\":\"$1f\"}},{\"metadata\":{\"tags\":[],\"concepts\":[]},\"sys\":{\"space\":{\"sys\":{\"type\":\"Link\",\"linkType\":\"Space\",\"id\":\"wjg1udsw901v\"}},\"id\":\"aLxVZHYGnw53GvdtjMsio\",\"type\":\"Entry\",\"createdAt\":\"2020-07-08T07:23:37.130Z\",\"updatedAt\":\"2021-01-25T10:45:58.773Z\",\"environment\":{\"sys\":{\"id\":\"master\",\"type\":\"Link\",\"linkType\":\"Environment\"}},\"publishedVersion\":412,\"revision\":7,\"contentType\":{\"sys\":{\"type\":\"Link\",\"linkType\":\"ContentType\",\"id\":\"theCodeTransposerBlogPosts\"}},\"locale\":\"en-GB\"},\"fields\":{\"hero\":{\"metadata\":{\"tags\":[],\"concepts\":[]},\"sys\":{\"space\":{\"sys\":{\"type\":\"Link\",\"linkType\":\"Space\",\"id\":\"wjg1udsw901v\"}},\"id\":\"6hjsGXkoyitmyiEuBdeTP2\",\"type\":\"Asset\",\"createdAt\":\"2020-07-08T07:28:31.589Z\",\"updatedAt\":\"2020-07-08T07:28:31.589Z\",\"environment\":{\"sys\":{\"id\":\"master\",\"type\":\"Link\",\"linkType\":\"Environment\"}},\"publishedVersion\":4,\"revision\":1,\"locale\":\"en-GB\"},\"fields\":{\"title\":\"Gatsby JS\",\"file\":{\"url\":\"//images.ctfassets.net/wjg1udsw901v/6hjsGXkoyitmyiEuBdeTP2/c77e74af9235ac775f18836e2de07cac/gatsby-logo.jpg\",\"details\":{\"size\":24454,\"image\":{\"width\":960,\"height\":540}},\"fileName\":\"gatsby-logo.jpg\",\"contentType\":\"image/jpeg\"}}},\"title\":\"Creating my dream tech blog with GatsbyJS\",\"tags\":[\"contentful\",\"disqus\",\"google-analytics\",\"blog\",\"react\",\"graphql\"],\"slug\":\"gatsby-tech-blog-starter\",\"datePublished\":\"2020-07-08T00:00+01:00\",\"bodym\":\"$20\"}},{\"metadata\":{\"tags\":[],\"concepts\":[]},\"sys\":{\"space\":{\"sys\":{\"type\":\"Link\",\"linkType\":\"Space\",\"id\":\"wjg1udsw901v\"}},\"id\":\"7HTIP6hGAwuoB7DHLmEhUi\",\"type\":\"Entry\",\"createdAt\":\"2020-06-28T17:31:51.294Z\",\"updatedAt\":\"2020-07-02T17:43:34.259Z\",\"environment\":{\"sys\":{\"id\":\"master\",\"type\":\"Link\",\"linkType\":\"Environment\"}},\"publishedVersion\":72,\"revision\":3,\"contentType\":{\"sys\":{\"type\":\"Link\",\"linkType\":\"ContentType\",\"id\":\"theCodeTransposerBlogPosts\"}},\"locale\":\"en-GB\"},\"fields\":{\"hero\":{\"metadata\":{\"tags\":[],\"concepts\":[]},\"sys\":{\"space\":{\"sys\":{\"type\":\"Link\",\"linkType\":\"Space\",\"id\":\"wjg1udsw901v\"}},\"id\":\"UMa2shO53yjhwxv5PF0go\",\"type\":\"Asset\",\"createdAt\":\"2020-07-02T17:43:16.514Z\",\"updatedAt\":\"2020-07-02T17:43:16.514Z\",\"environment\":{\"sys\":{\"id\":\"master\",\"type\":\"Link\",\"linkType\":\"Environment\"}},\"publishedVersion\":6,\"revision\":1,\"locale\":\"en-GB\"},\"fields\":{\"title\":\"Azure Poison Queues Monitoring\",\"file\":{\"url\":\"//images.ctfassets.net/wjg1udsw901v/UMa2shO53yjhwxv5PF0go/cbf2e4489e801053a91d77a038dcbde9/tobias-tullius-4dKy7d3lkKM-unsplash.jpg\",\"details\":{\"size\":4379377,\"image\":{\"width\":4912,\"height\":3264}},\"fileName\":\"tobias-tullius-4dKy7d3lkKM-unsplash.jpg\",\"contentType\":\"image/jpeg\"}}},\"title\":\"Making a Azure poison queue Slack notifier\",\"tags\":[\"azure\",\"poison queue\",\"monitoring\",\"slack\",\"azure-queues\"],\"slug\":\"azure-poison-queue-notifier\",\"datePublished\":\"2017-09-23T00:00+01:00\",\"bodym\":\"$21\"}},{\"metadata\":{\"tags\":[],\"concepts\":[]},\"sys\":{\"space\":{\"sys\":{\"type\":\"Link\",\"linkType\":\"Space\",\"id\":\"wjg1udsw901v\"}},\"id\":\"7L2t1iKJrp2lW1A5OPQqqC\",\"type\":\"Entry\",\"createdAt\":\"2020-06-28T18:24:06.856Z\",\"updatedAt\":\"2020-07-02T17:50:26.494Z\",\"environment\":{\"sys\":{\"id\":\"master\",\"type\":\"Link\",\"linkType\":\"Environment\"}},\"publishedVersion\":59,\"revision\":2,\"contentType\":{\"sys\":{\"type\":\"Link\",\"linkType\":\"ContentType\",\"id\":\"theCodeTransposerBlogPosts\"}},\"locale\":\"en-GB\"},\"fields\":{\"hero\":{\"metadata\":{\"tags\":[],\"concepts\":[]},\"sys\":{\"space\":{\"sys\":{\"type\":\"Link\",\"linkType\":\"Space\",\"id\":\"wjg1udsw901v\"}},\"id\":\"27s4Gn7WXRTKhSaaWBU2RN\",\"type\":\"Asset\",\"createdAt\":\"2020-07-02T17:49:41.191Z\",\"updatedAt\":\"2020-07-02T17:49:41.191Z\",\"environment\":{\"sys\":{\"id\":\"master\",\"type\":\"Link\",\"linkType\":\"Environment\"}},\"publishedVersion\":5,\"revision\":1,\"locale\":\"en-GB\"},\"fields\":{\"title\":\"Contention Based Programming\",\"file\":{\"url\":\"//images.ctfassets.net/wjg1udsw901v/27s4Gn7WXRTKhSaaWBU2RN/c057b731733a4d8943365bdeaeb71147/alain-pham-P_qvsF7Yodw-unsplash.jpg\",\"details\":{\"size\":4213457,\"image\":{\"width\":6016,\"height\":4016}},\"fileName\":\"alain-pham-P_qvsF7Yodw-unsplash.jpg\",\"contentType\":\"image/jpeg\"}}},\"title\":\"Fix poor project structure with Convention Based Programming\",\"tags\":[\"convention\",\"unit-test\",\"project-structure\"],\"slug\":\"convention-based-programming\",\"datePublished\":\"2017-08-20T00:00+01:00\",\"bodym\":\"$22\"}},{\"metadata\":{\"tags\":[],\"concepts\":[]},\"sys\":{\"space\":{\"sys\":{\"type\":\"Link\",\"linkType\":\"Space\",\"id\":\"wjg1udsw901v\"}},\"id\":\"3JPof9nR7LY1oL1562Rj65\",\"type\":\"Entry\",\"createdAt\":\"2020-06-28T18:42:22.087Z\",\"updatedAt\":\"2021-01-25T10:45:11.461Z\",\"environment\":{\"sys\":{\"id\":\"master\",\"type\":\"Link\",\"linkType\":\"Environment\"}},\"publishedVersion\":31,\"revision\":3,\"contentType\":{\"sys\":{\"type\":\"Link\",\"linkType\":\"ContentType\",\"id\":\"theCodeTransposerBlogPosts\"}},\"locale\":\"en-GB\"},\"fields\":{\"hero\":{\"metadata\":{\"tags\":[],\"concepts\":[]},\"sys\":{\"space\":{\"sys\":{\"type\":\"Link\",\"linkType\":\"Space\",\"id\":\"wjg1udsw901v\"}},\"id\":\"3YSq2wLiYV0f3KvoXUXjXL\",\"type\":\"Asset\",\"createdAt\":\"2020-07-02T17:47:11.331Z\",\"updatedAt\":\"2020-07-02T17:47:11.331Z\",\"environment\":{\"sys\":{\"id\":\"master\",\"type\":\"Link\",\"linkType\":\"Environment\"}},\"publishedVersion\":5,\"revision\":1,\"locale\":\"en-GB\"},\"fields\":{\"title\":\"Unit Test Traffic Light\",\"file\":{\"url\":\"//images.ctfassets.net/wjg1udsw901v/3YSq2wLiYV0f3KvoXUXjXL/19aa4d78b6d63287928c6d40f2e36d99/harshal-desai-0hCIrw8dVfE-unsplash.jpg\",\"details\":{\"size\":370069,\"image\":{\"width\":3872,\"height\":2592}},\"fileName\":\"harshal-desai-0hCIrw8dVfE-unsplash.jpg\",\"contentType\":\"image/jpeg\"}}},\"title\":\"Splitting NUnit Unit Tests With TeamCity To Decrease CI Time\",\"tags\":[\"nunit\",\"unit-tests\",\"continuous-integration\",\"ci\",\"teamcity\"],\"slug\":\"nunit-test-ci-split\",\"datePublished\":\"2017-04-01T00:00+01:00\",\"bodym\":\"$23\"}}],\"allTags\":[\".env\",\".net\",\"Nx\",\"ai\",\"asp.net\",\"authentication\",\"authorization\",\"az-lazy\",\"azure\",\"azure-queues\",\"azure-storage\",\"banana-cake-pop\",\"blob\",\"blog\",\"bloomrpc\",\"c#\",\"chilli-cream\",\"ci\",\"cli\",\"commandline\",\"console\",\"containers\",\"contentful\",\"continuous-integration\",\"convention\",\"copilot\",\"deconstruction\",\"disqus\",\"dotnet\",\"dotnet core\",\"dotnet-tools\",\"electron\",\"env-cmd\",\"environments\",\"gatsbyjs\",\"git\",\"google-analytics\",\"graphql\",\"graphql-voyager\",\"gridwatch\",\"grpc\",\"grpc-reflection\",\"grpc-web\",\"helmet\",\"hotchocolate\",\"ide\",\"ipc-channel\",\"jaeger\",\"javascript\",\"json-ld\",\"knowledge-graph\",\"linked-data\",\"logging\",\"markdown\",\"mermaid\",\"monitoring\",\"monorepo\",\"msbuild\",\"new-relic\",\"notes\",\"nswag\",\"nuget\",\"nunit\",\"obsidian\",\"open-graph\",\"open-telemetry\",\"otlp\",\"ownership\",\"plantuml\",\"poison queue\",\"powershell\",\"powershell-gallery\",\"project-structure\",\"proto-files\",\"queues\",\"react\",\"research\",\"rest\",\"seo\",\"shx\",\"slack\",\"spa\",\"syntax\",\"table-storage\",\"teamcity\",\"template\",\"tokens\",\"tracing\",\"twitter\",\"unit-test\",\"unit-tests\",\"versioning\",\"windows-terminal\",\"wsl\"]}]]\n"])</script></body></html>